Blog

Tinkerfest 2018 Recap

Tinkerfest 2018 exceeded expectations.  Going into the event, I was hearing museum staff say they anticipated 8-9 thousand people.  An hour before the event closed, I heard that they exceeded 10,000 guests, making it the largest single-day attendance ever in the history of the museum.  The final official attendance count was 11,134, although the actual number was much higher because many people came through the entrance without checking in.  Thank you to all the staff and volunteers of Science Museum Oklahoma for making this such a fun-filled, educational, and entertaining day.

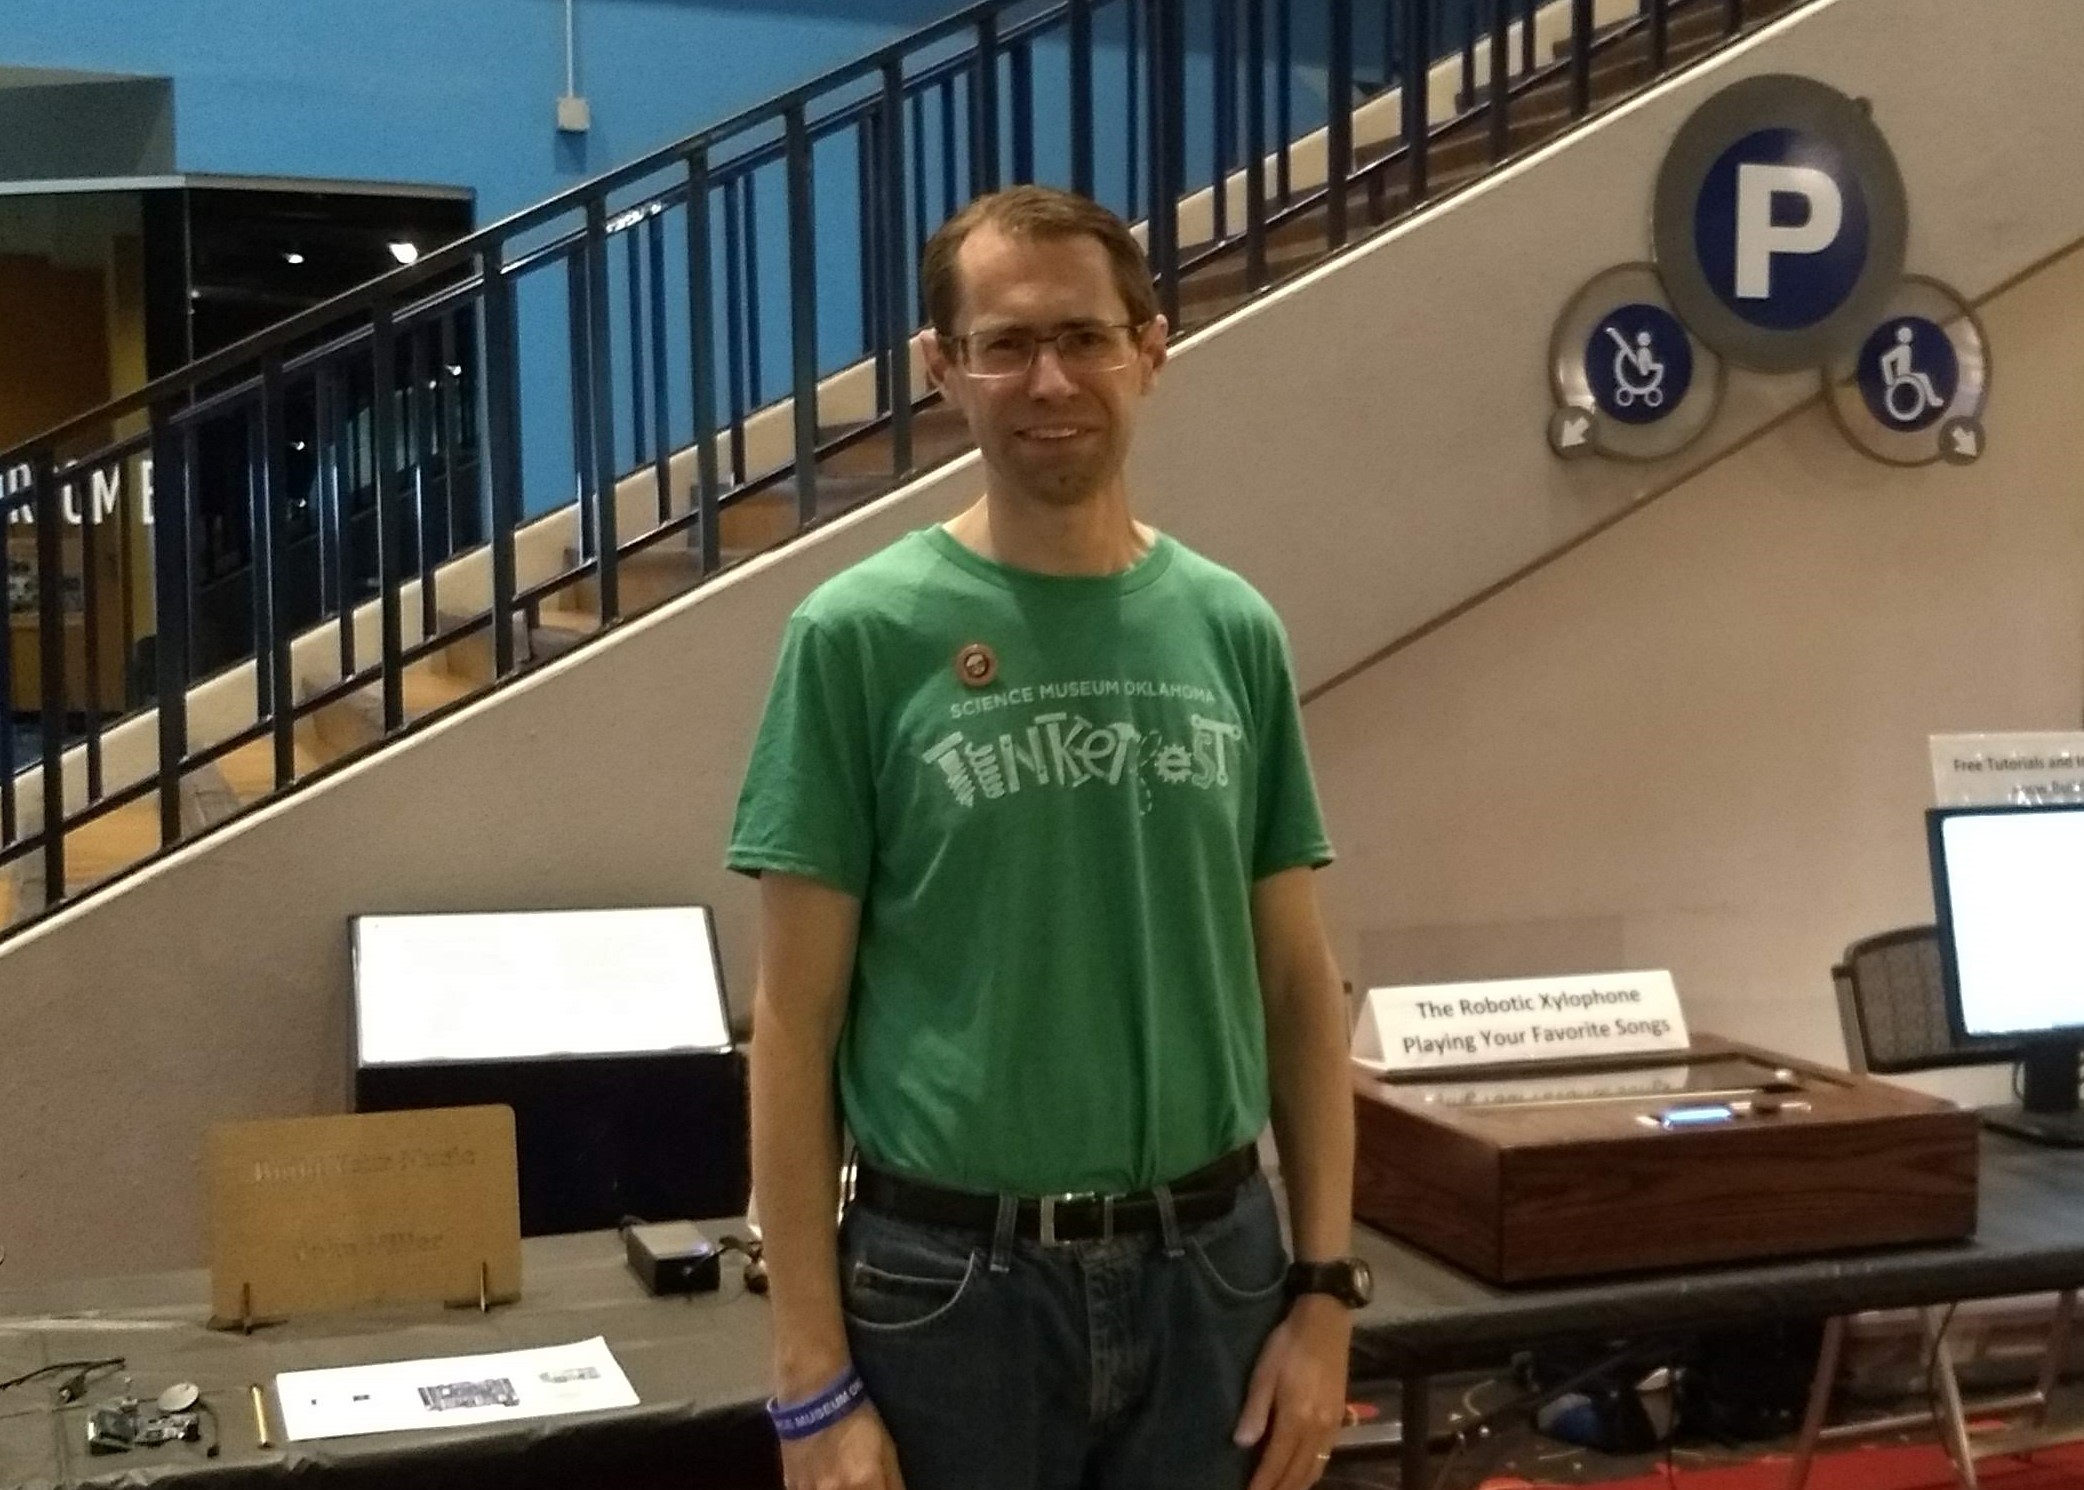
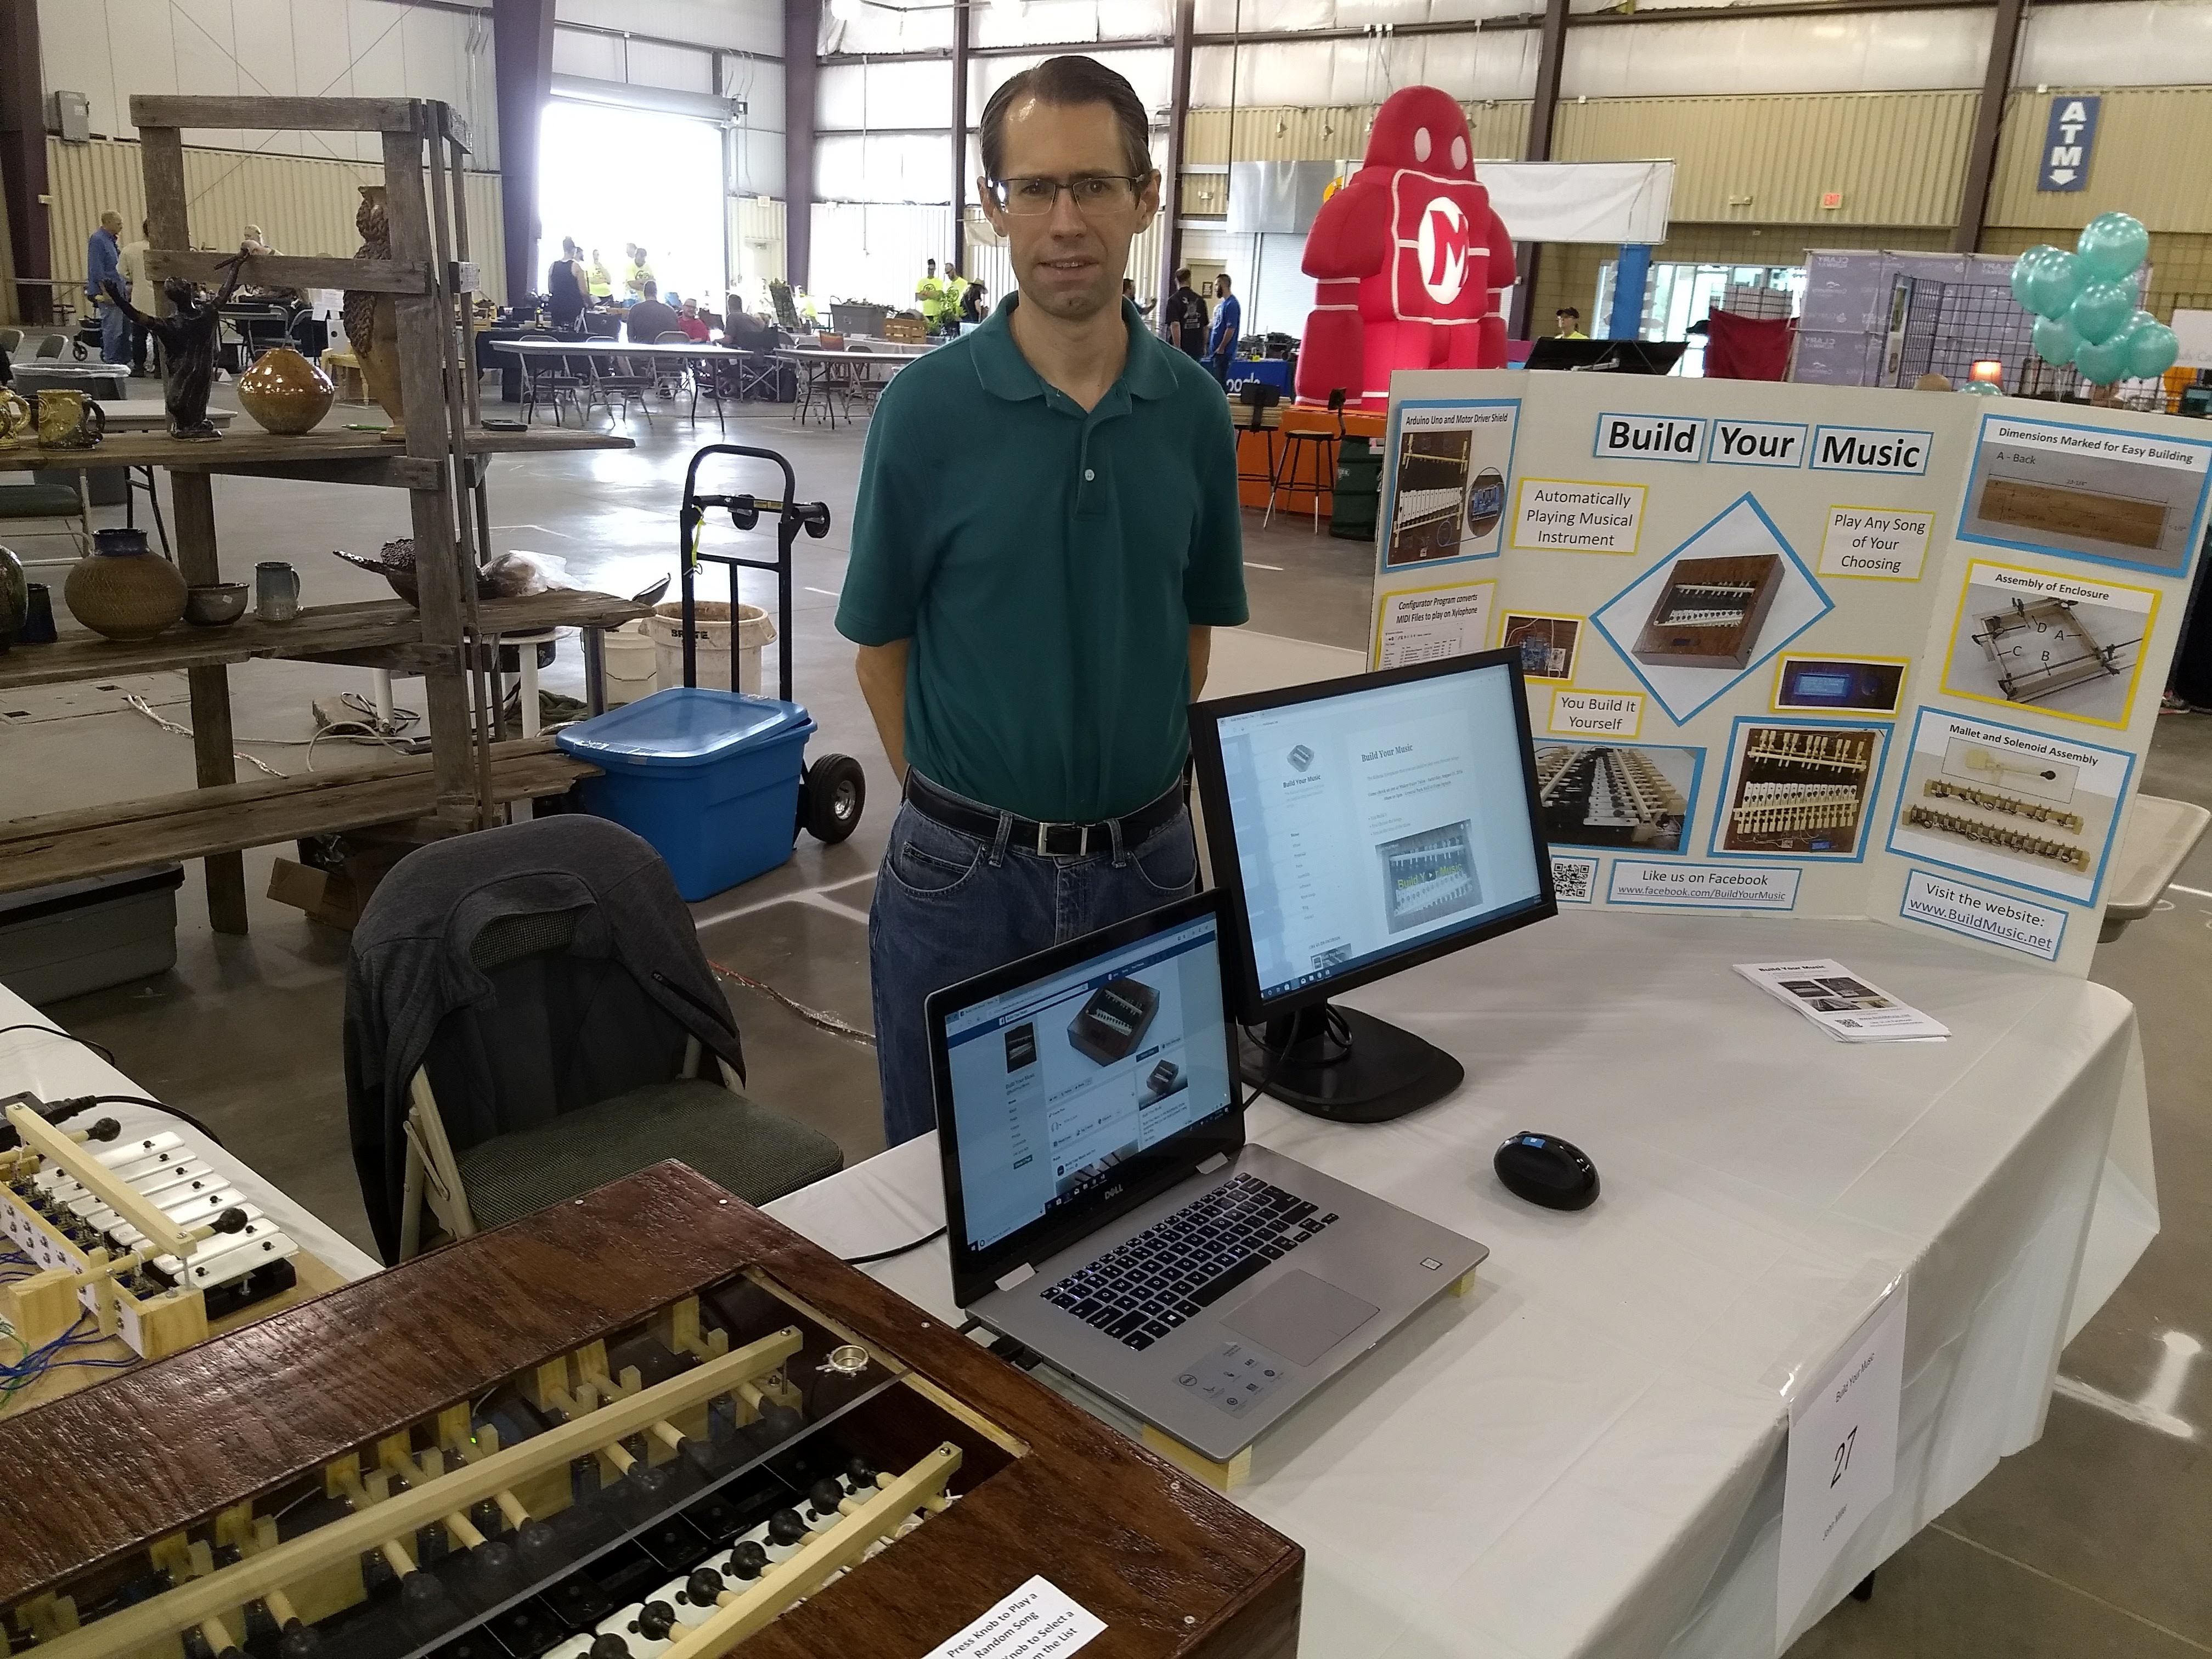
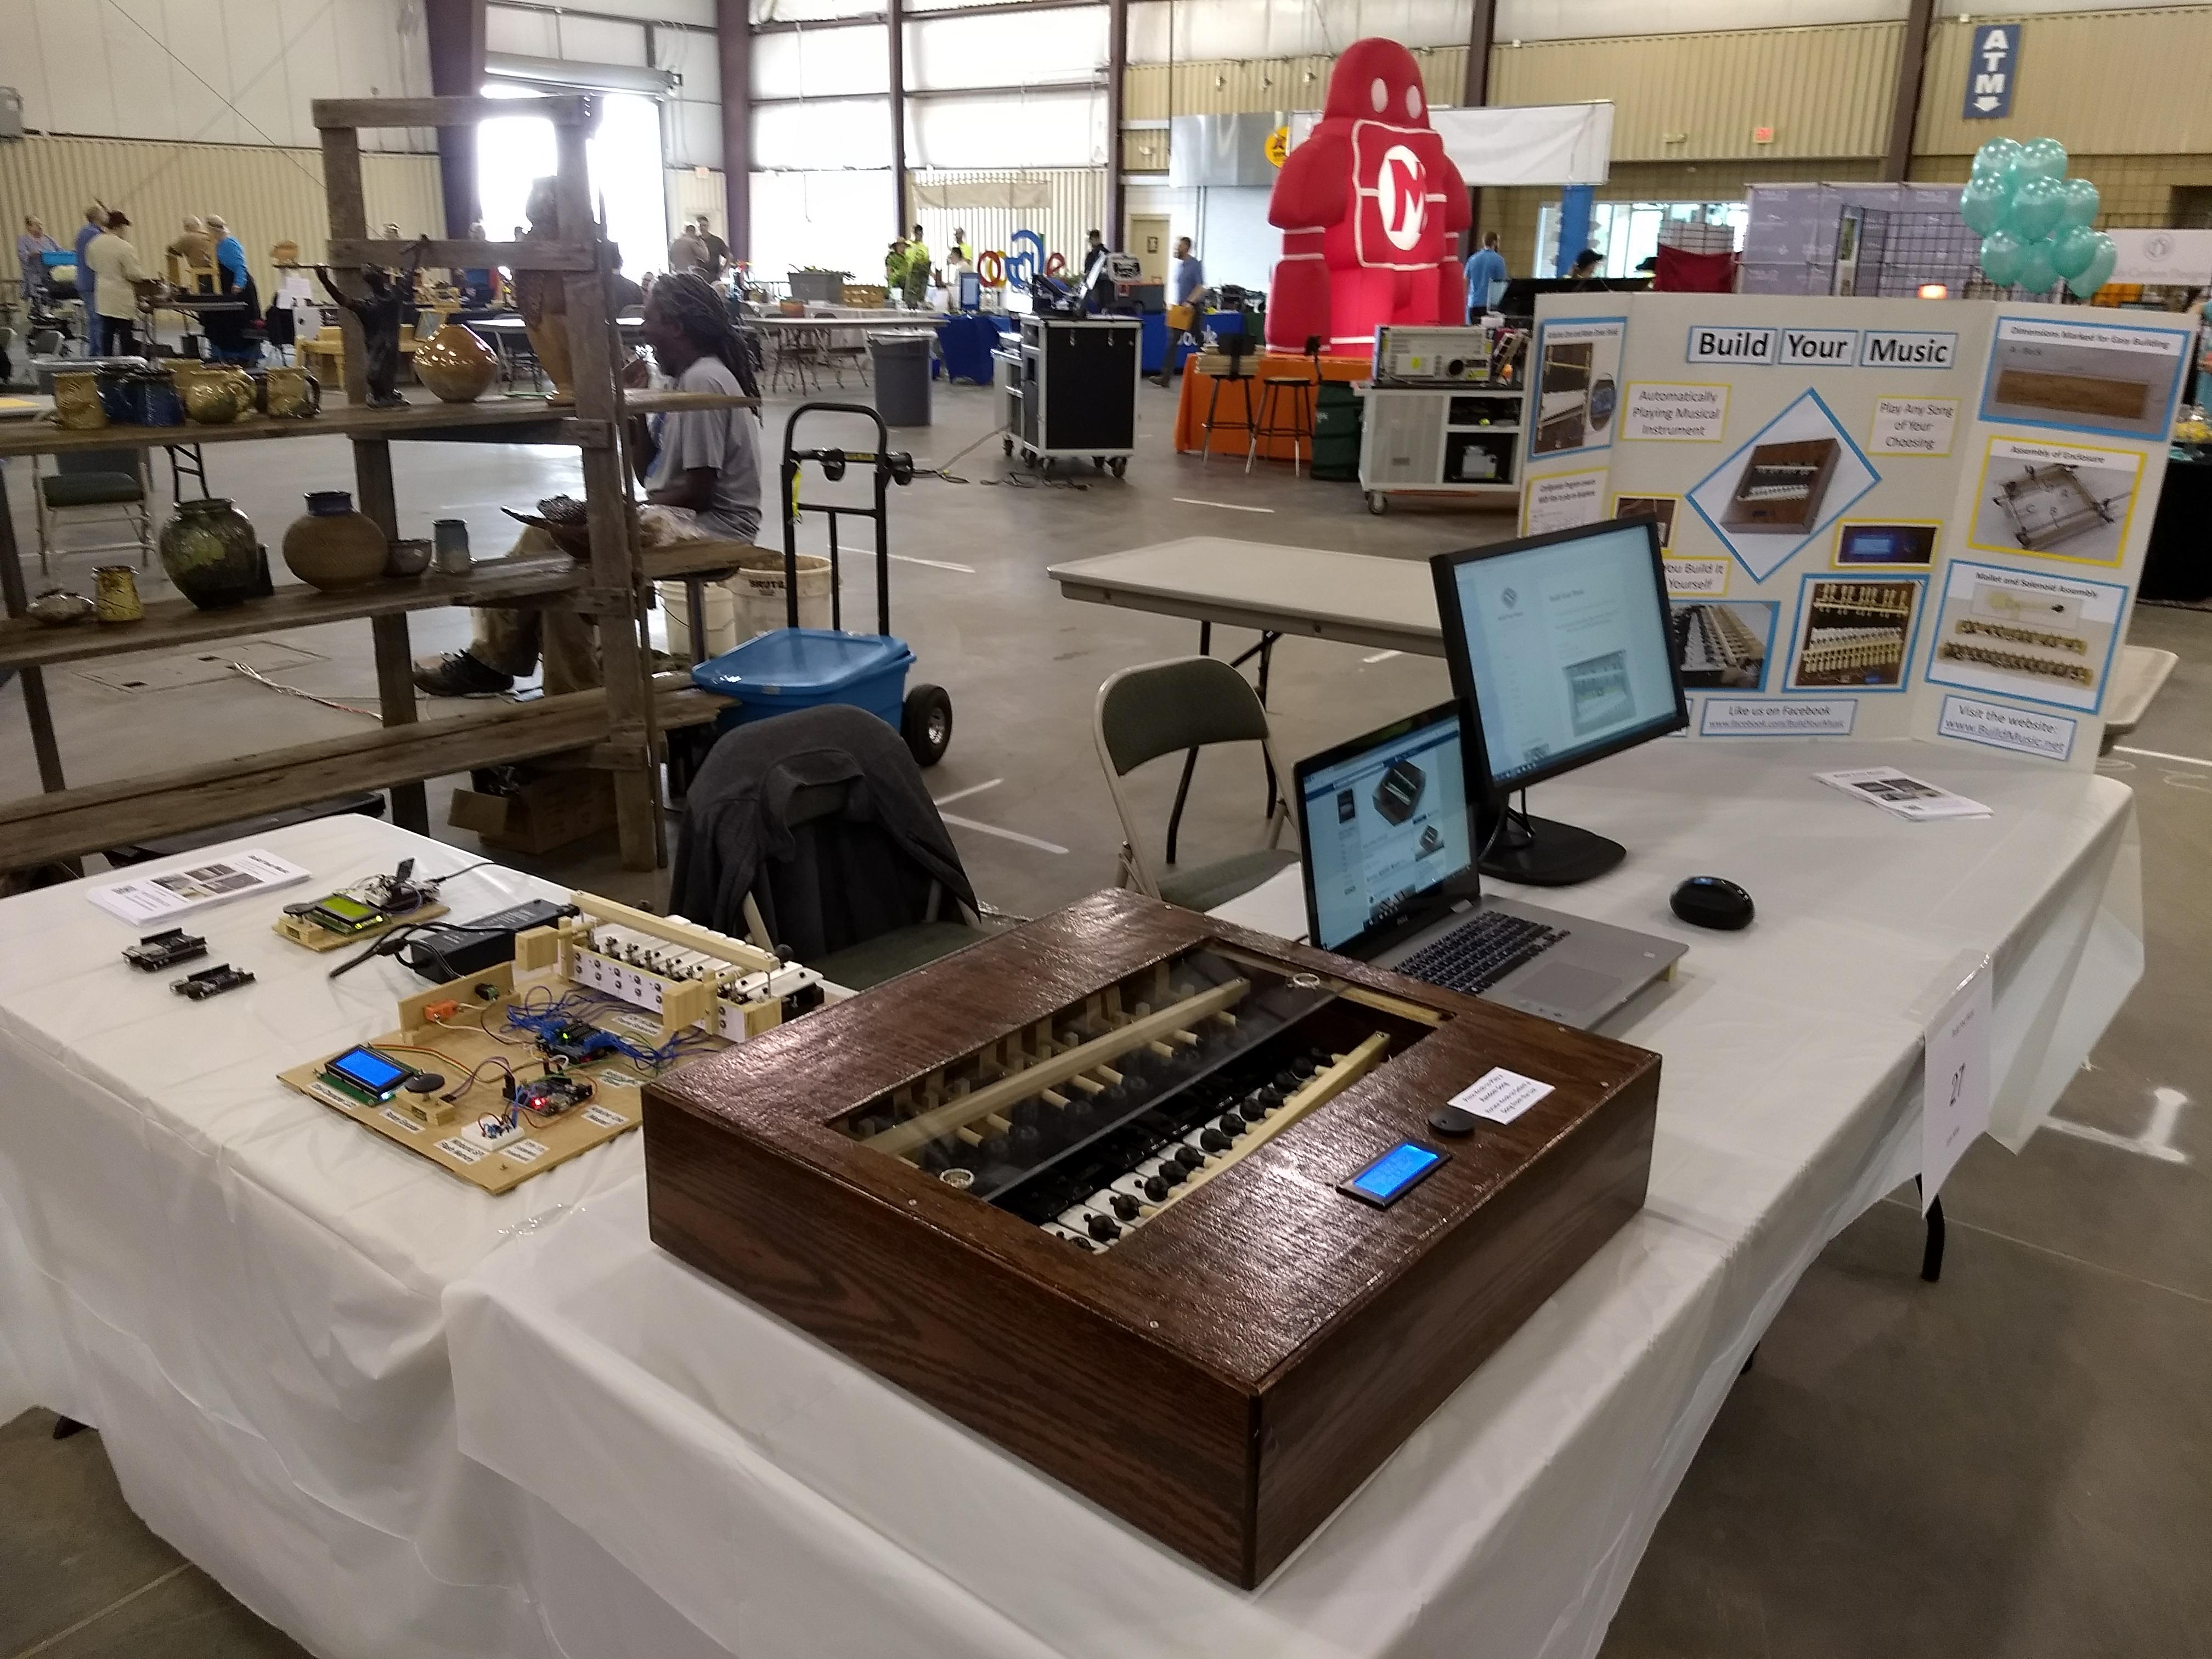
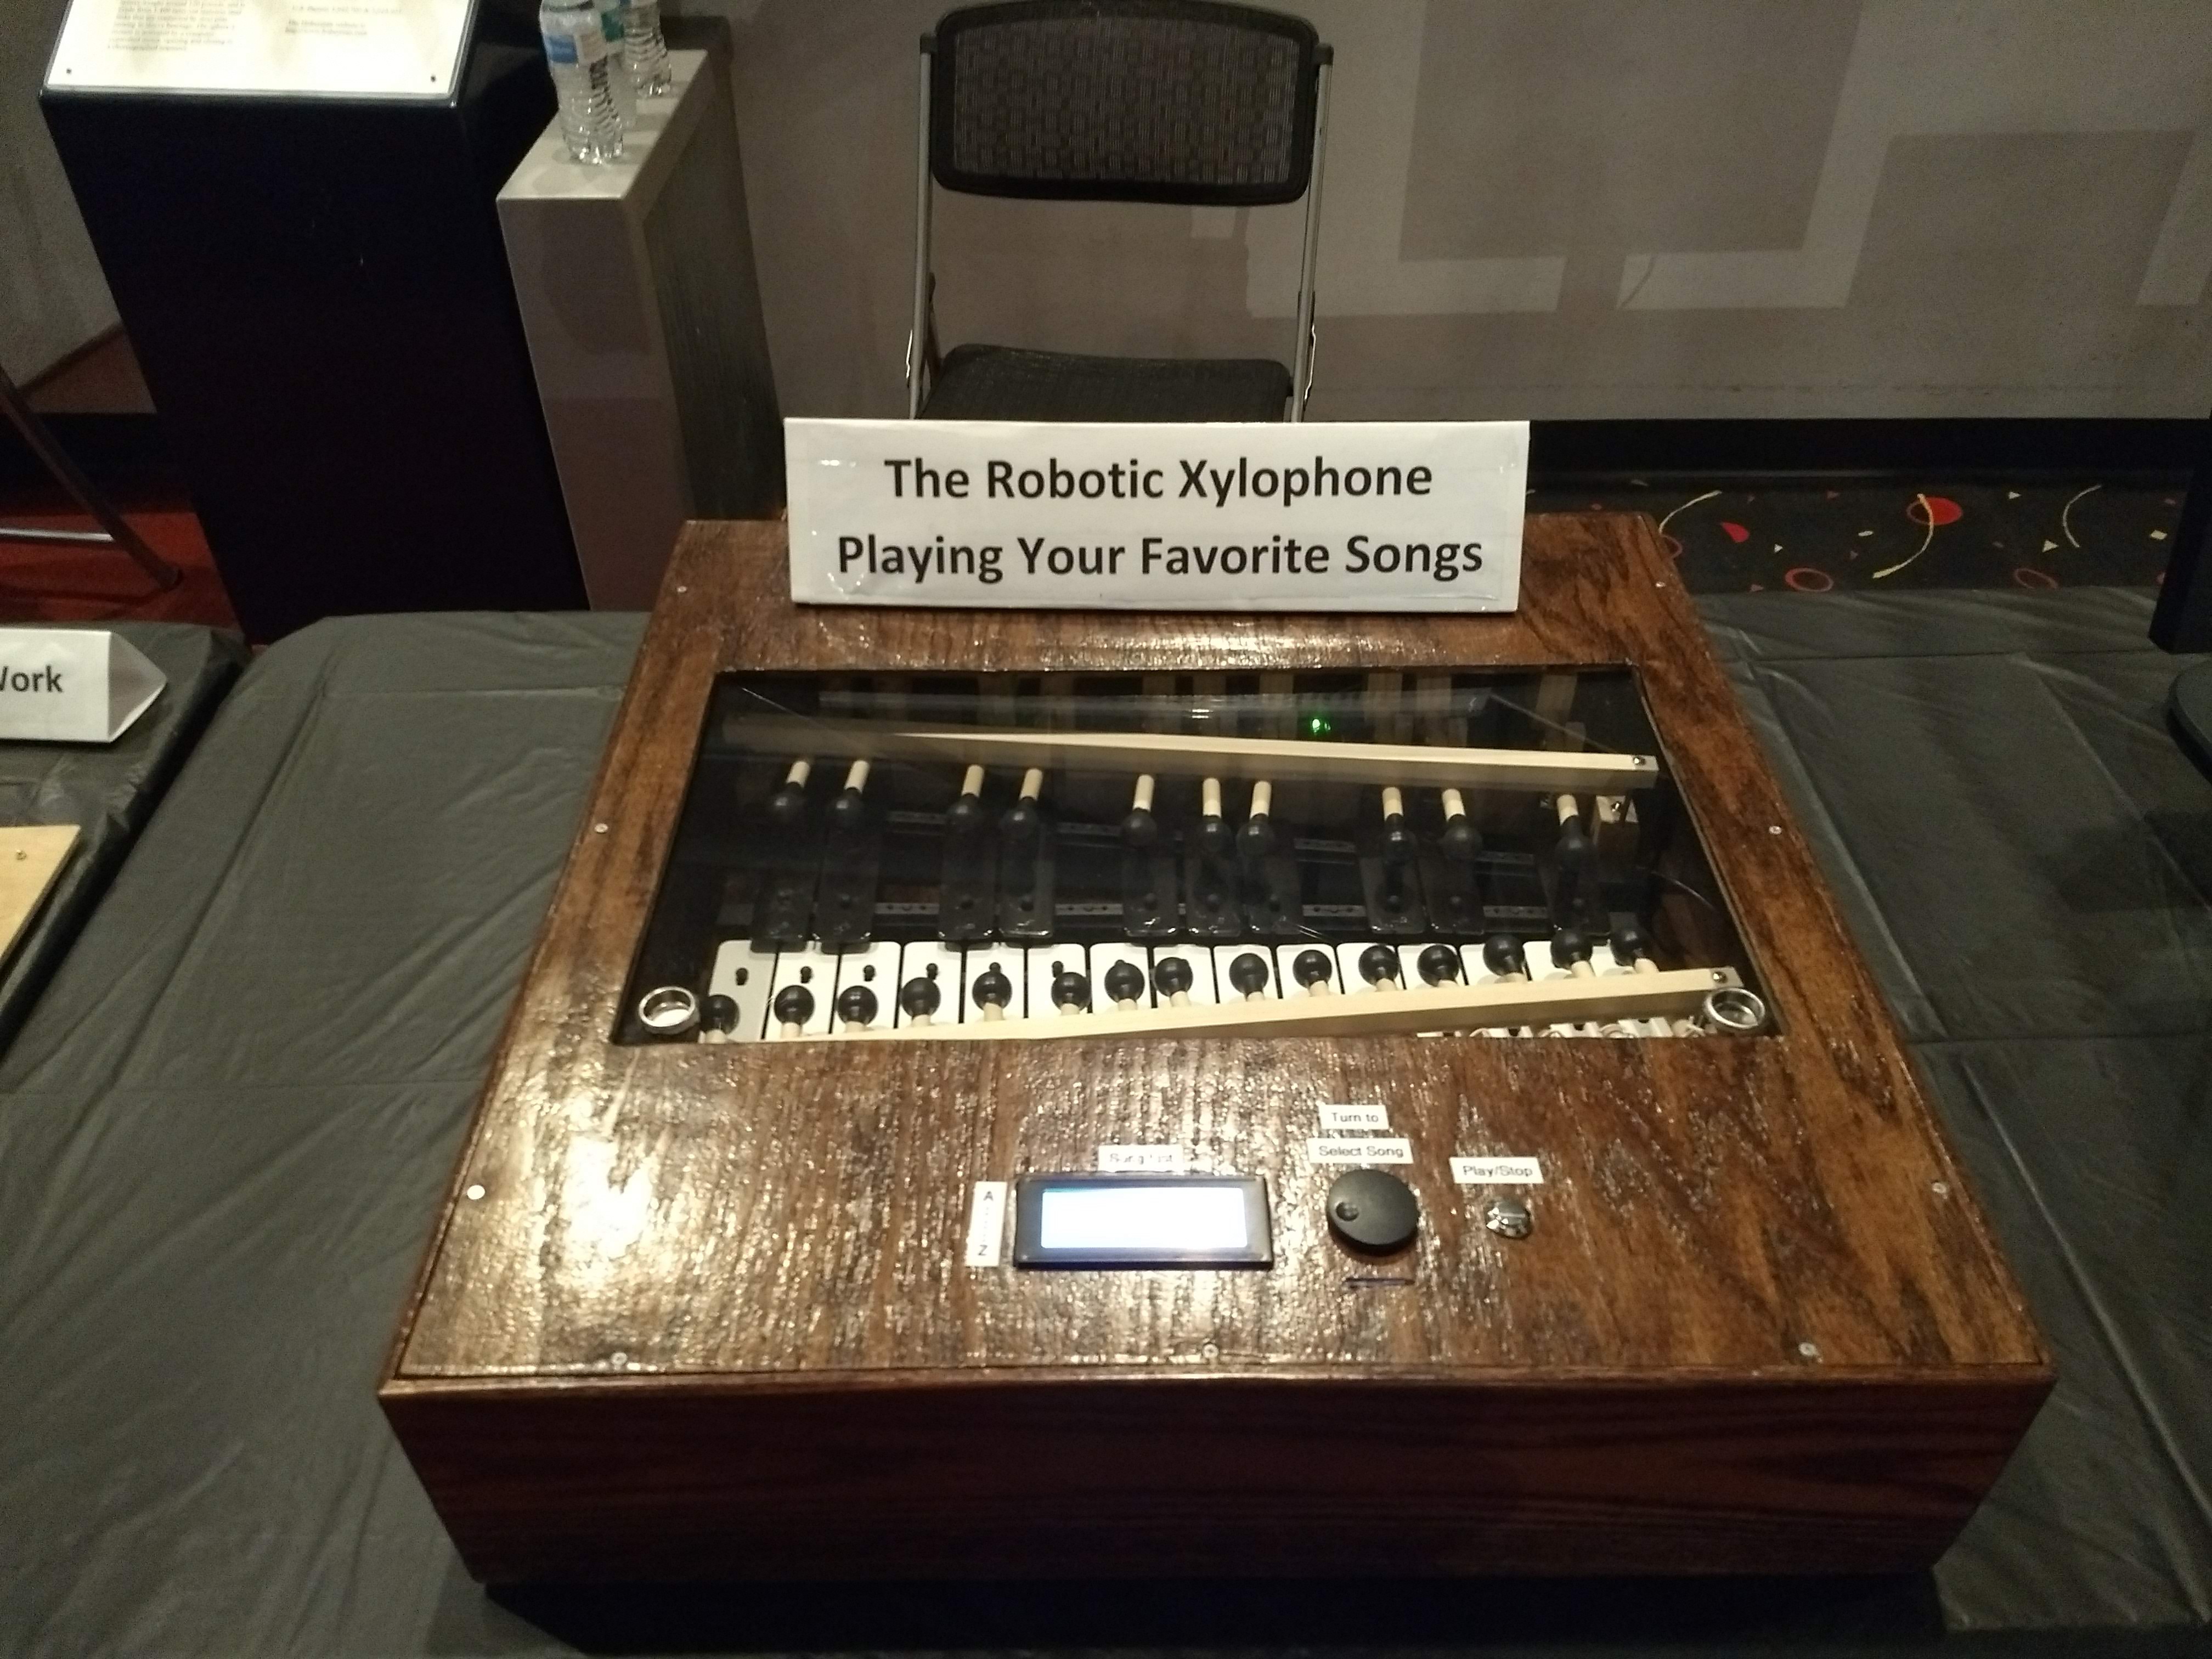
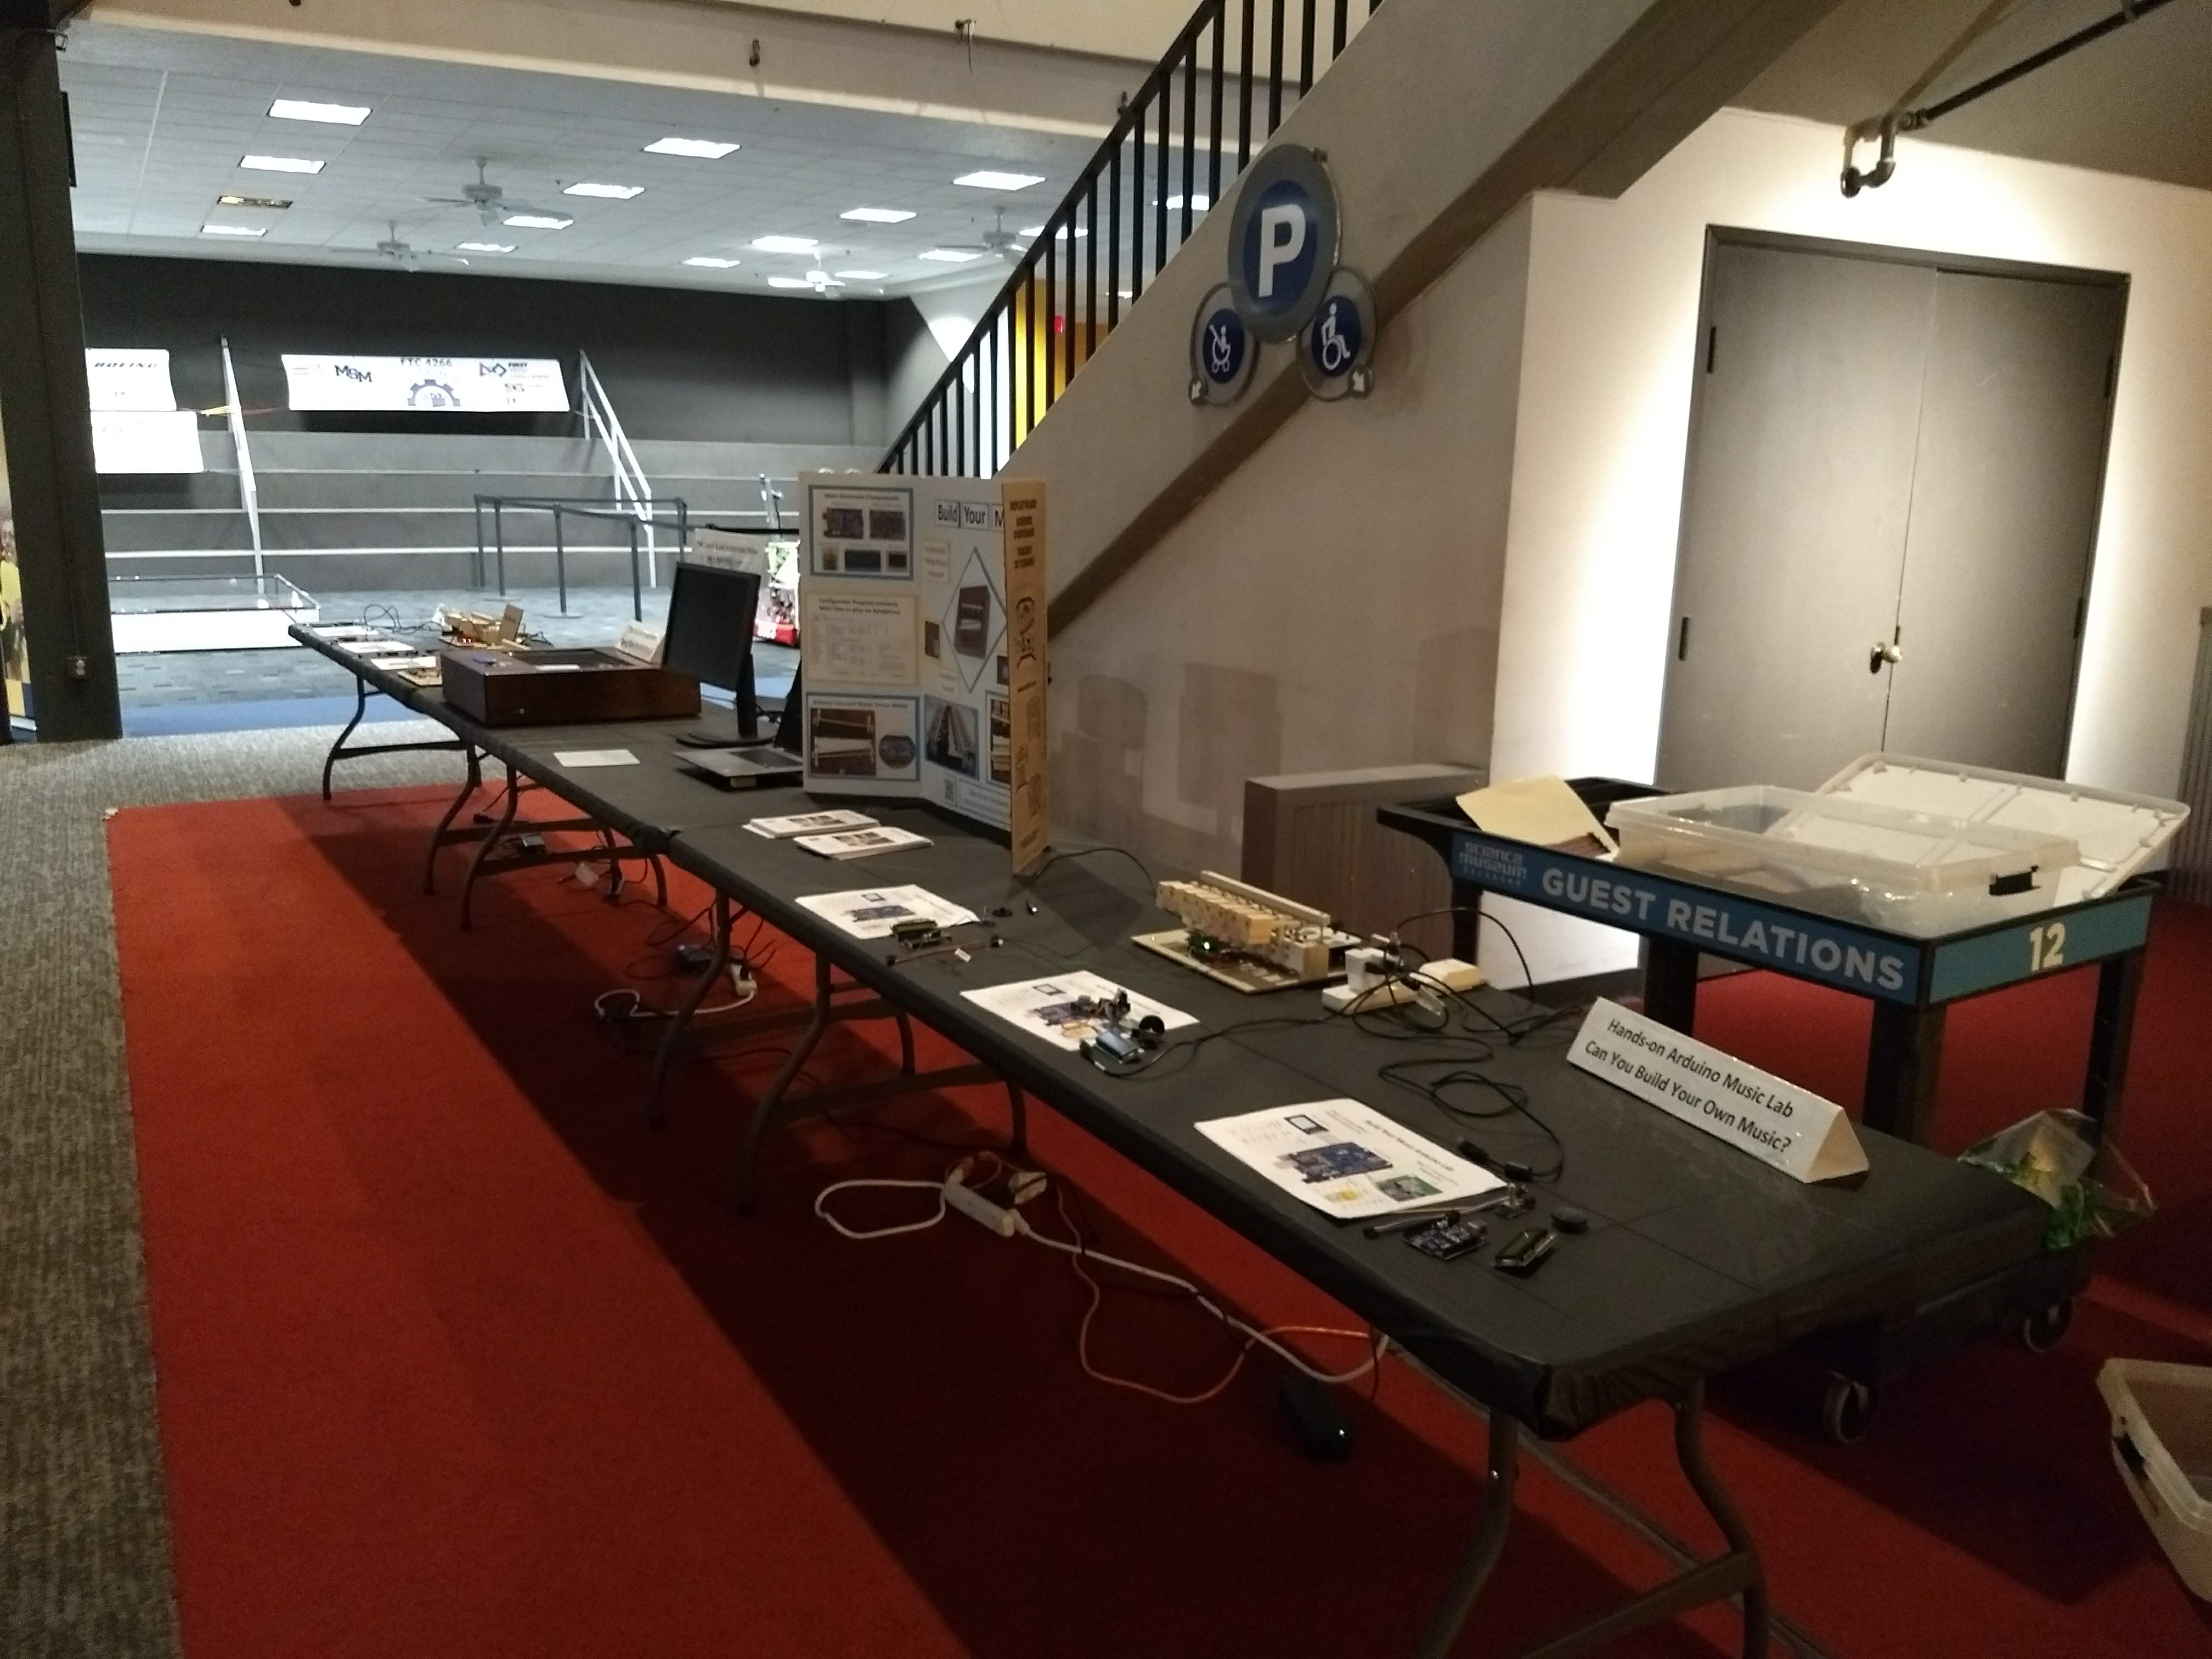
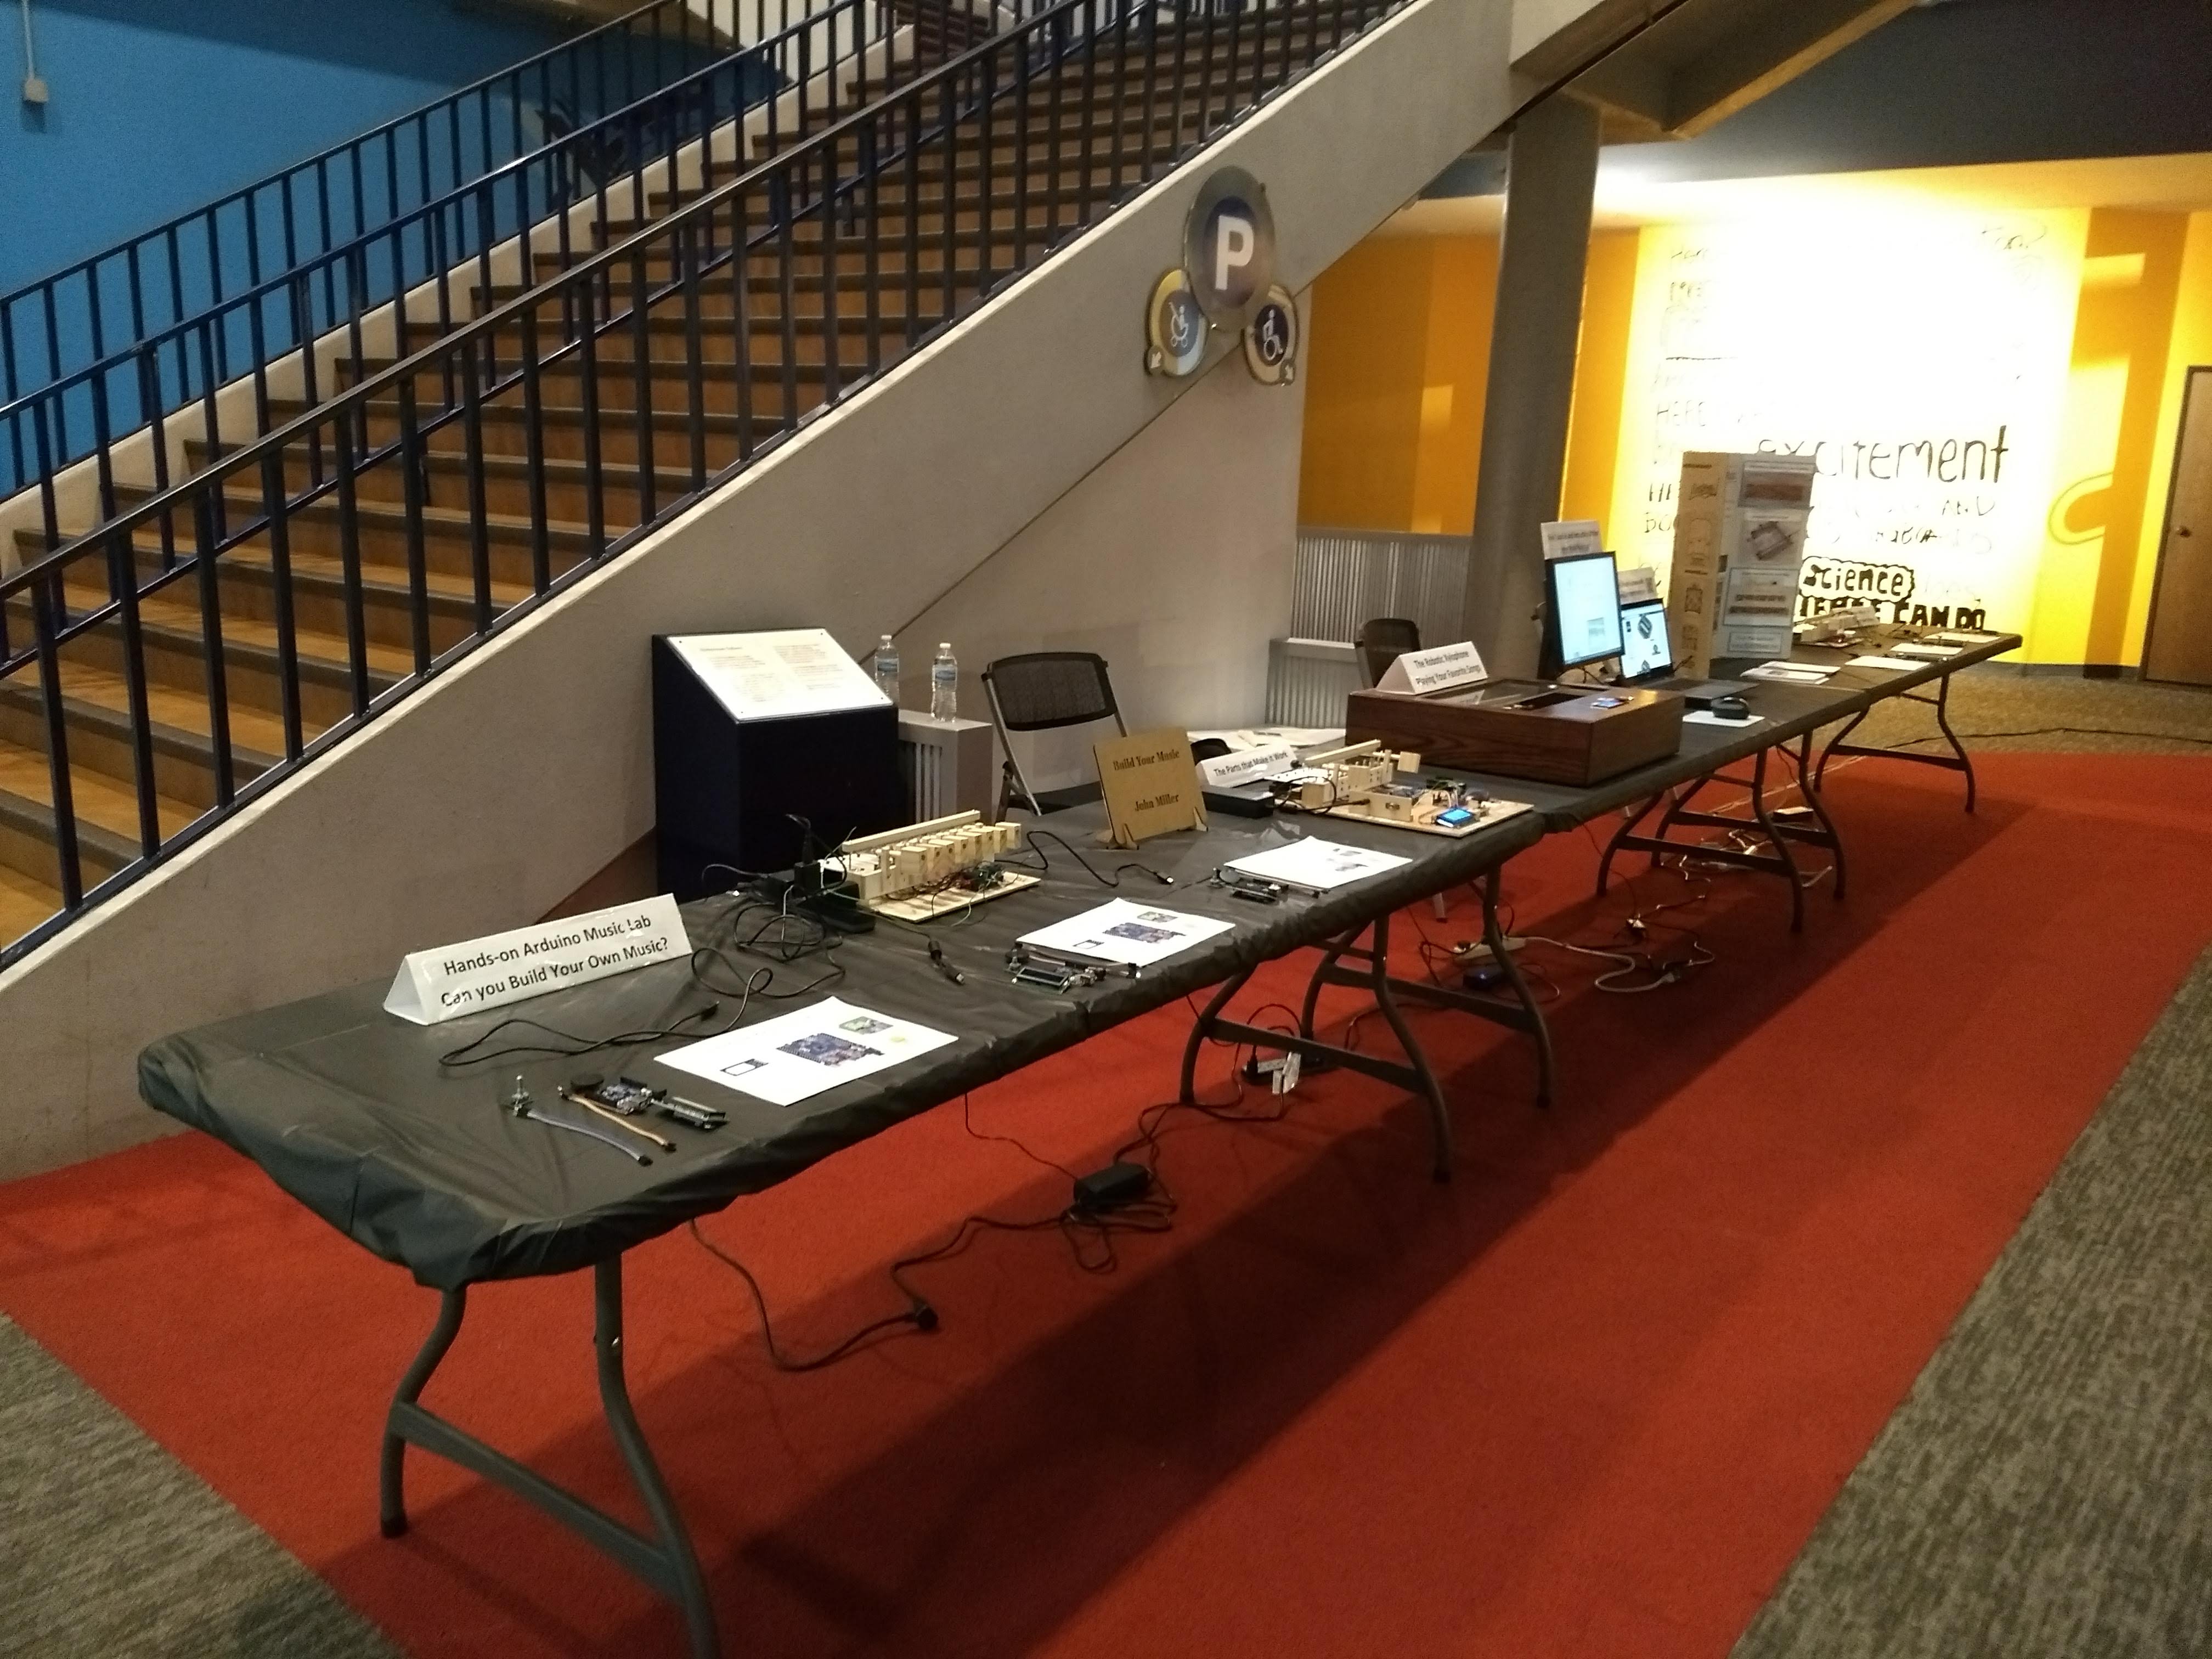
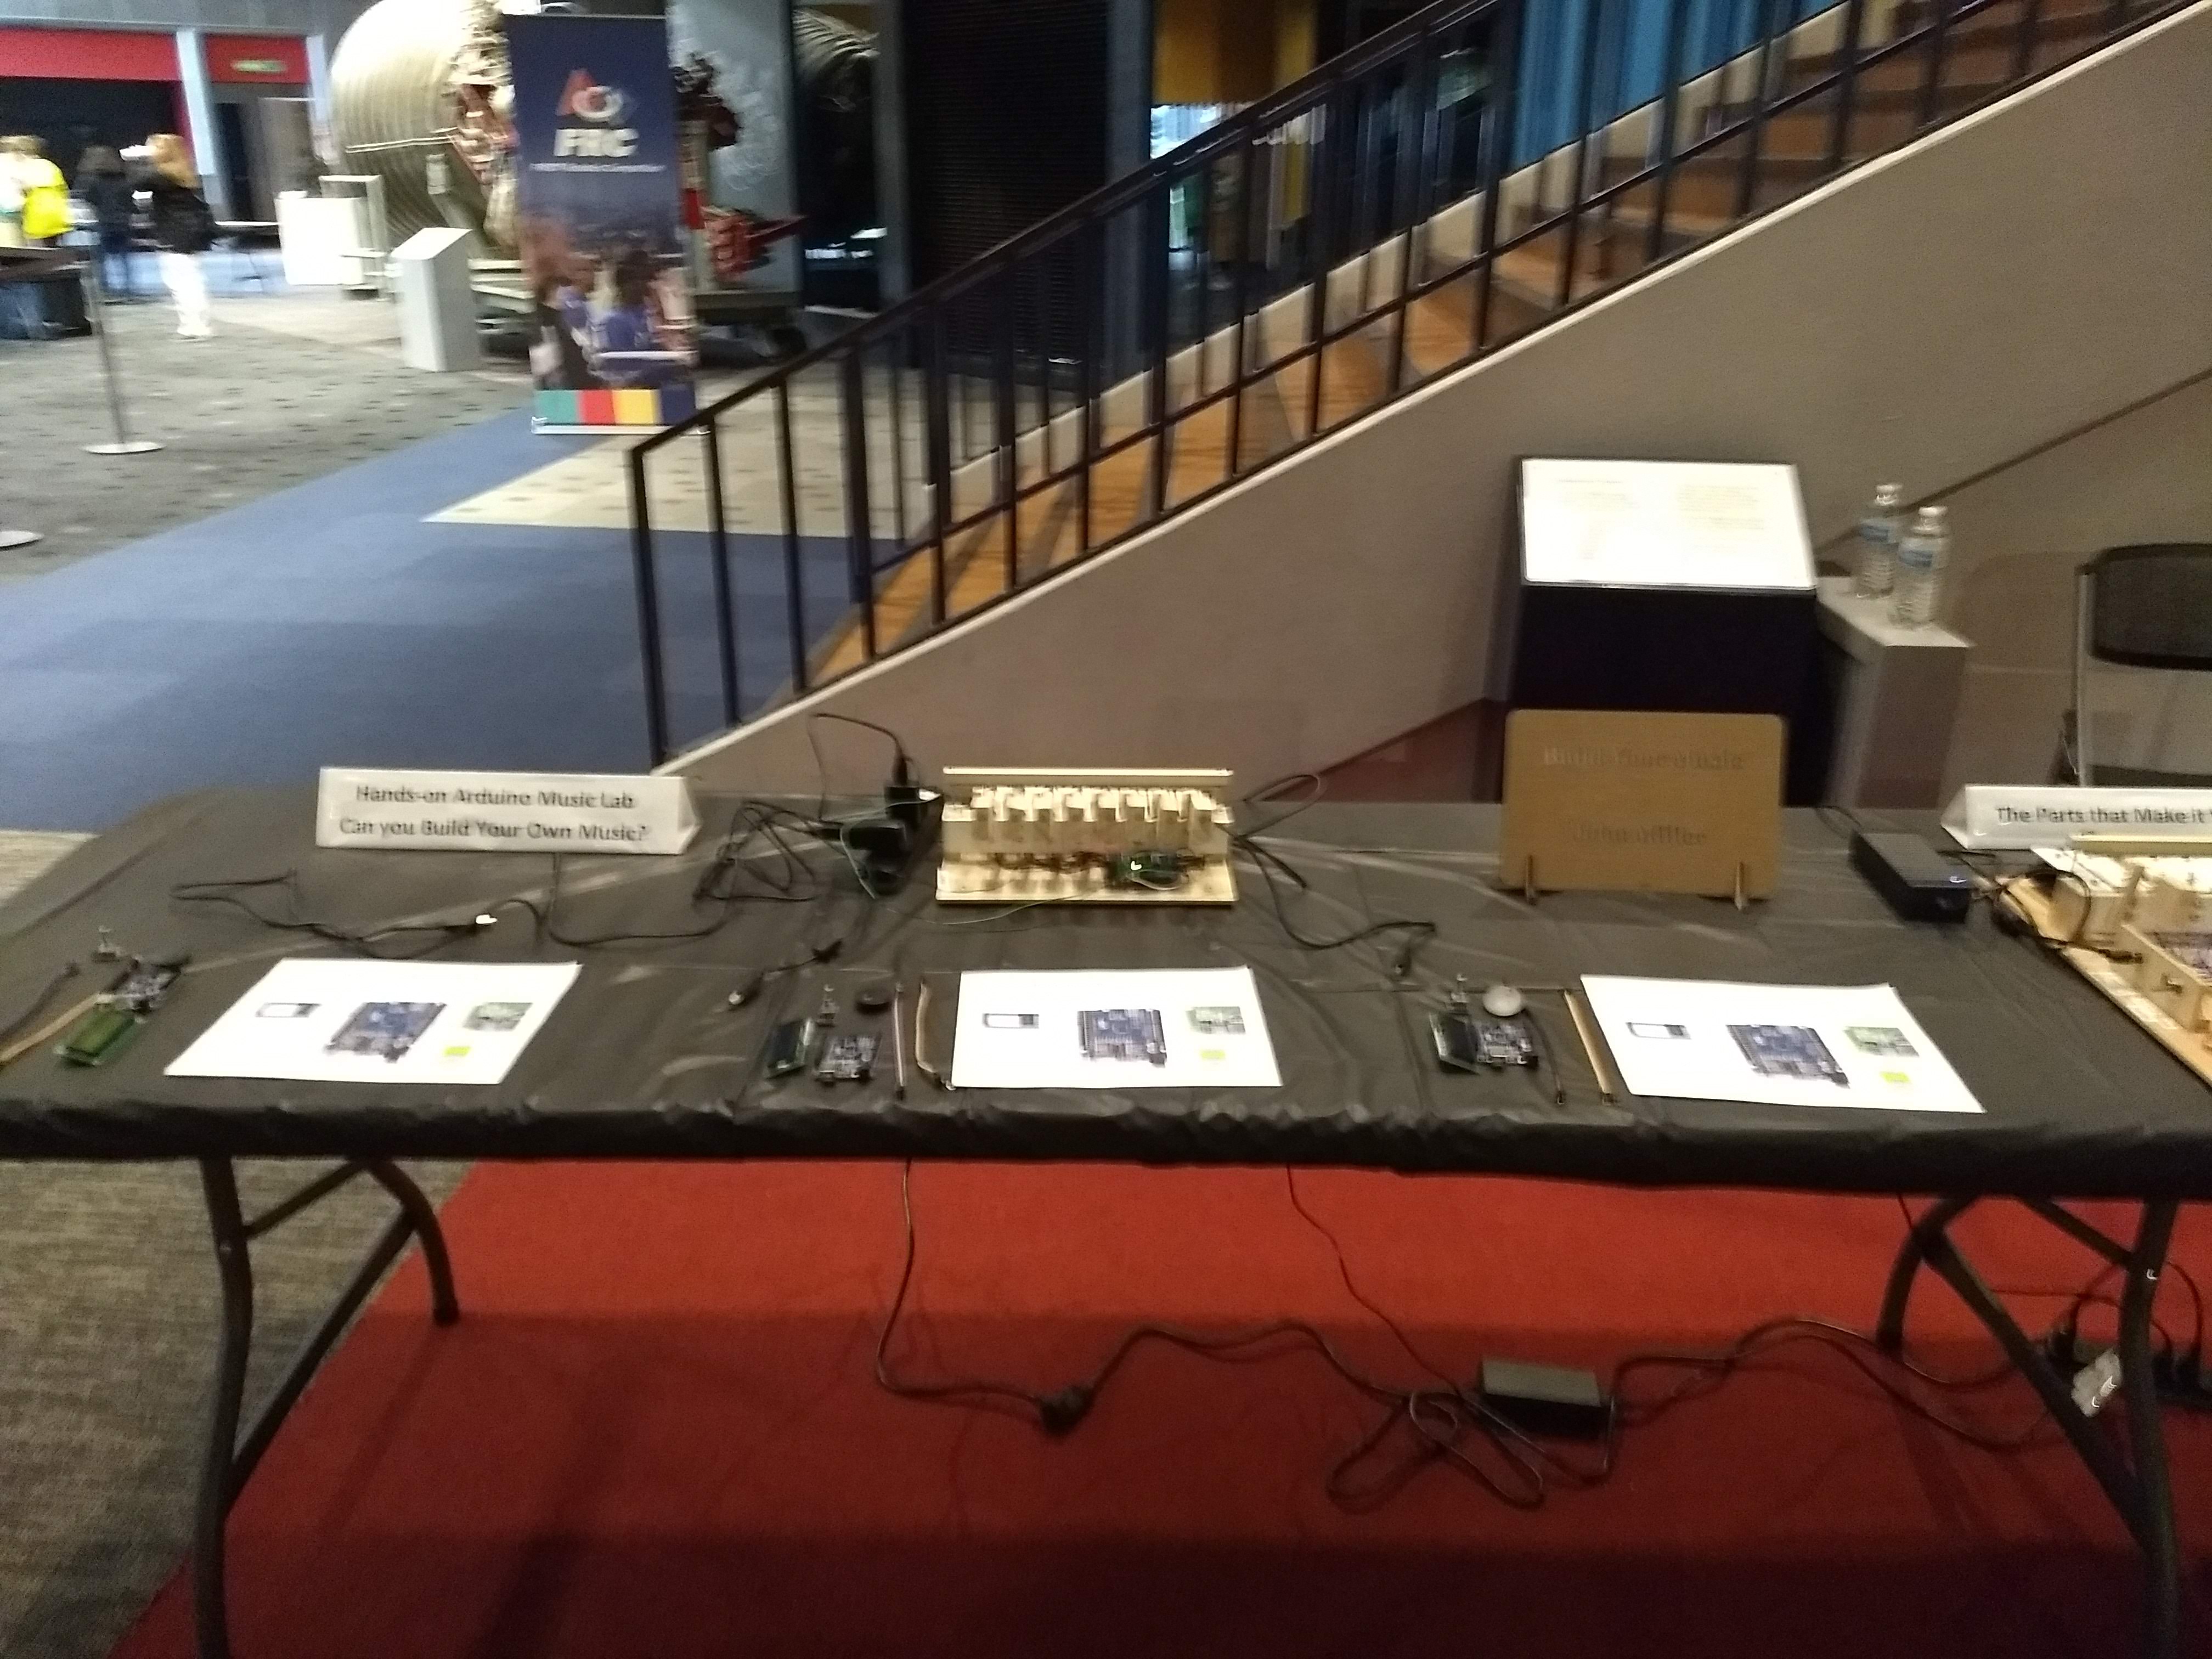
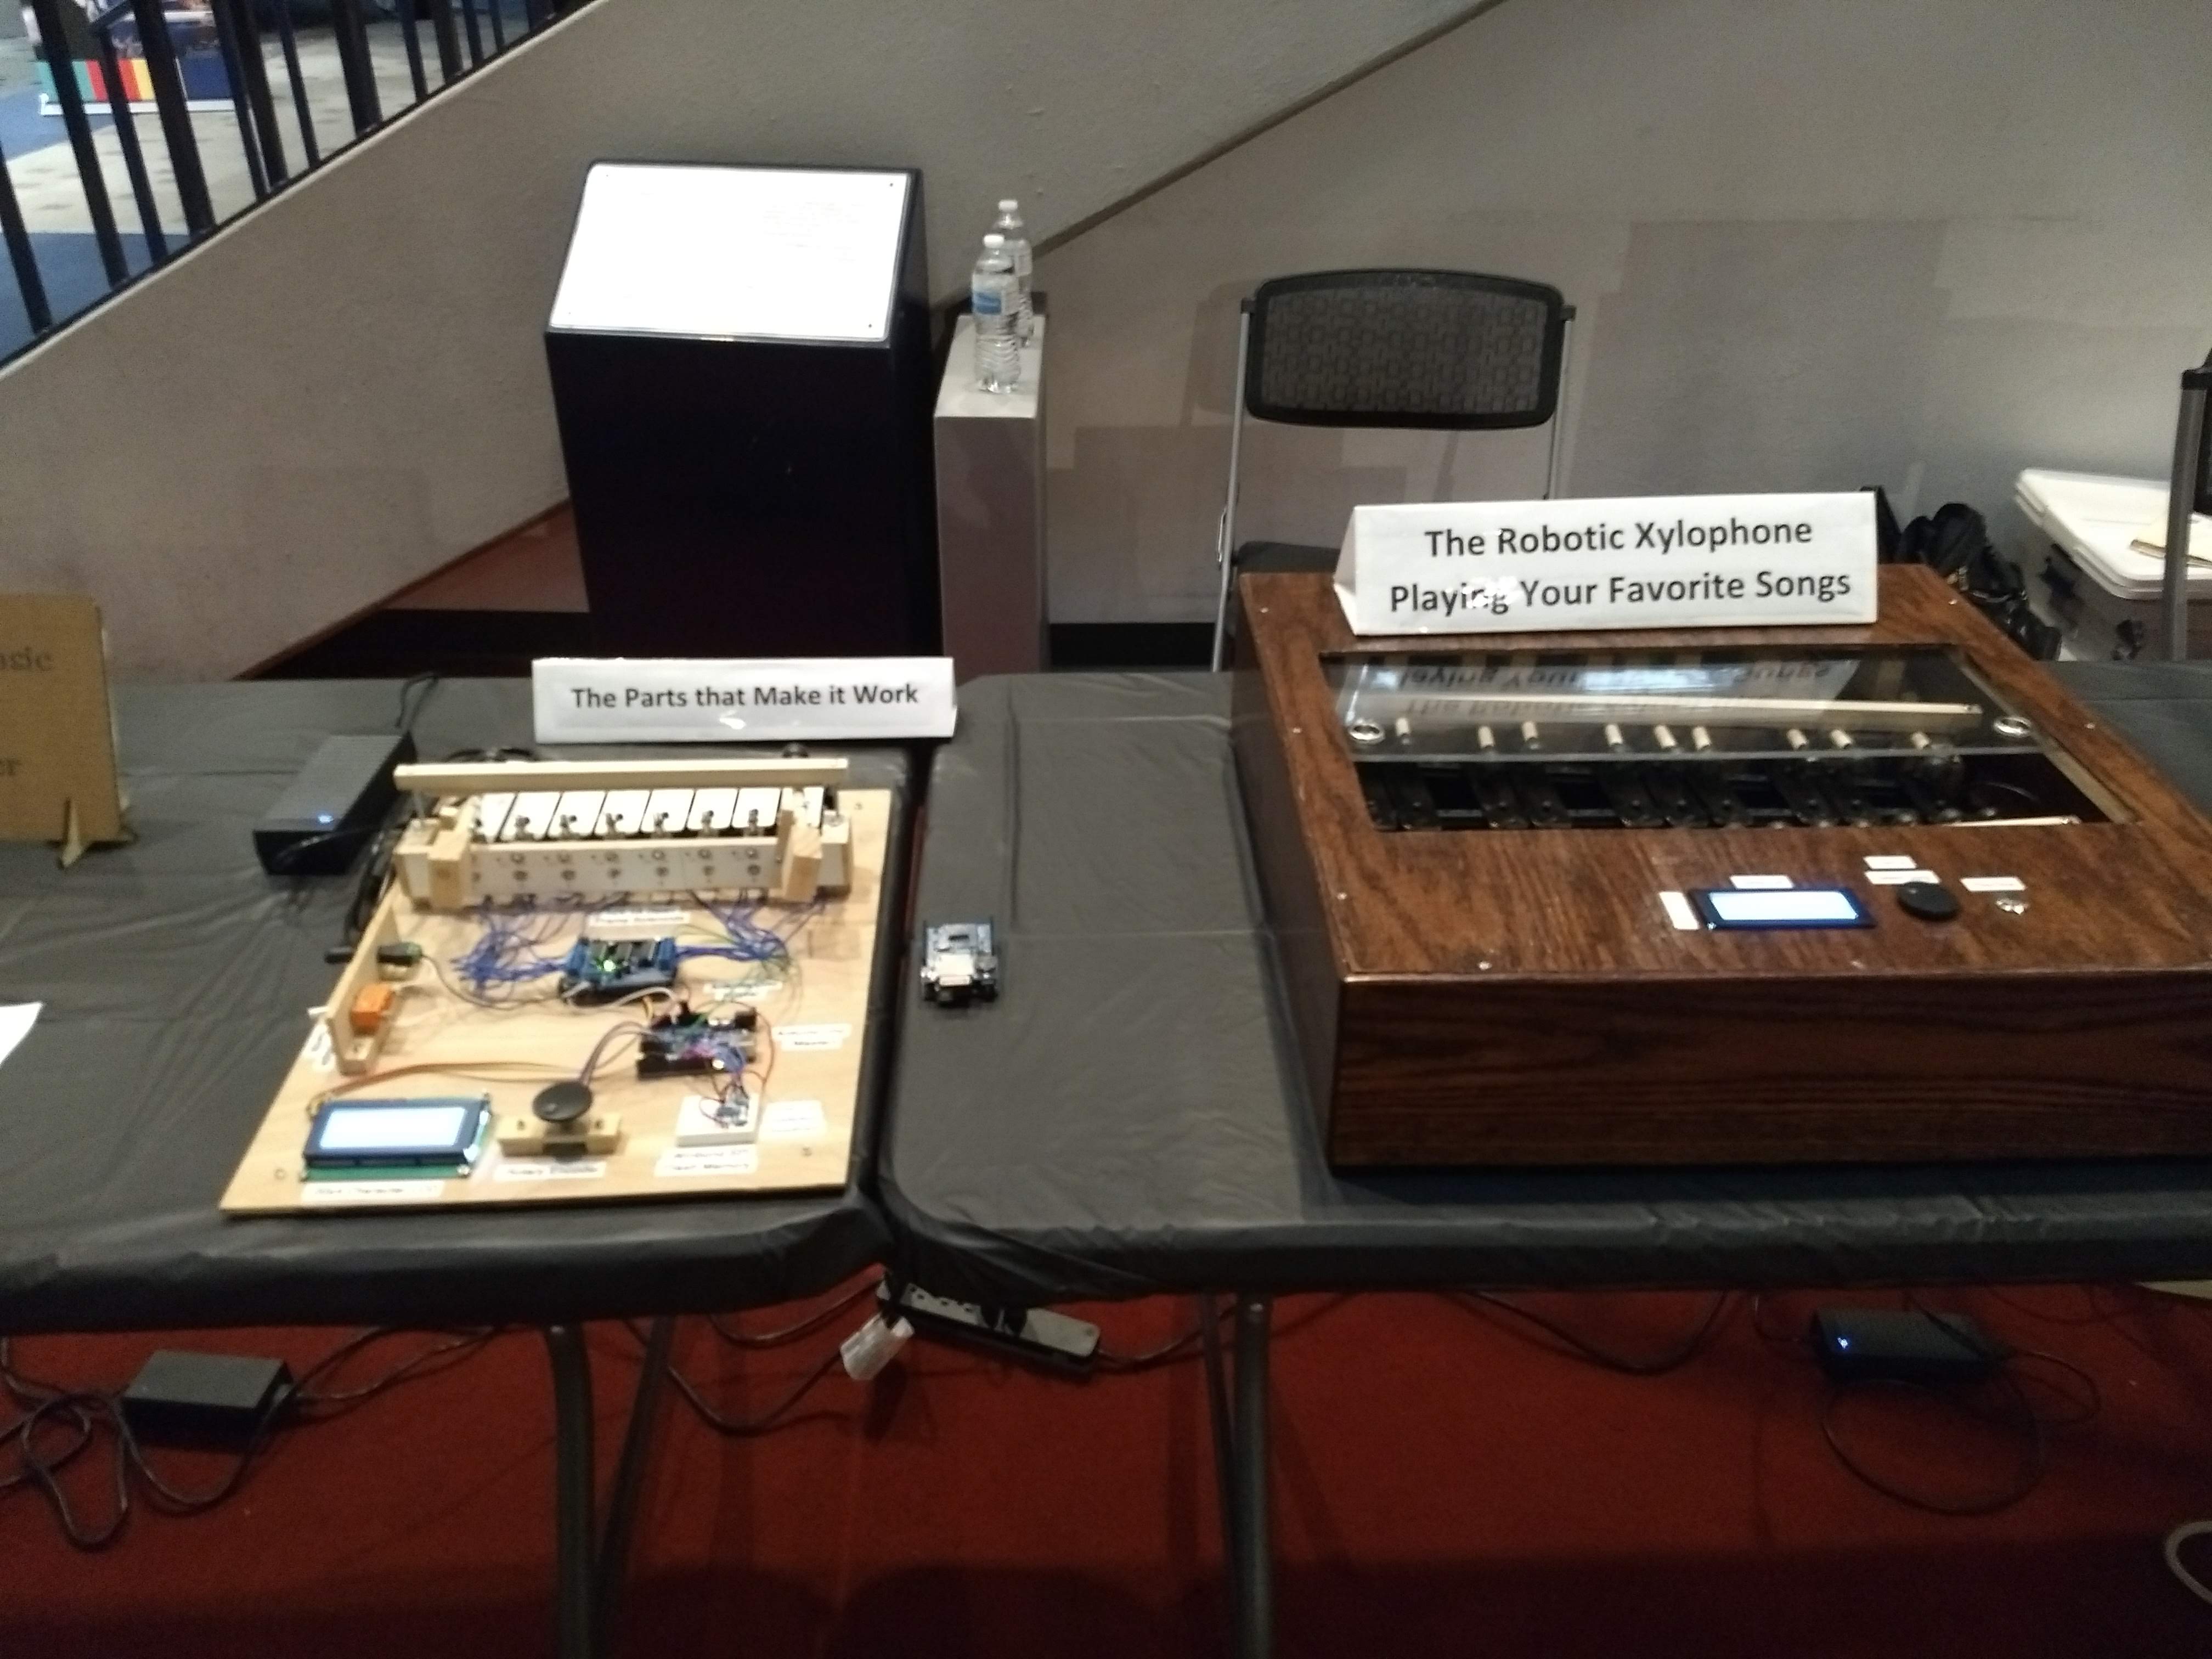
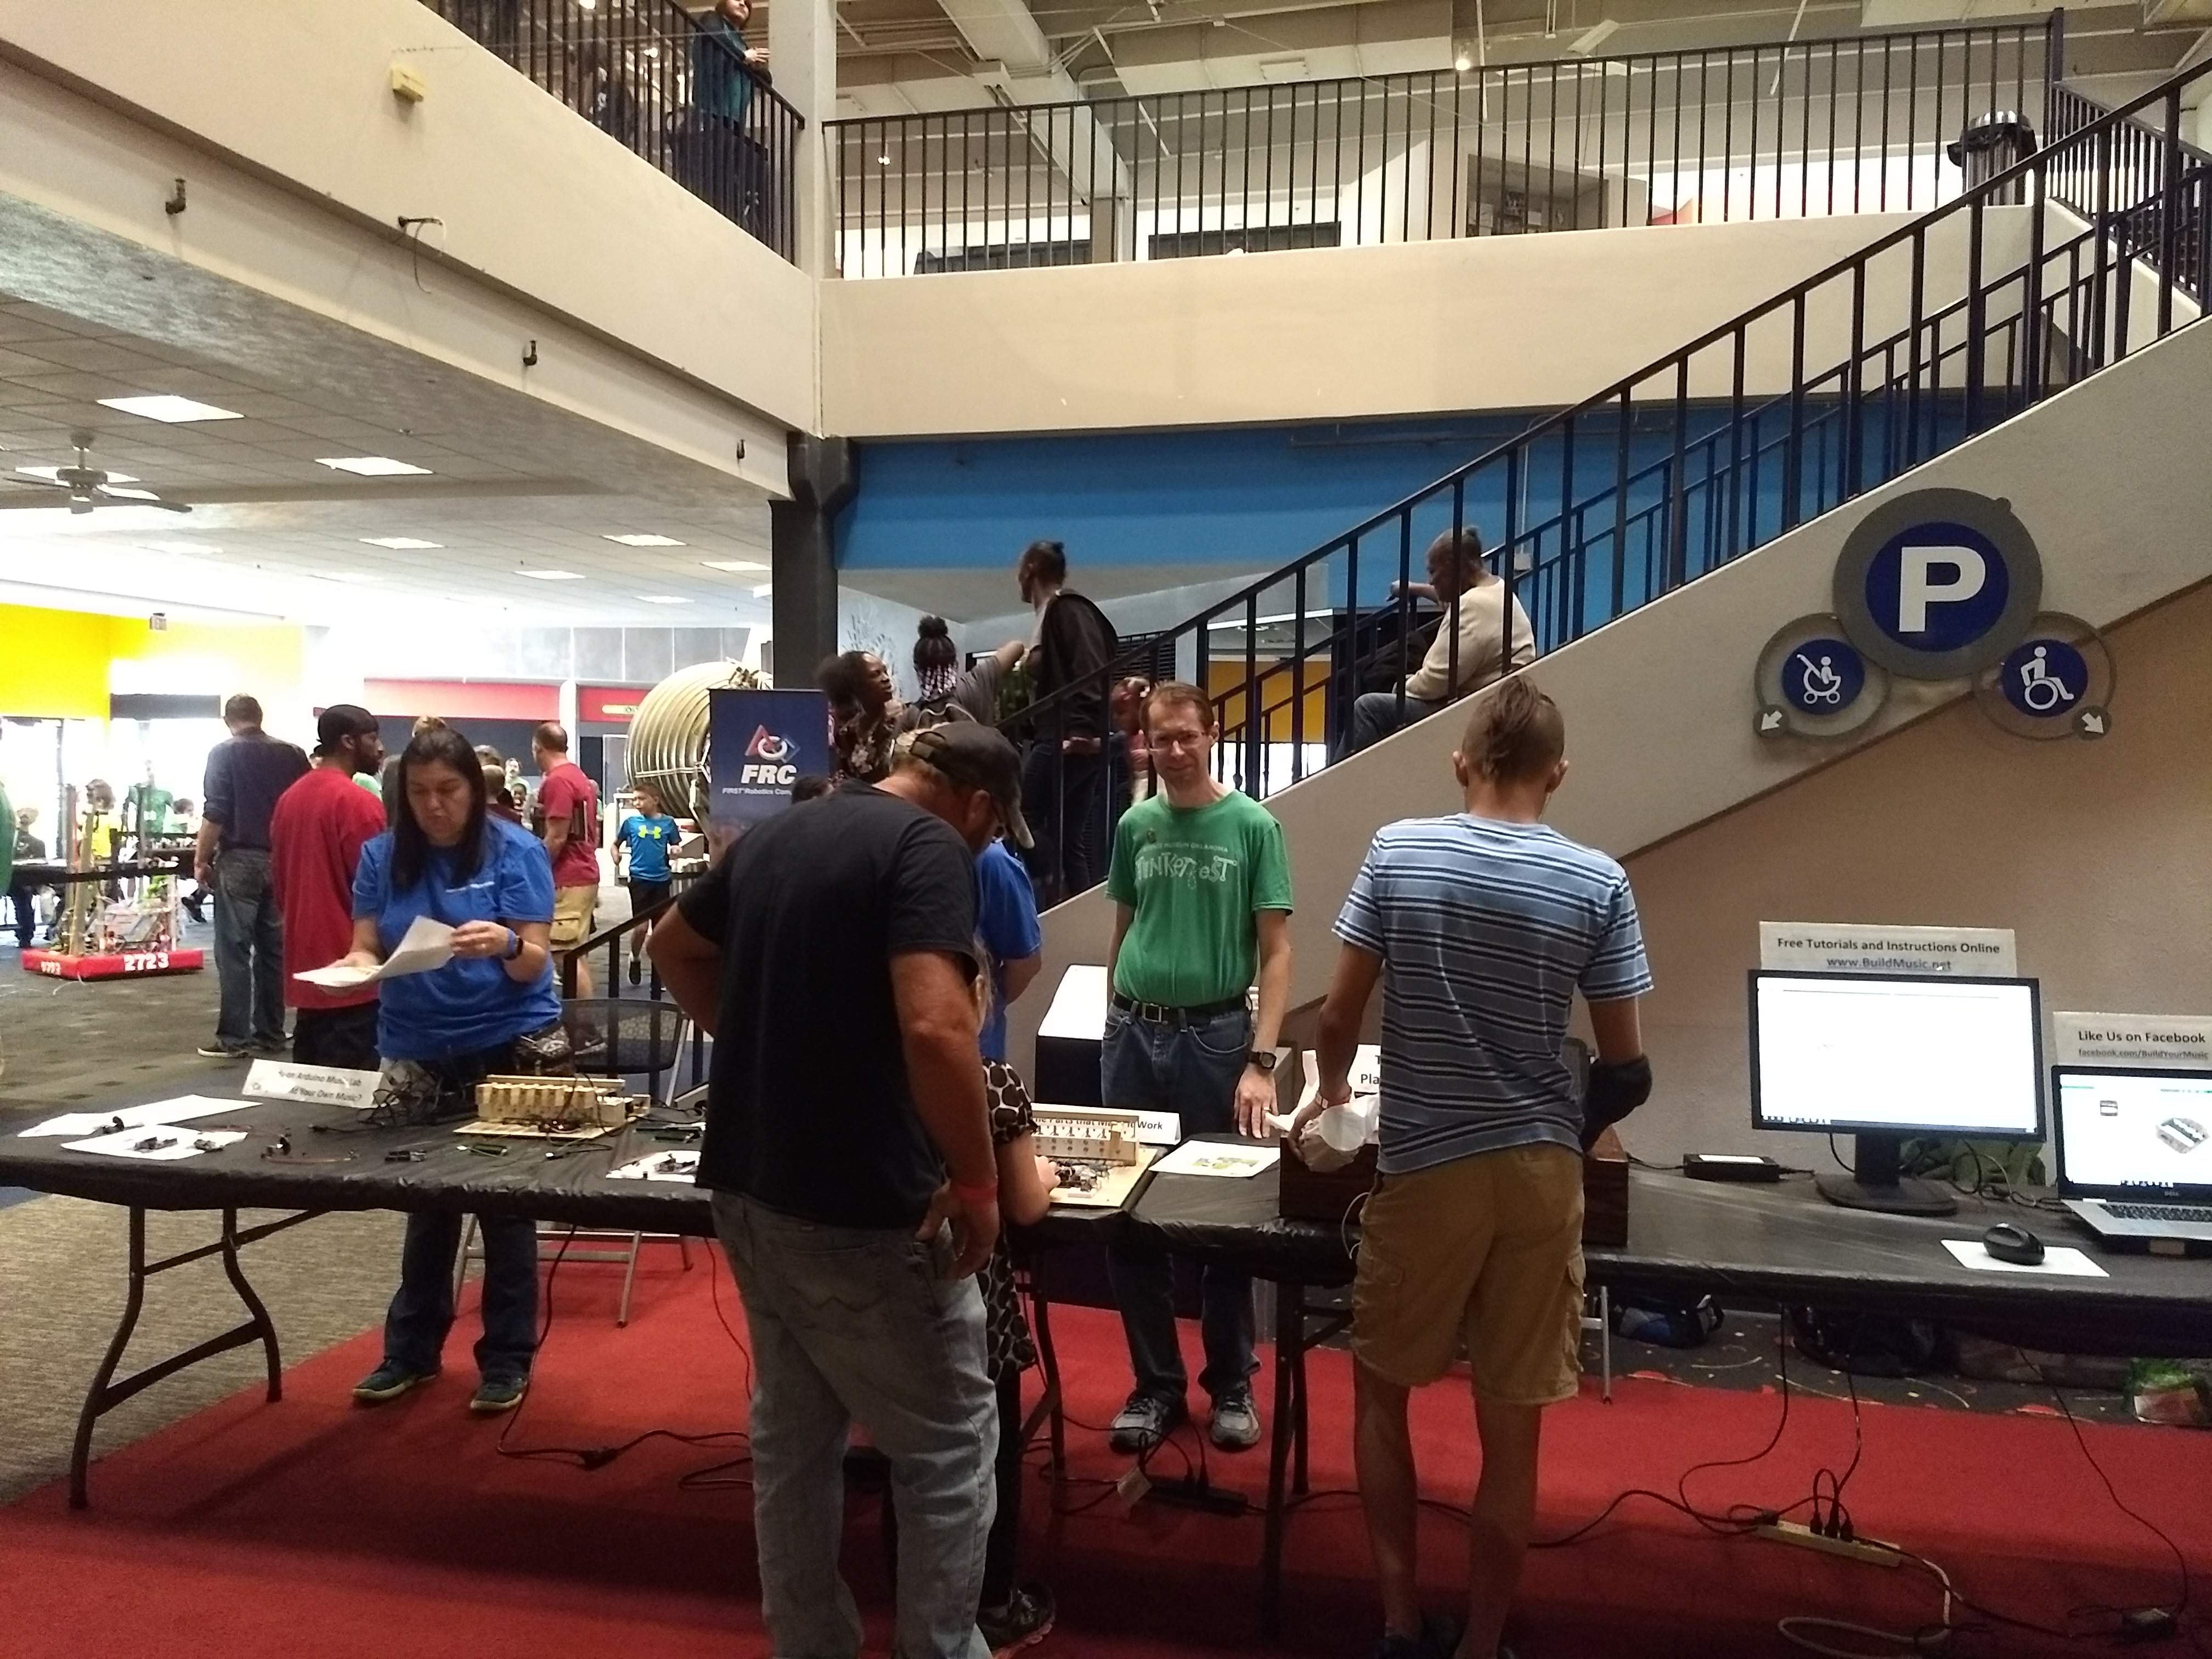
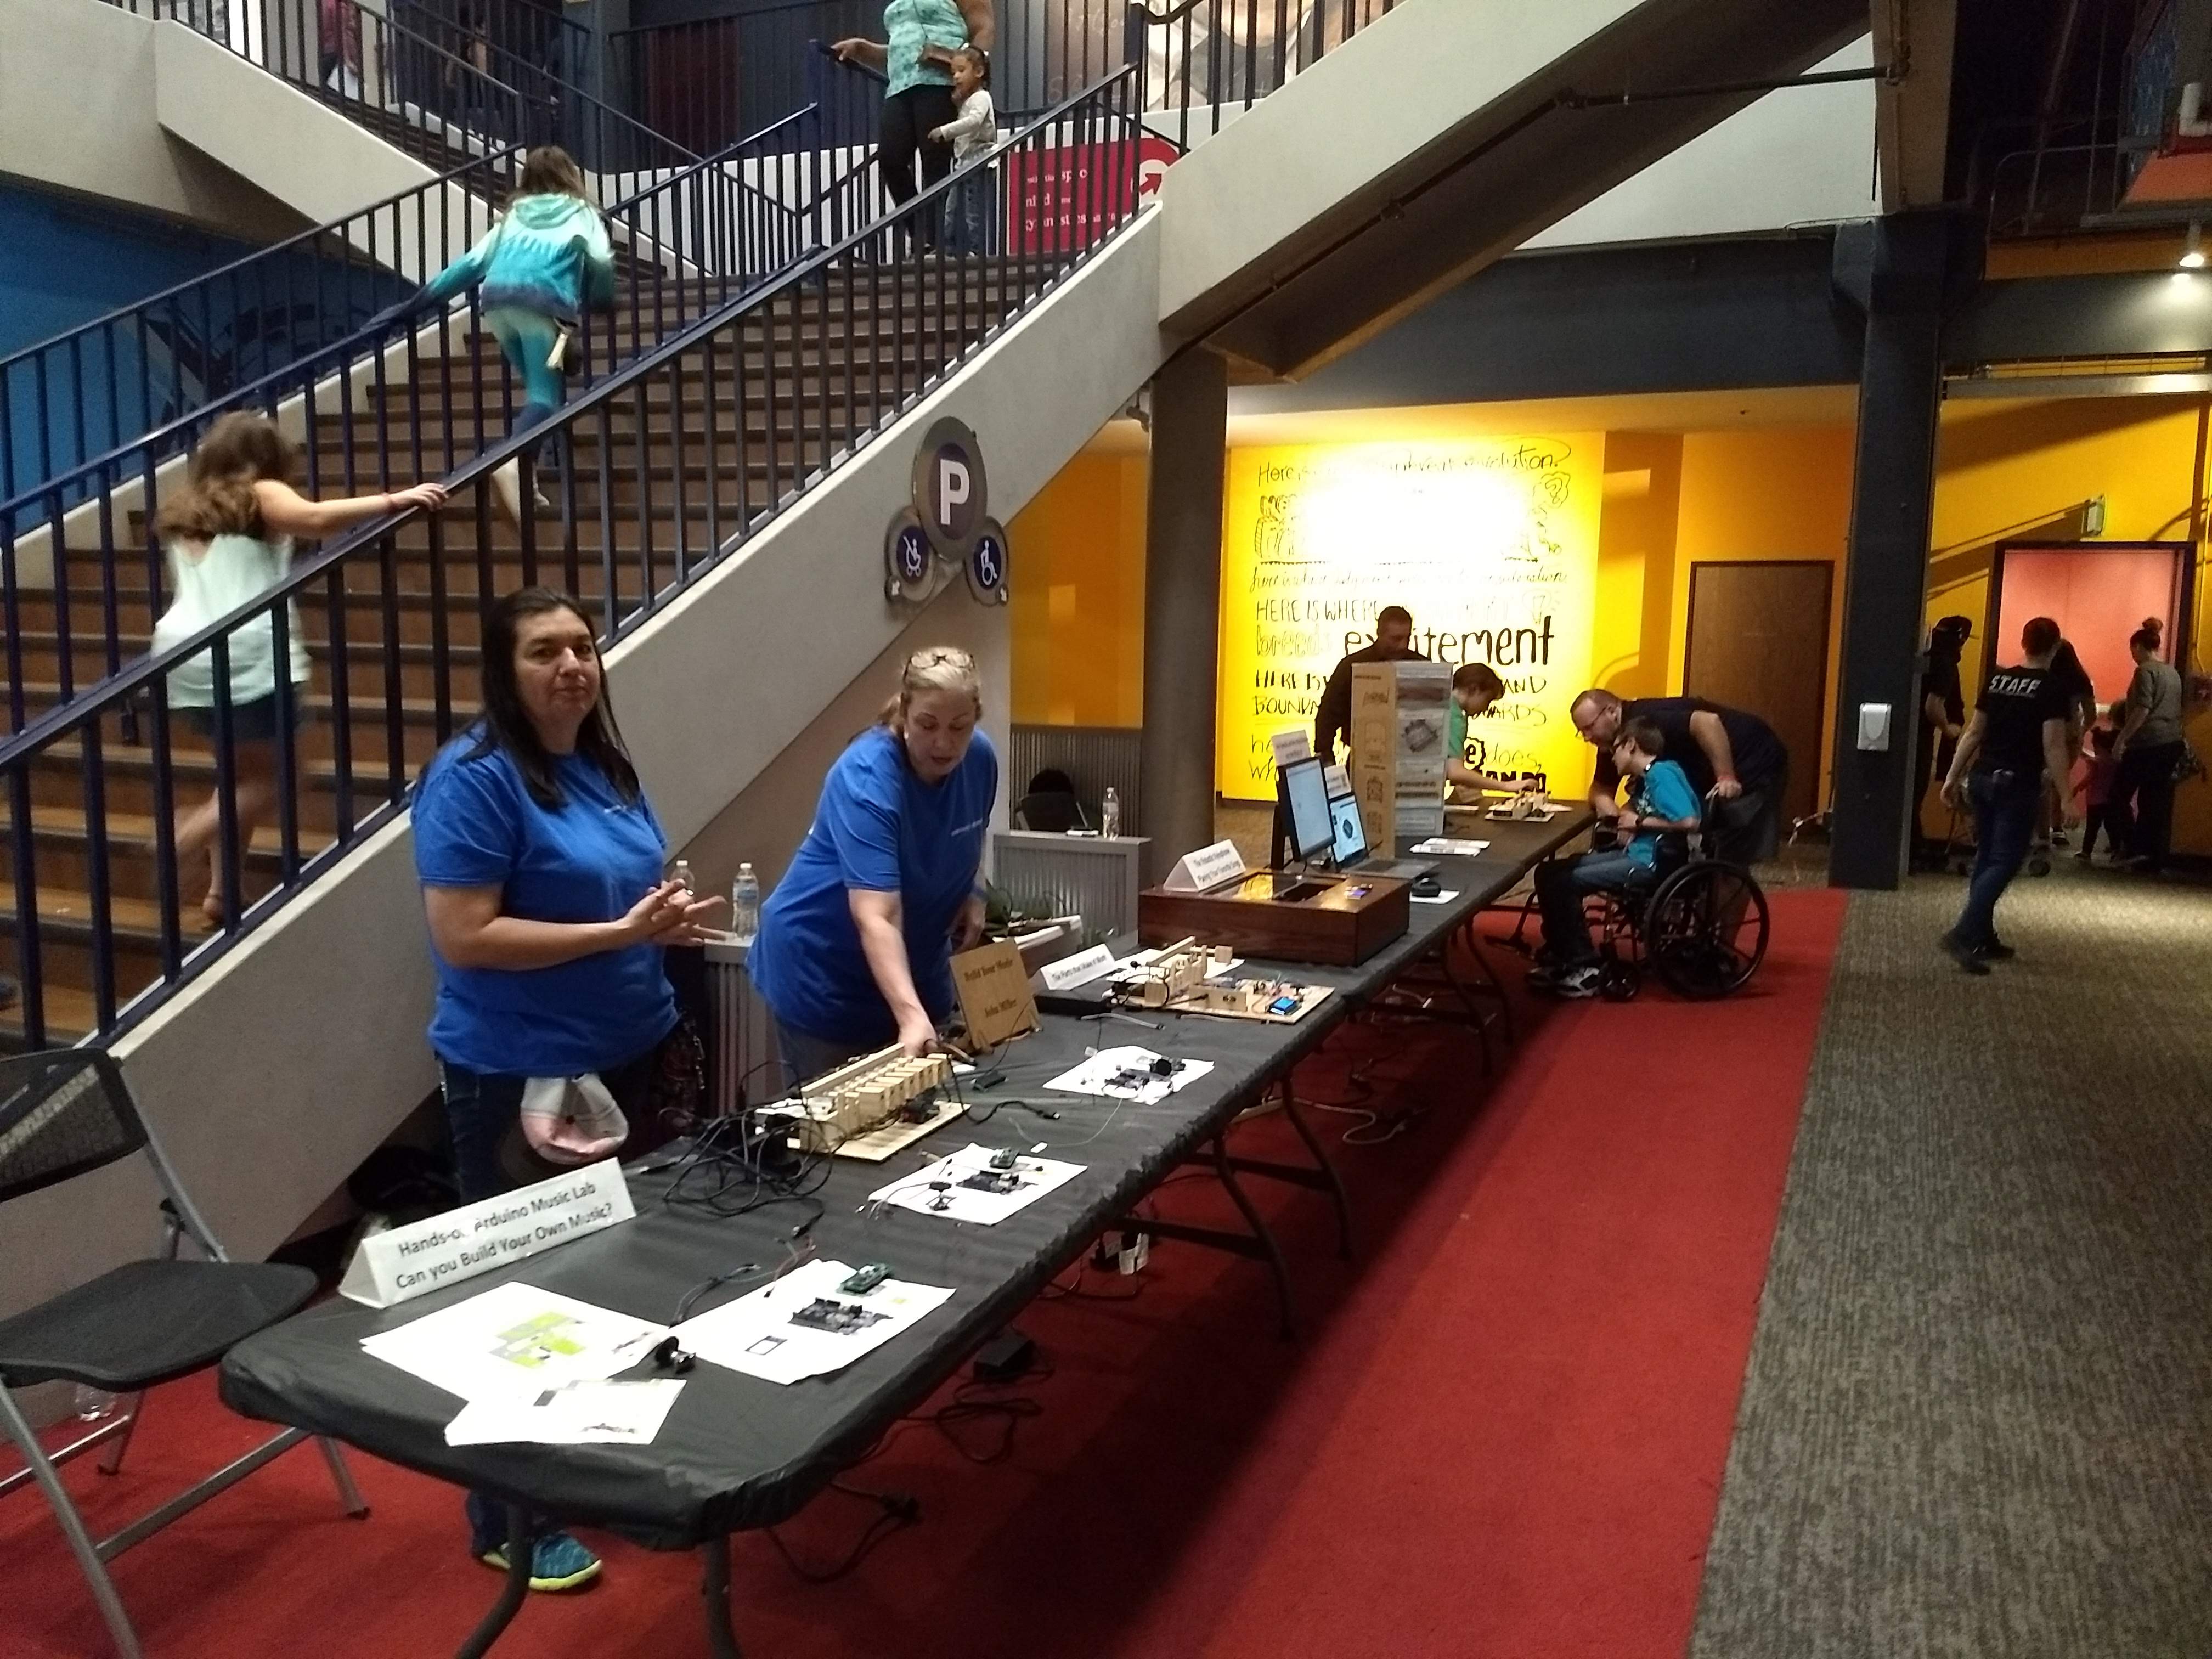
As for my own Build Your Music exhibit, the experience went very well.  I arrived on Friday night to get a head start setting up.  The staff was very friendly and eager to help me with whatever I needed.  I was surprised by how many people knew my name.  Some of them, I know I had talked with at Make Faire Tulsa, but others must have just familiarized themselves with the list of guest tinkerers.  I had requested two 8-foot tables, and the museum gave me three, which turned out to be just right.  I put the main robotic xylophone in the middle, and the Arduino Music Lab on either end.  It took me about an hour to set up.  Here are some photos of the exhibit:


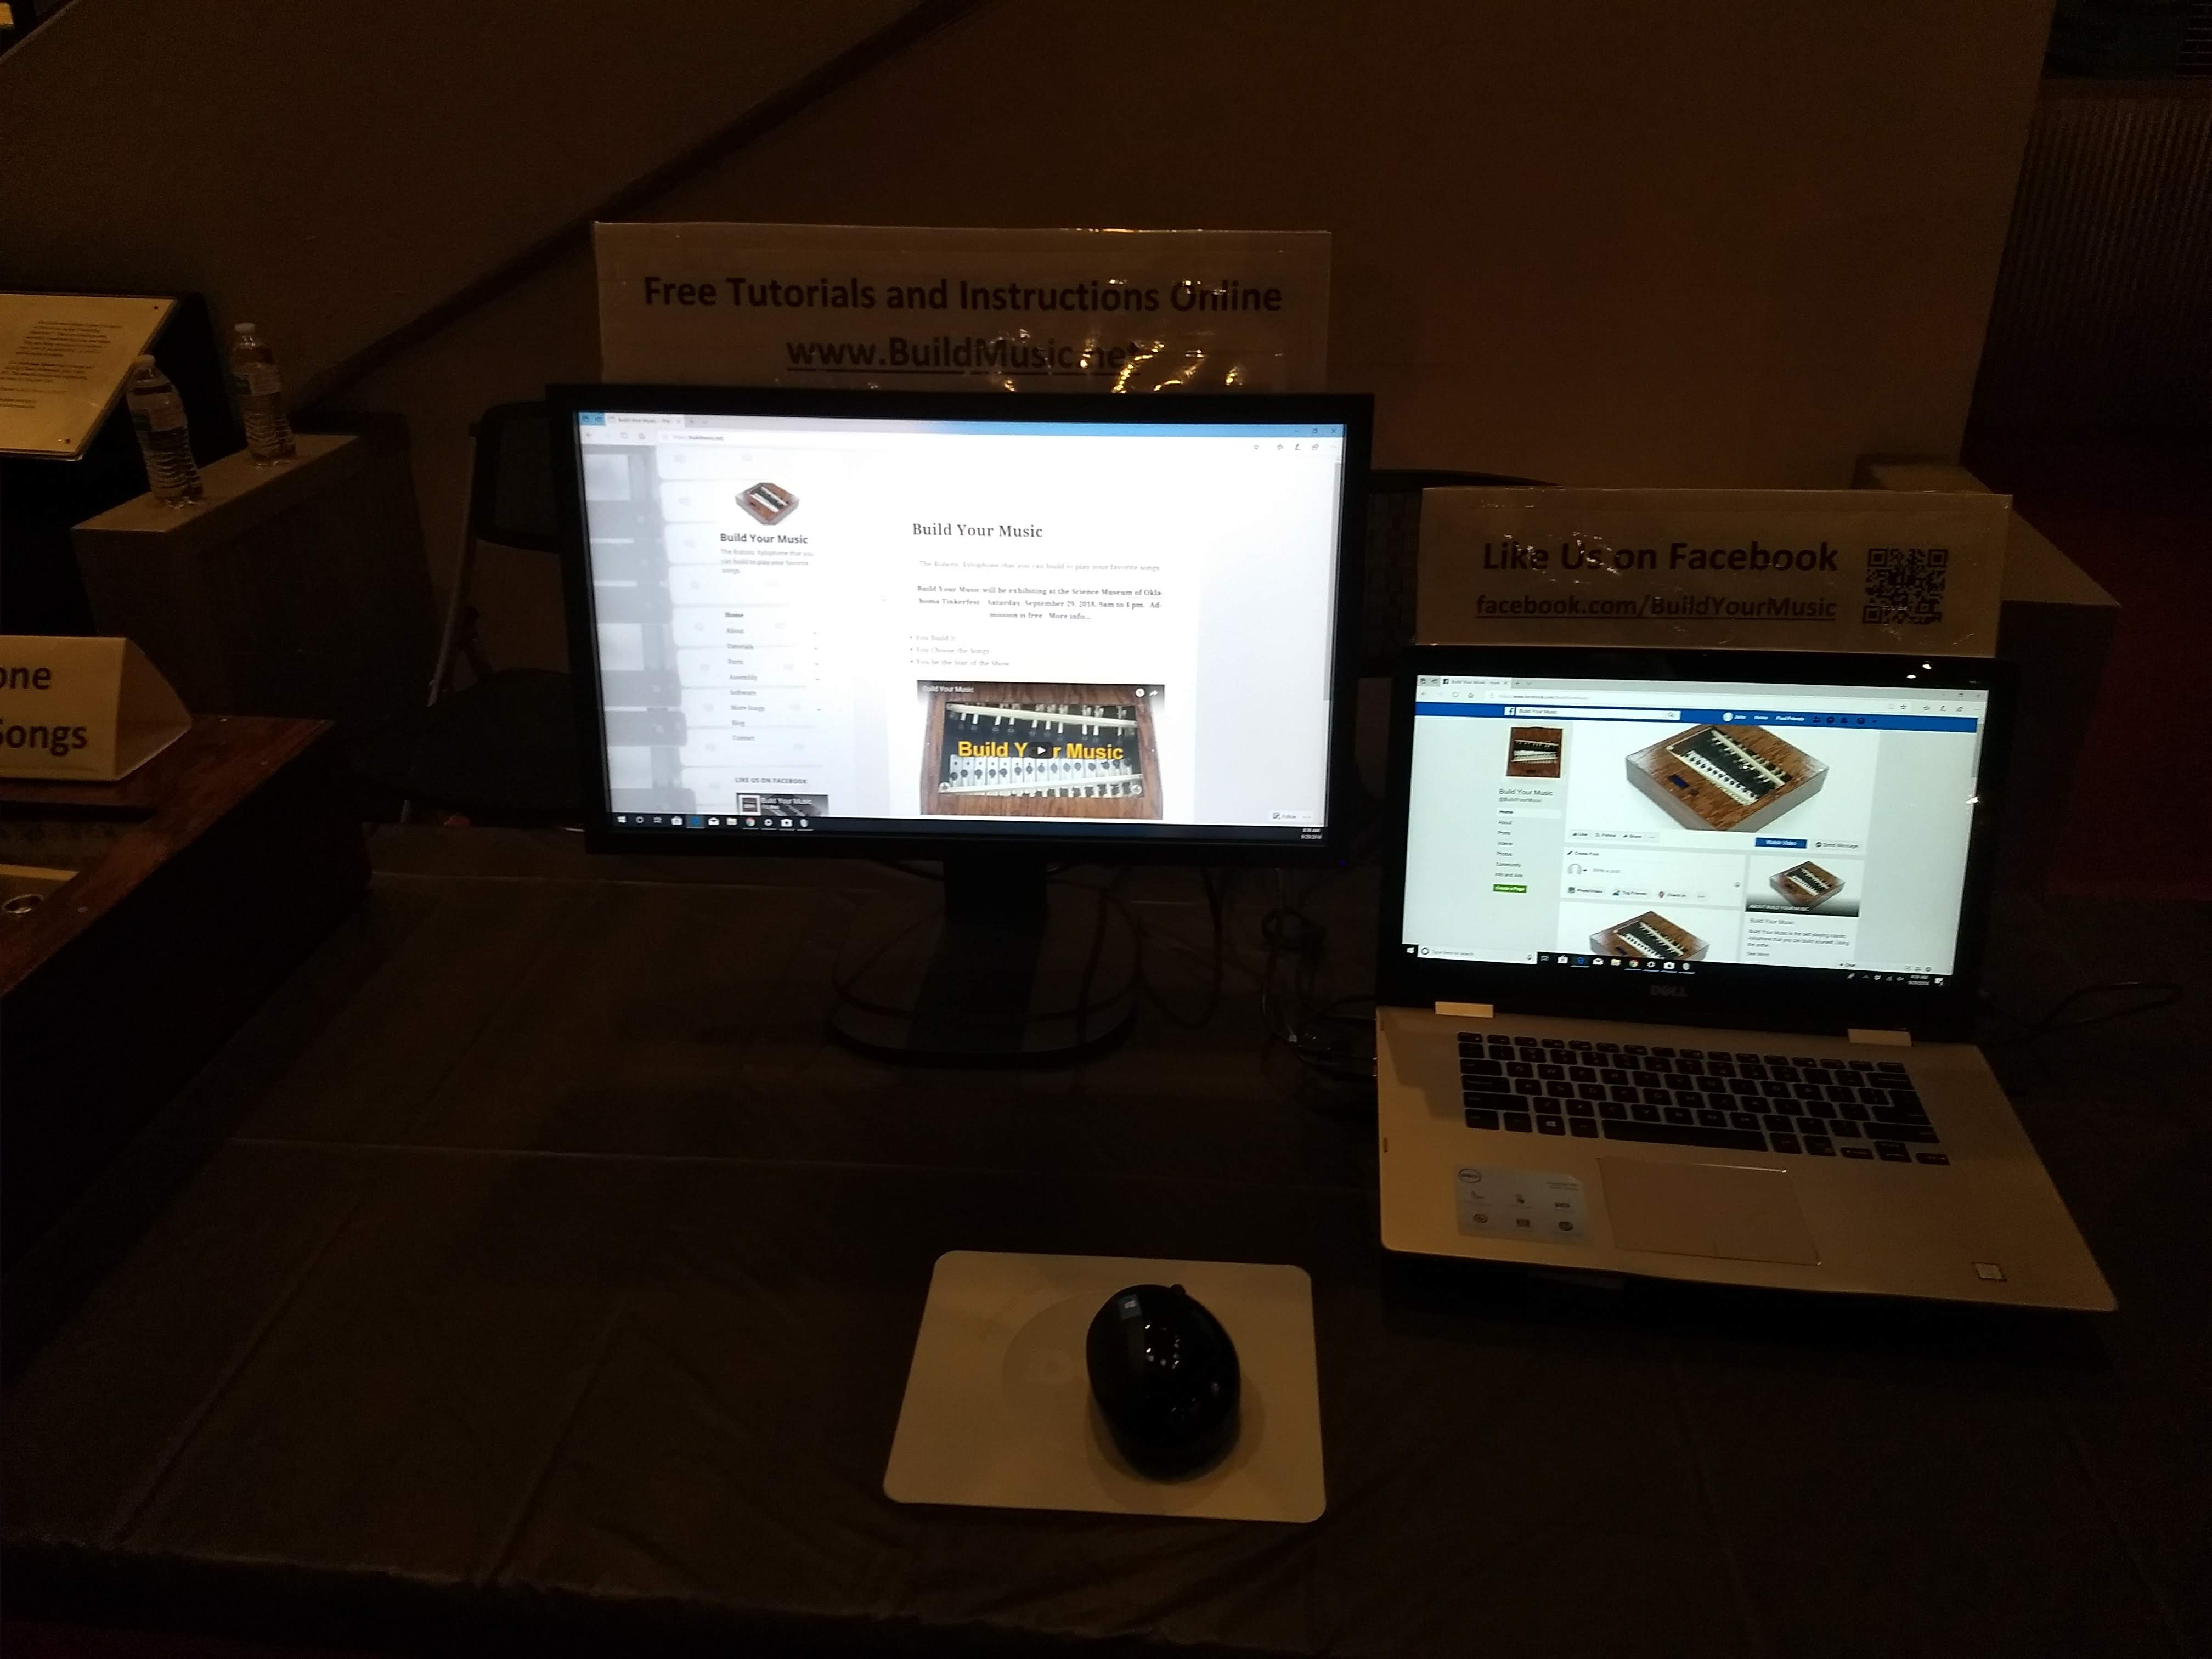
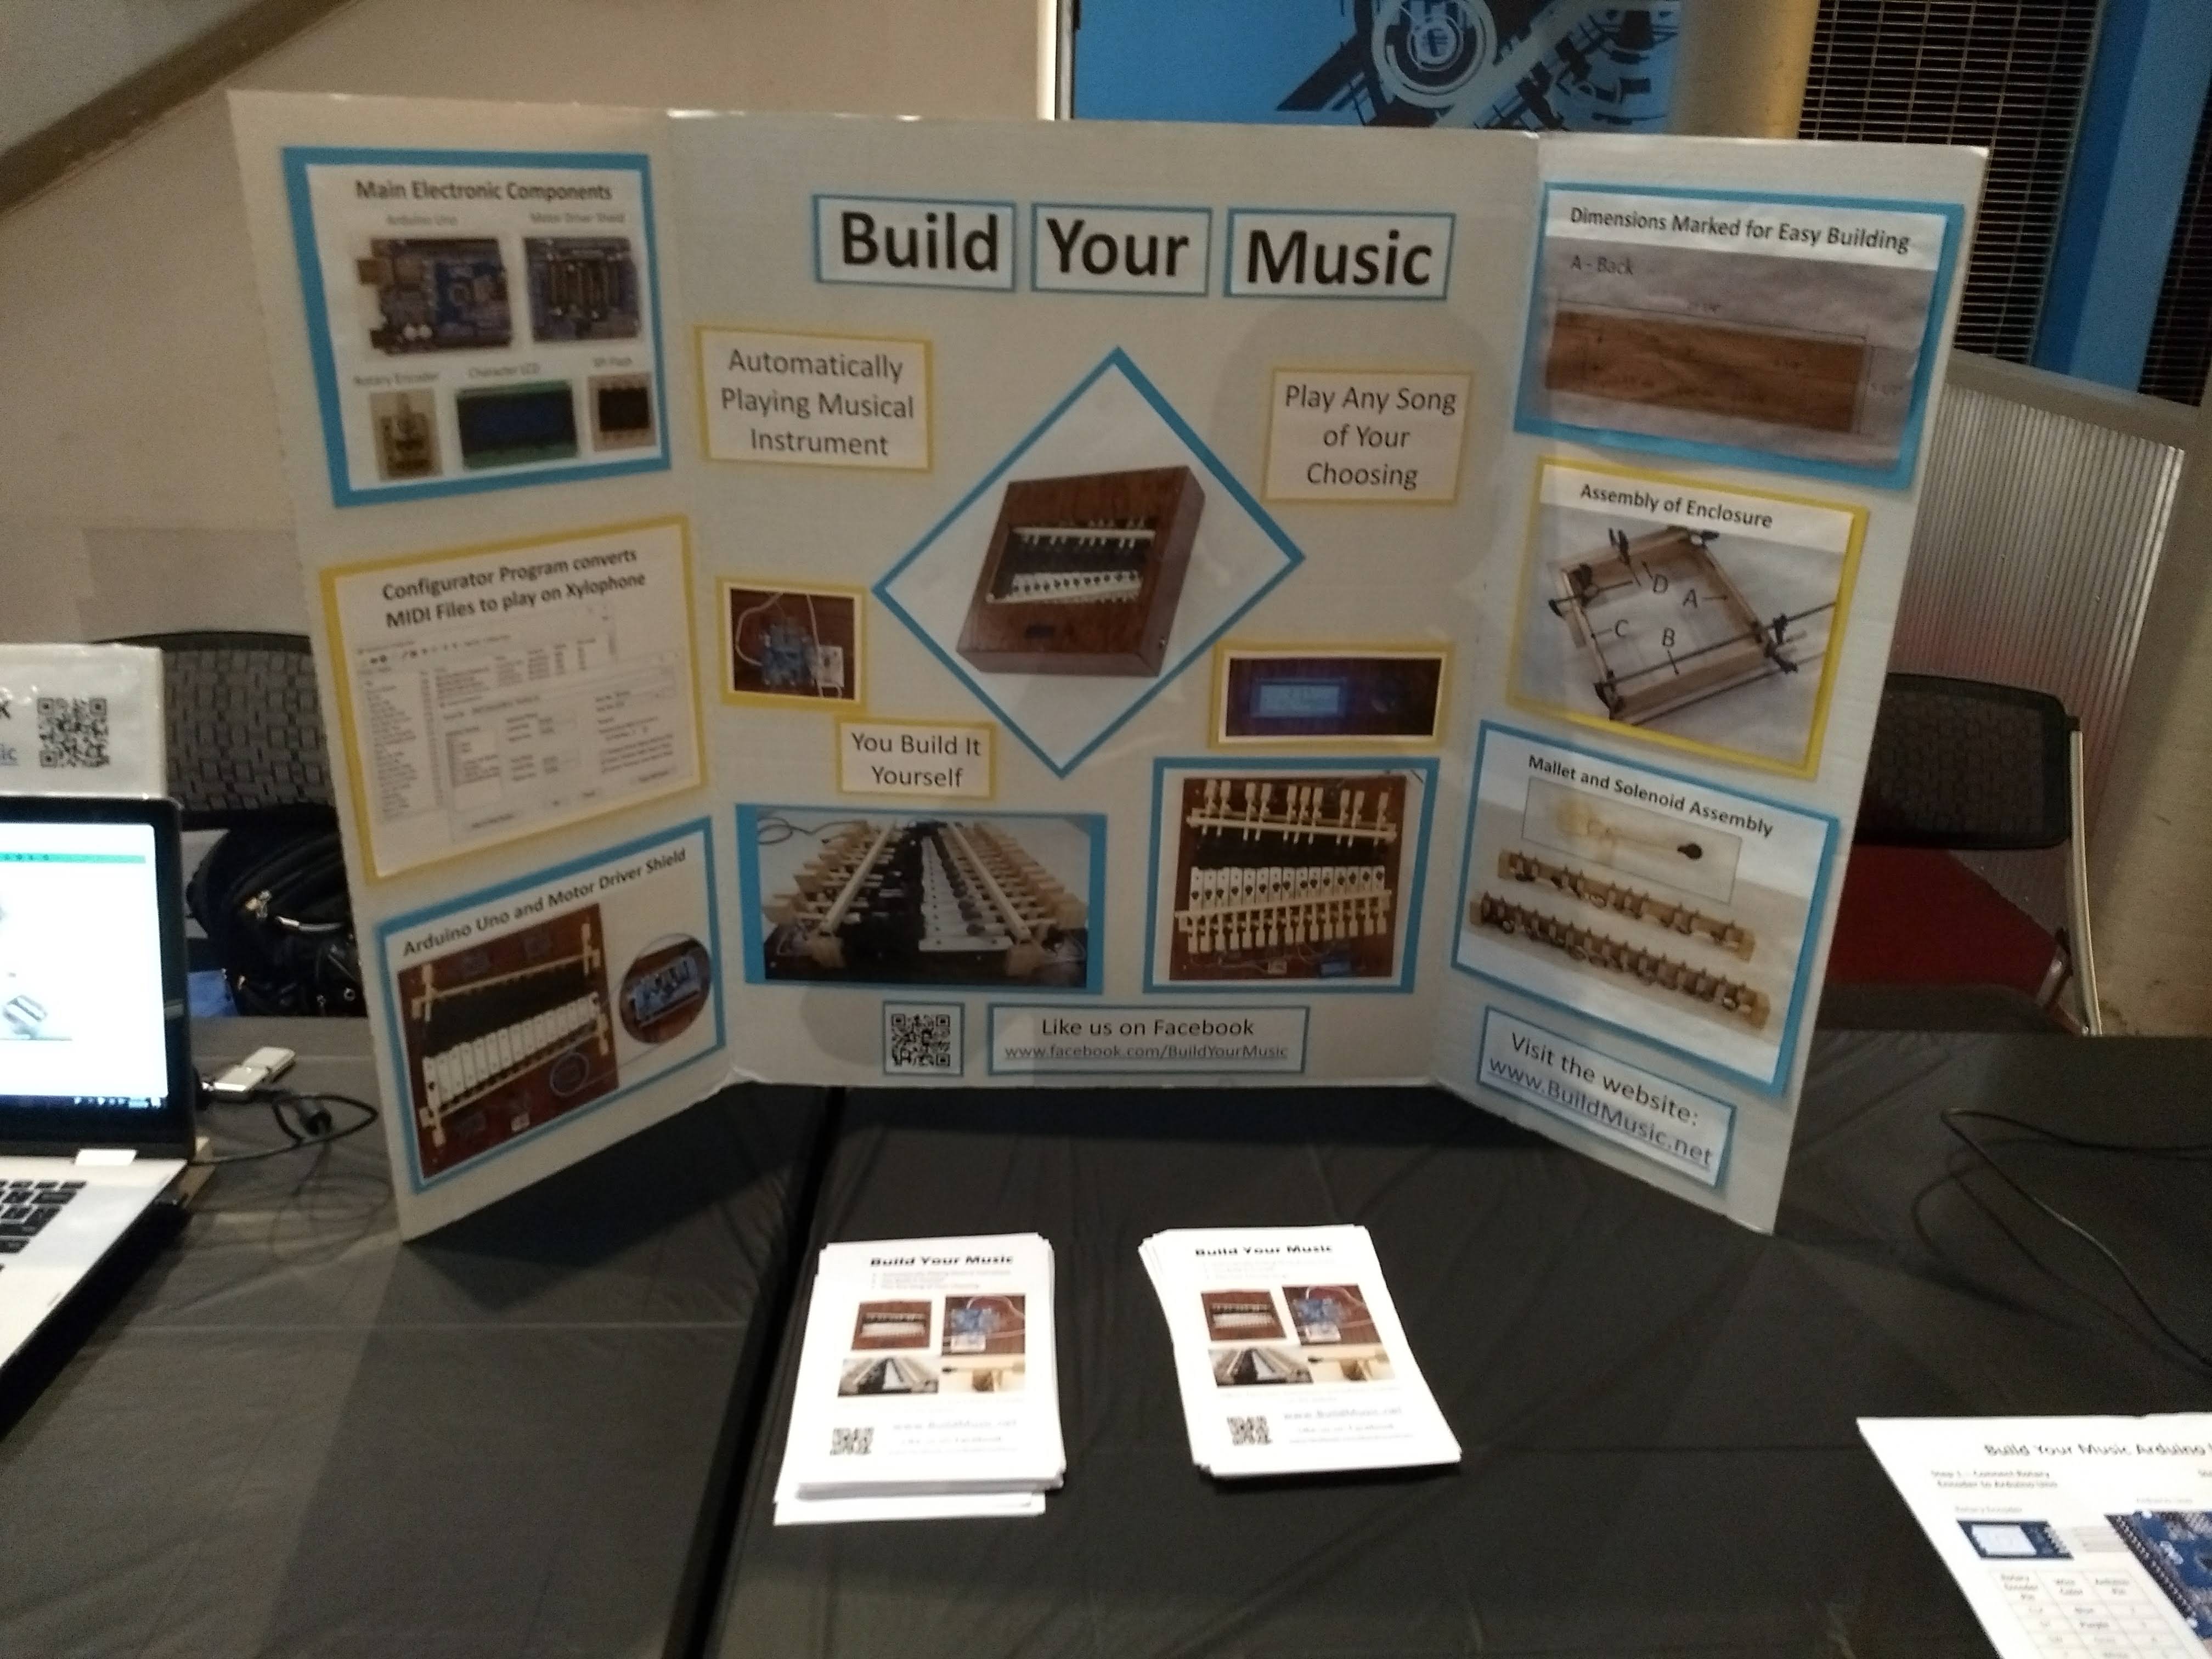
And here is a video tour:

Again I did a short Facebook Live broadcast prior to the event starting, where I shared the story of how I ended up coming to Tinkerfest.  I noticed that a few friends on Facebook even joined the broadcast live.


I also gave a Facebook Live tour of the exhibit, which is archived here.

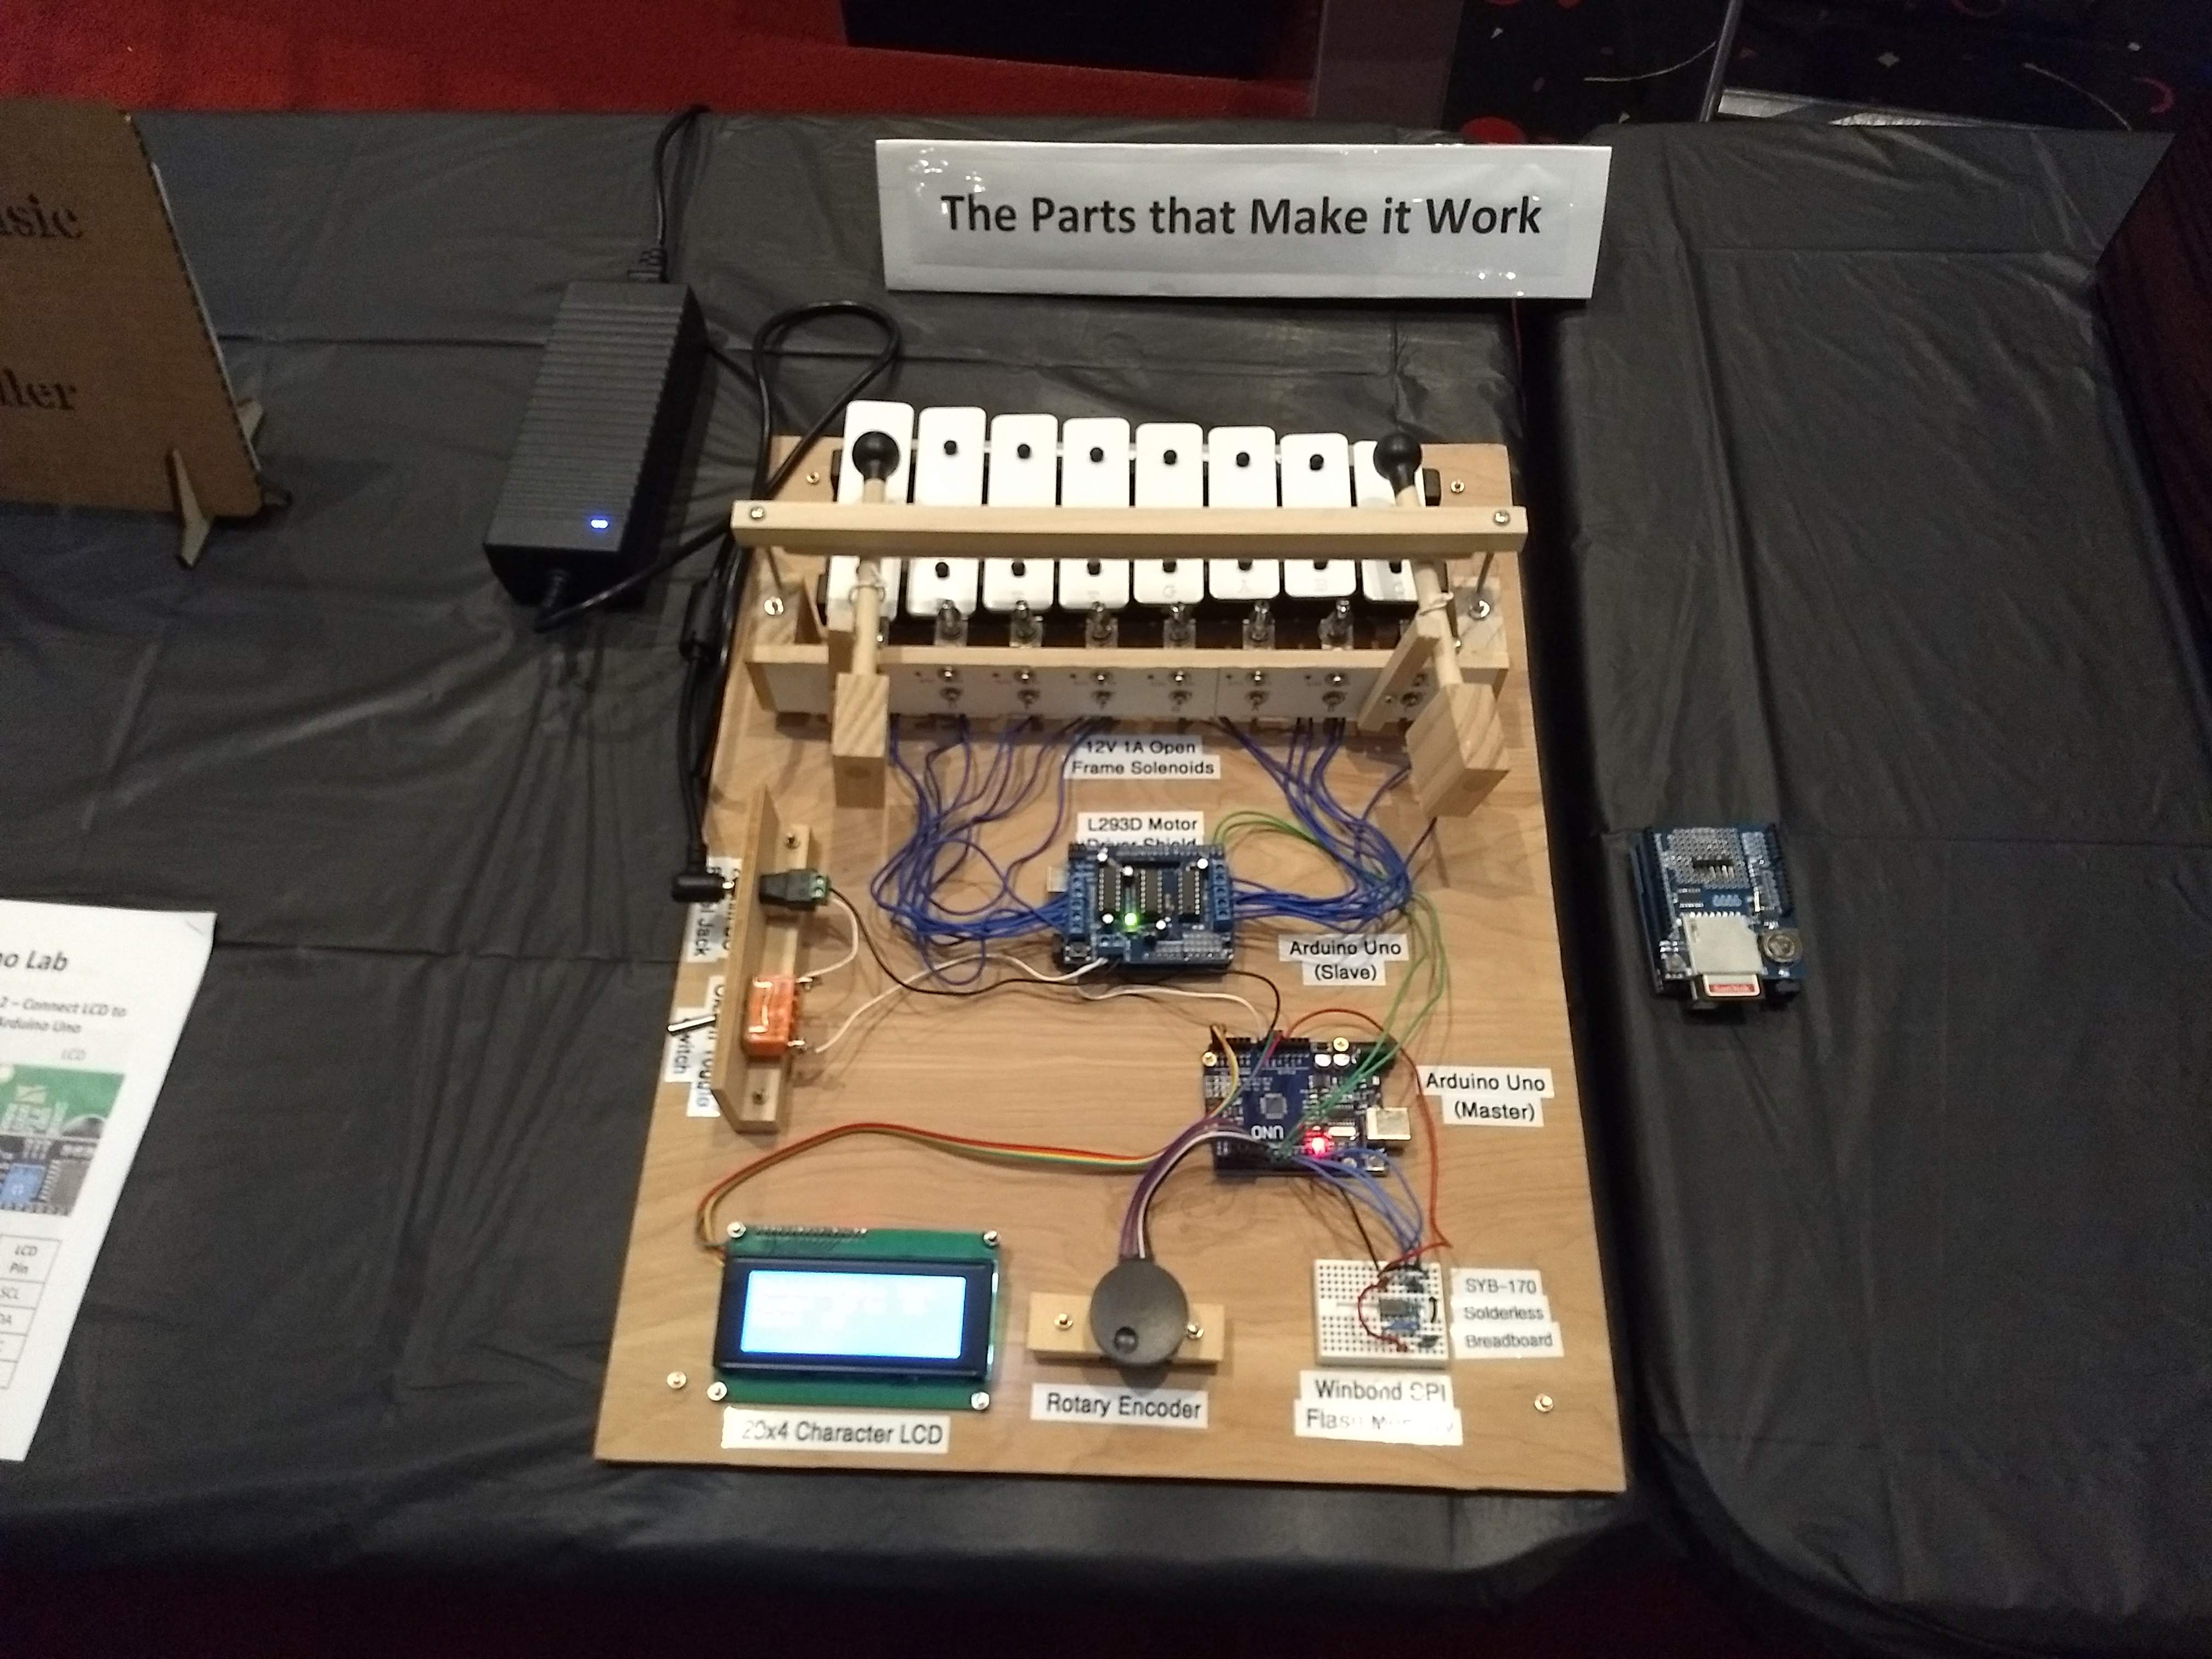
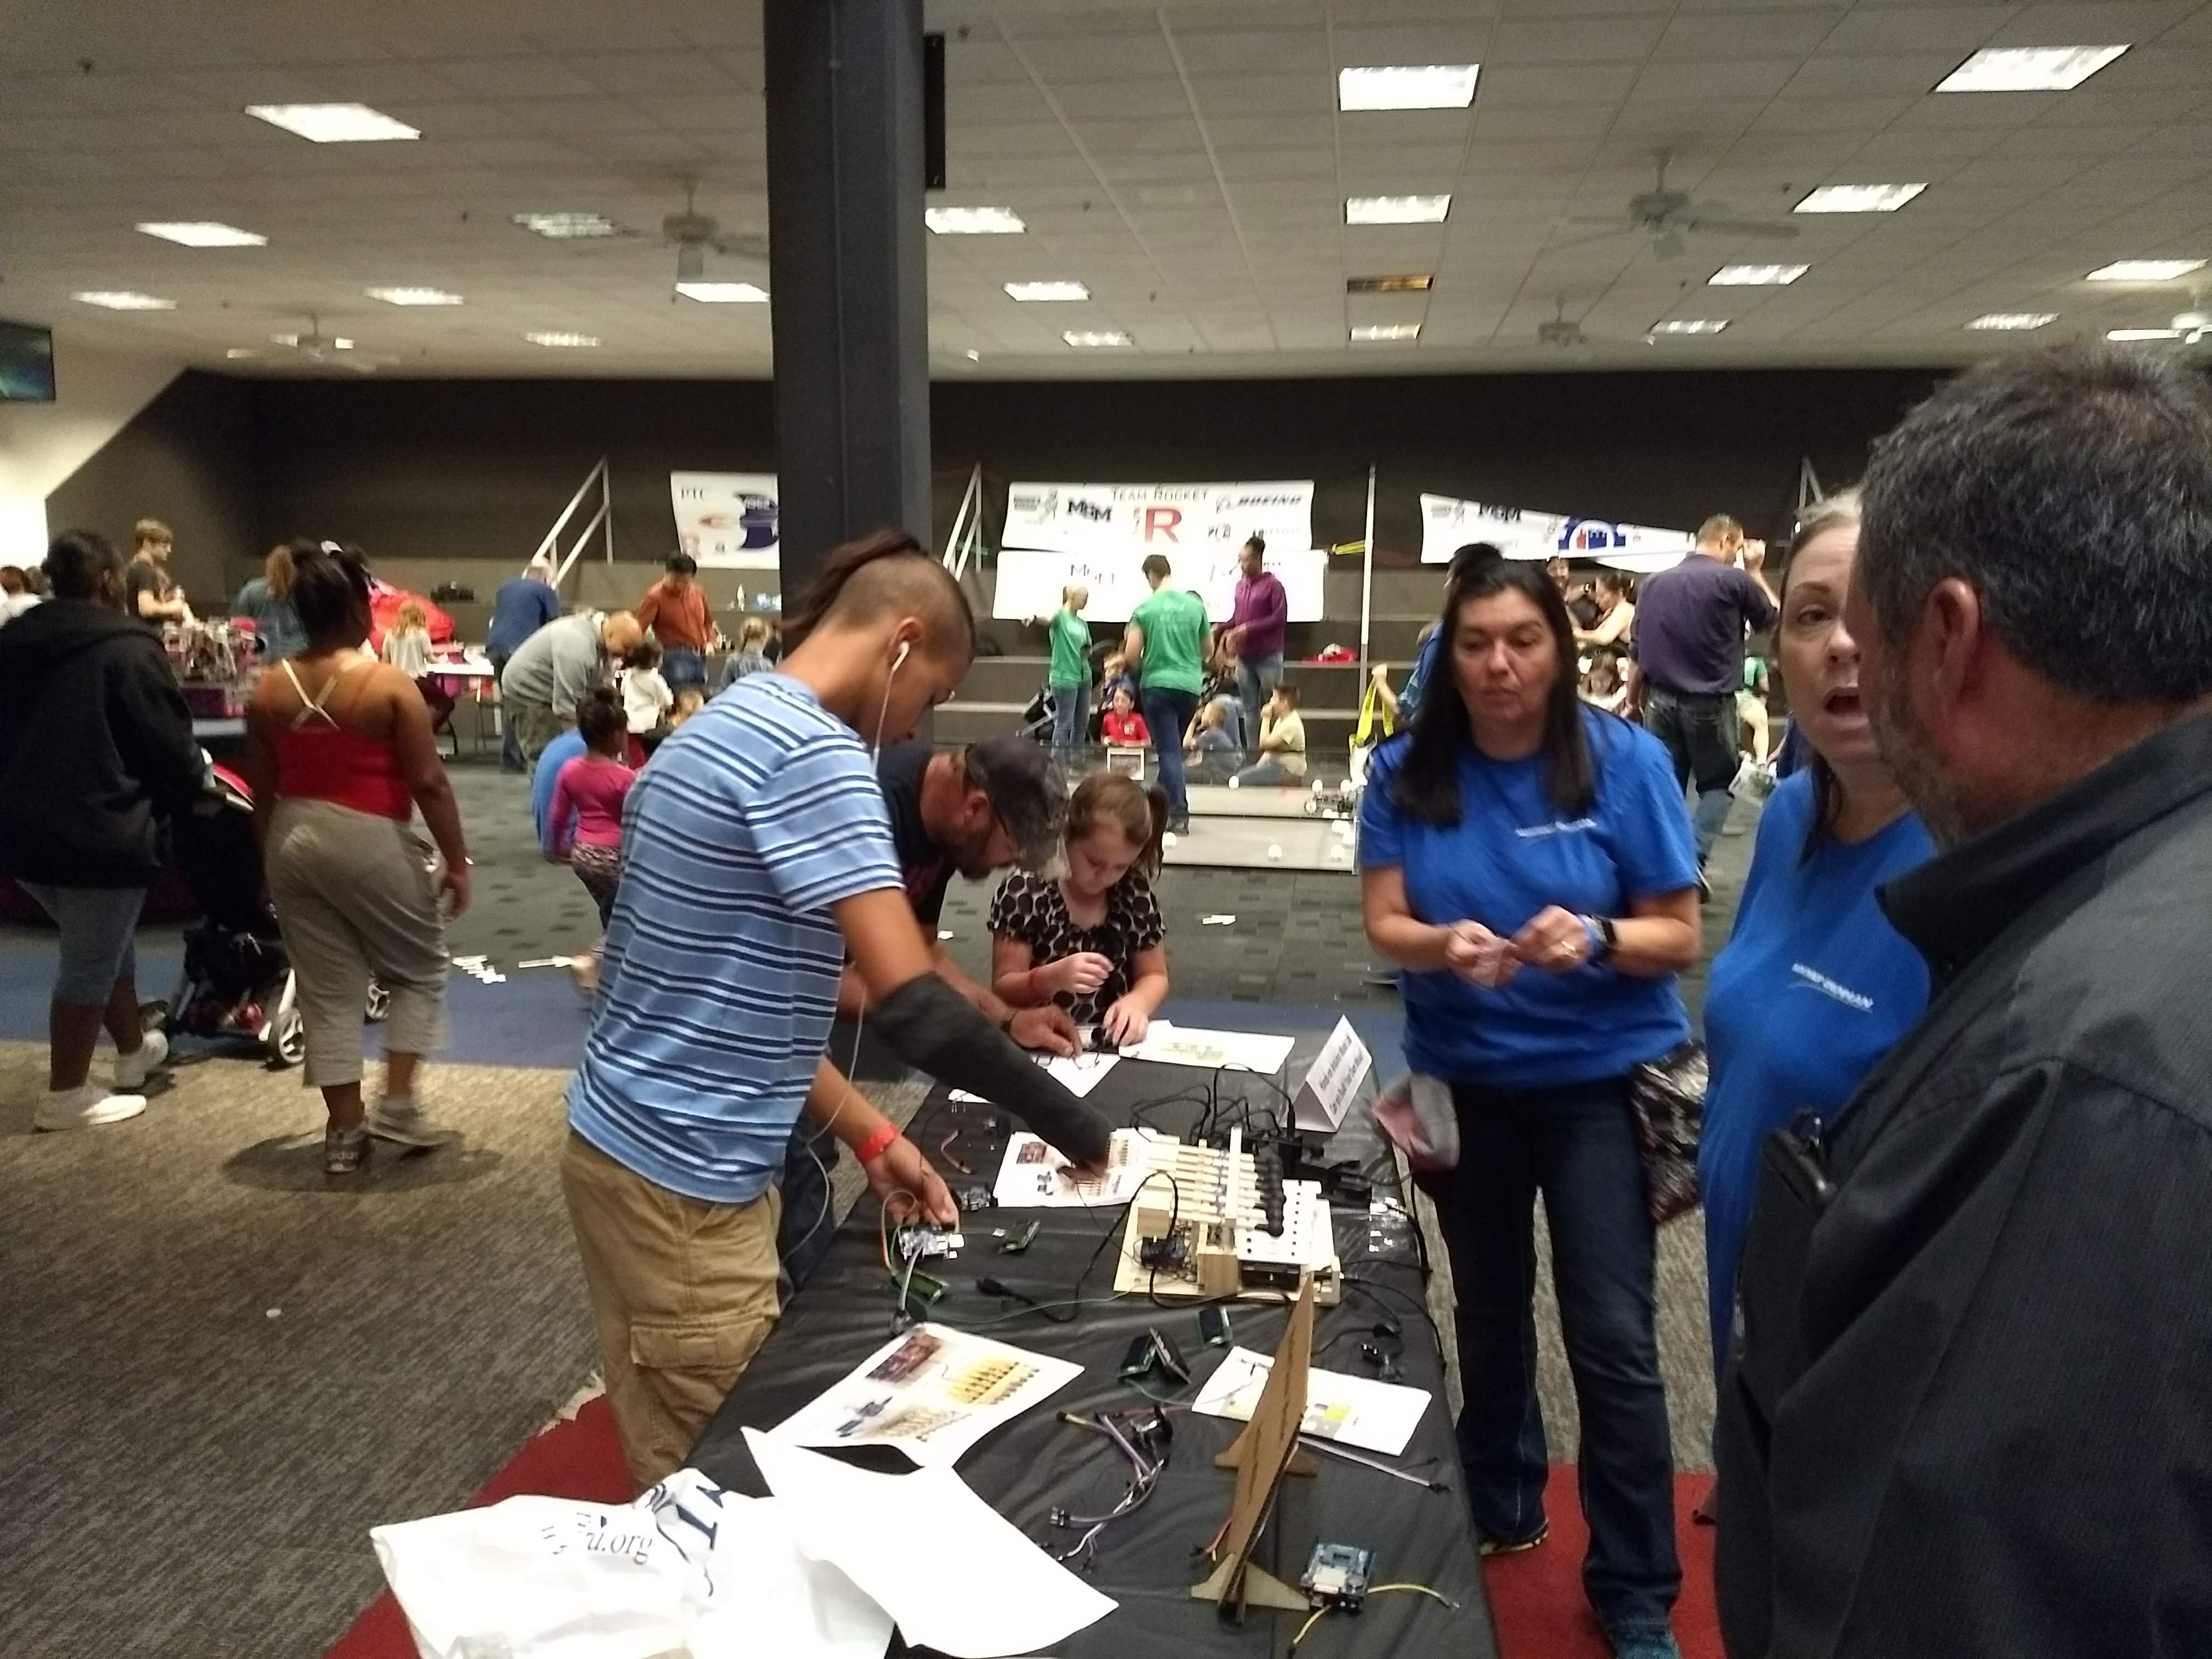
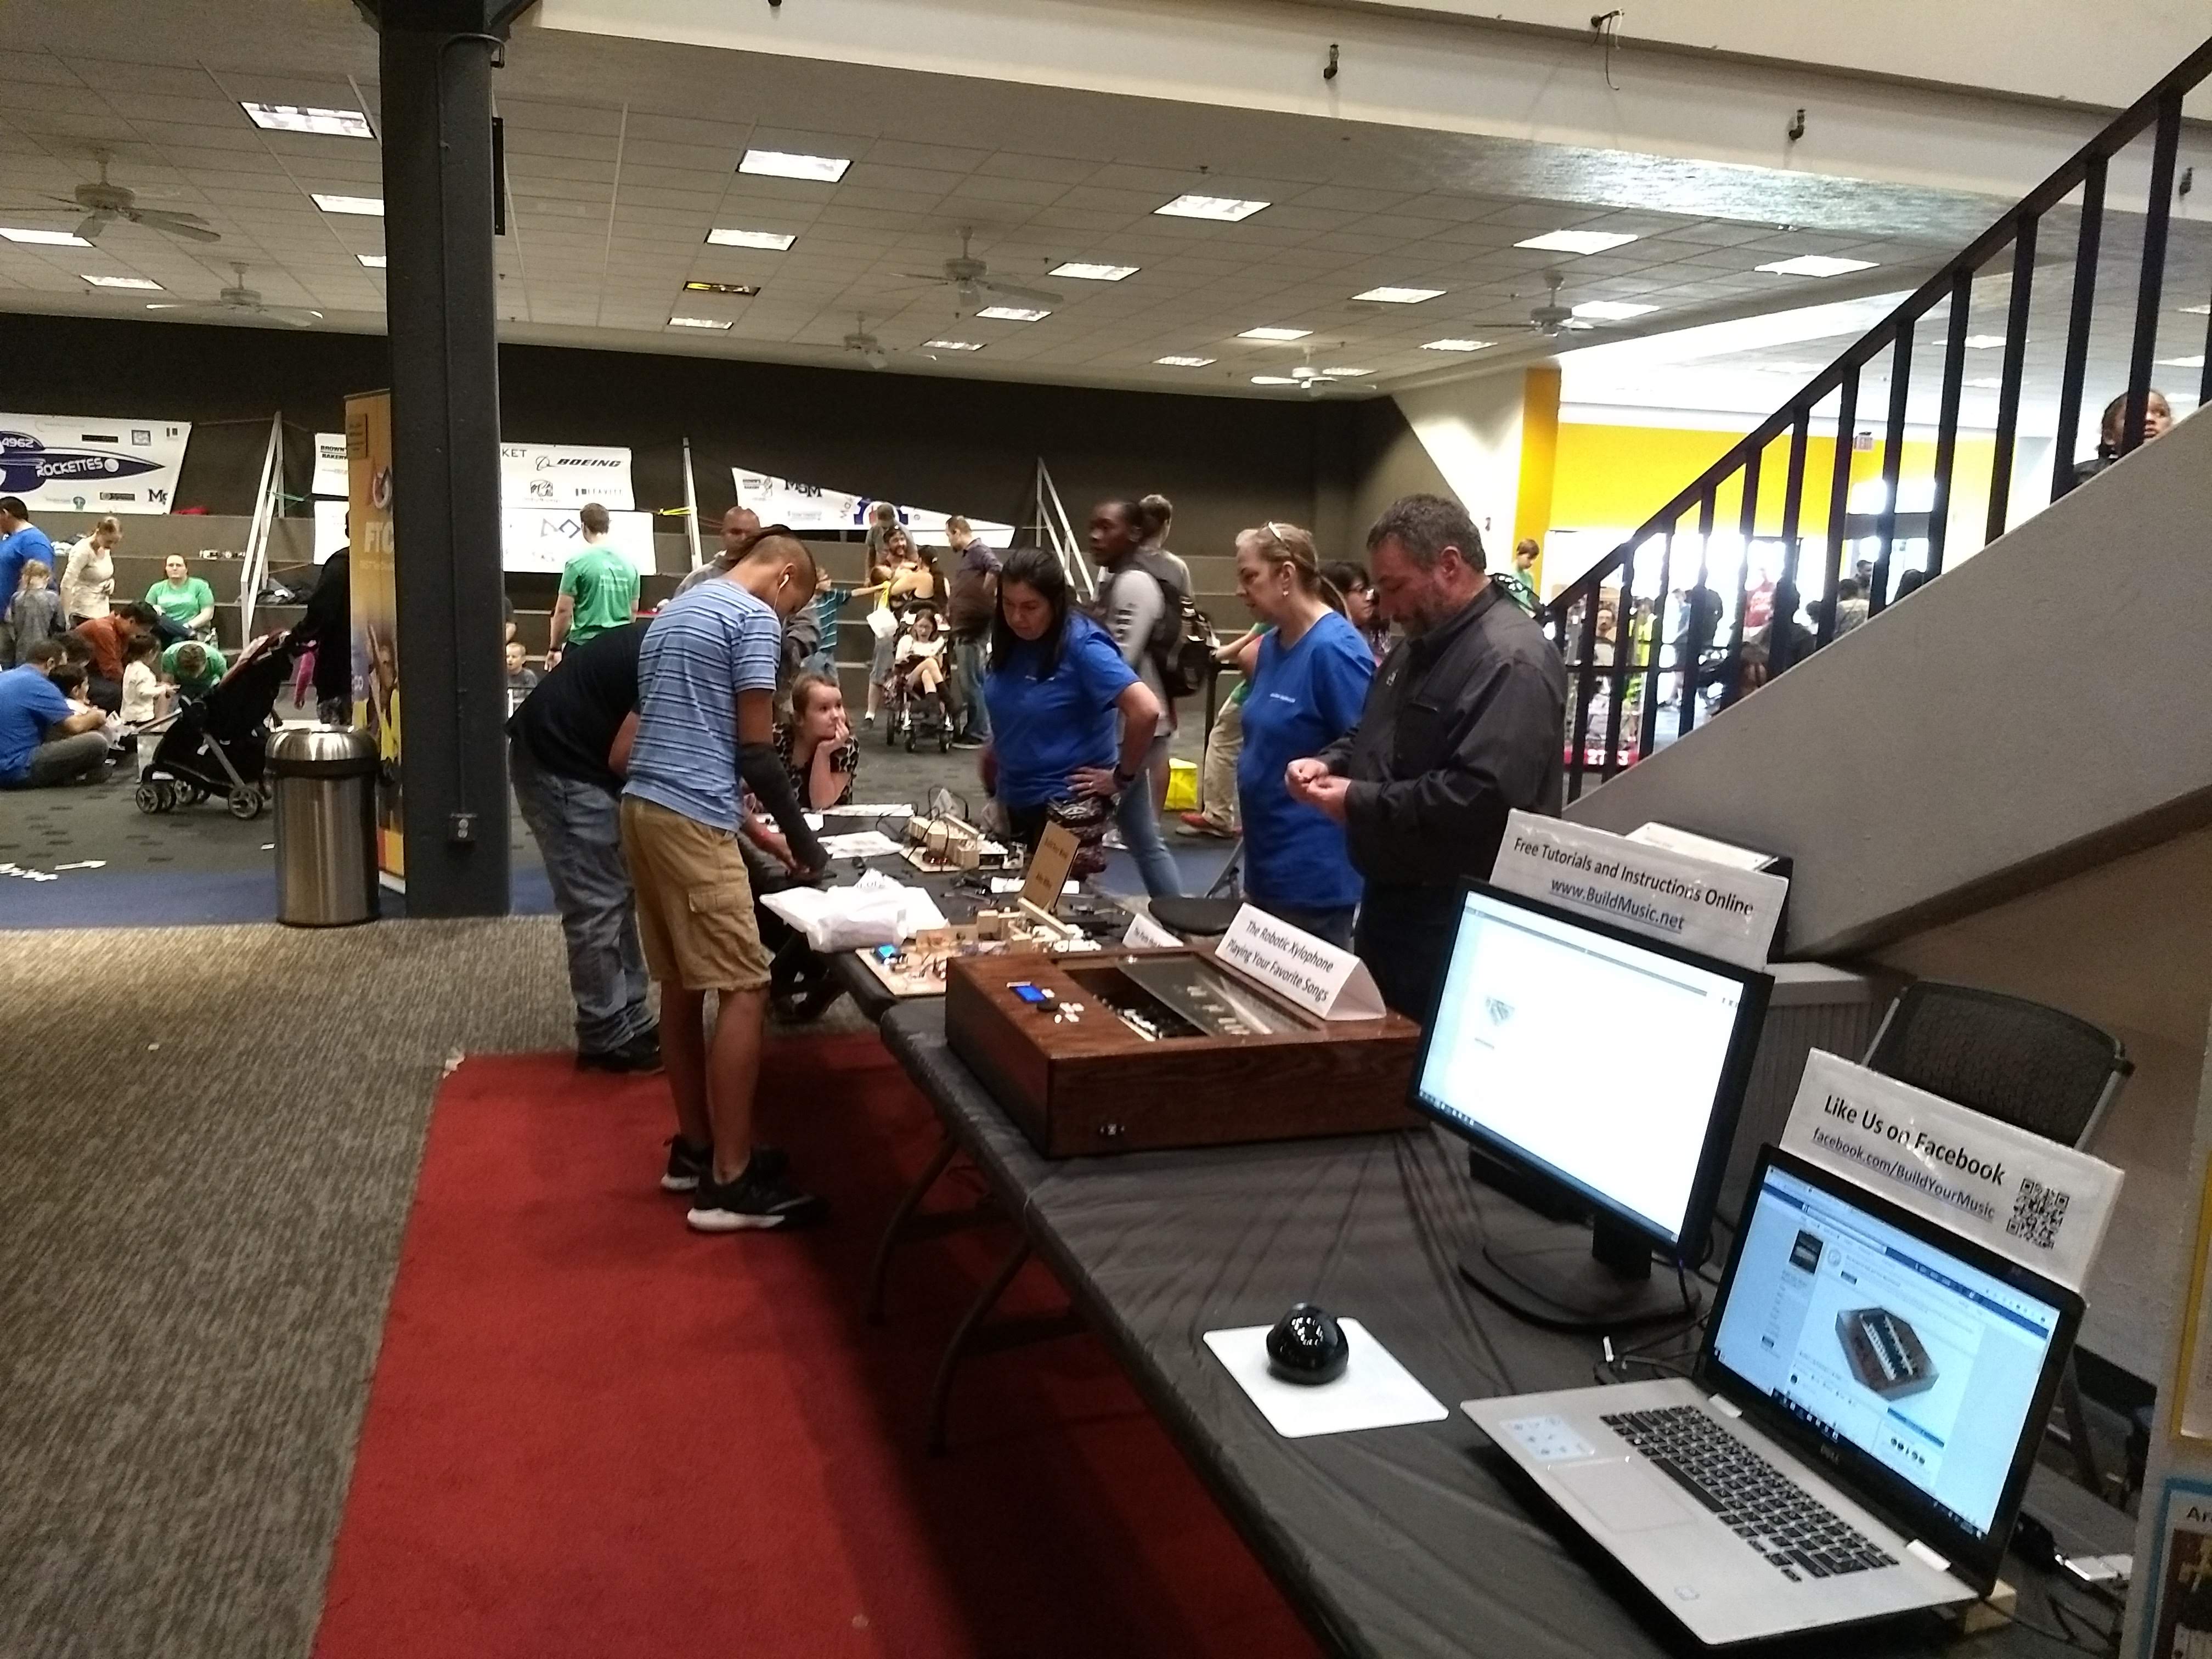
Tinkerfest opened at 9:00 AM on Saturday.  I was towards the back of the museum so for the first hour it was fairly quiet.  But after that point, there was an almost non-stop stream of people coming through.  The general audience makeup was a little different than at the previous two Maker Faires.  Whereas at Maker Faire, there were a lot of people who were interested in the in’s-and-out’s of the robotic xylophone, at the Science Museum, most of the people just wanted to see it play some songs.  (Although a few were interested in the more technical side.)  Some visitors were in front of the xylophone for 10 minutes or longer, just listening to it play the different songs.  Ten minutes is a long time to hold people’s attention, considering that at a museum, people usually move from one exhibit to the next fairly quickly.  A few times, I saw the same person come back more than once bringing a friend or family member to see the robotic xylophone.

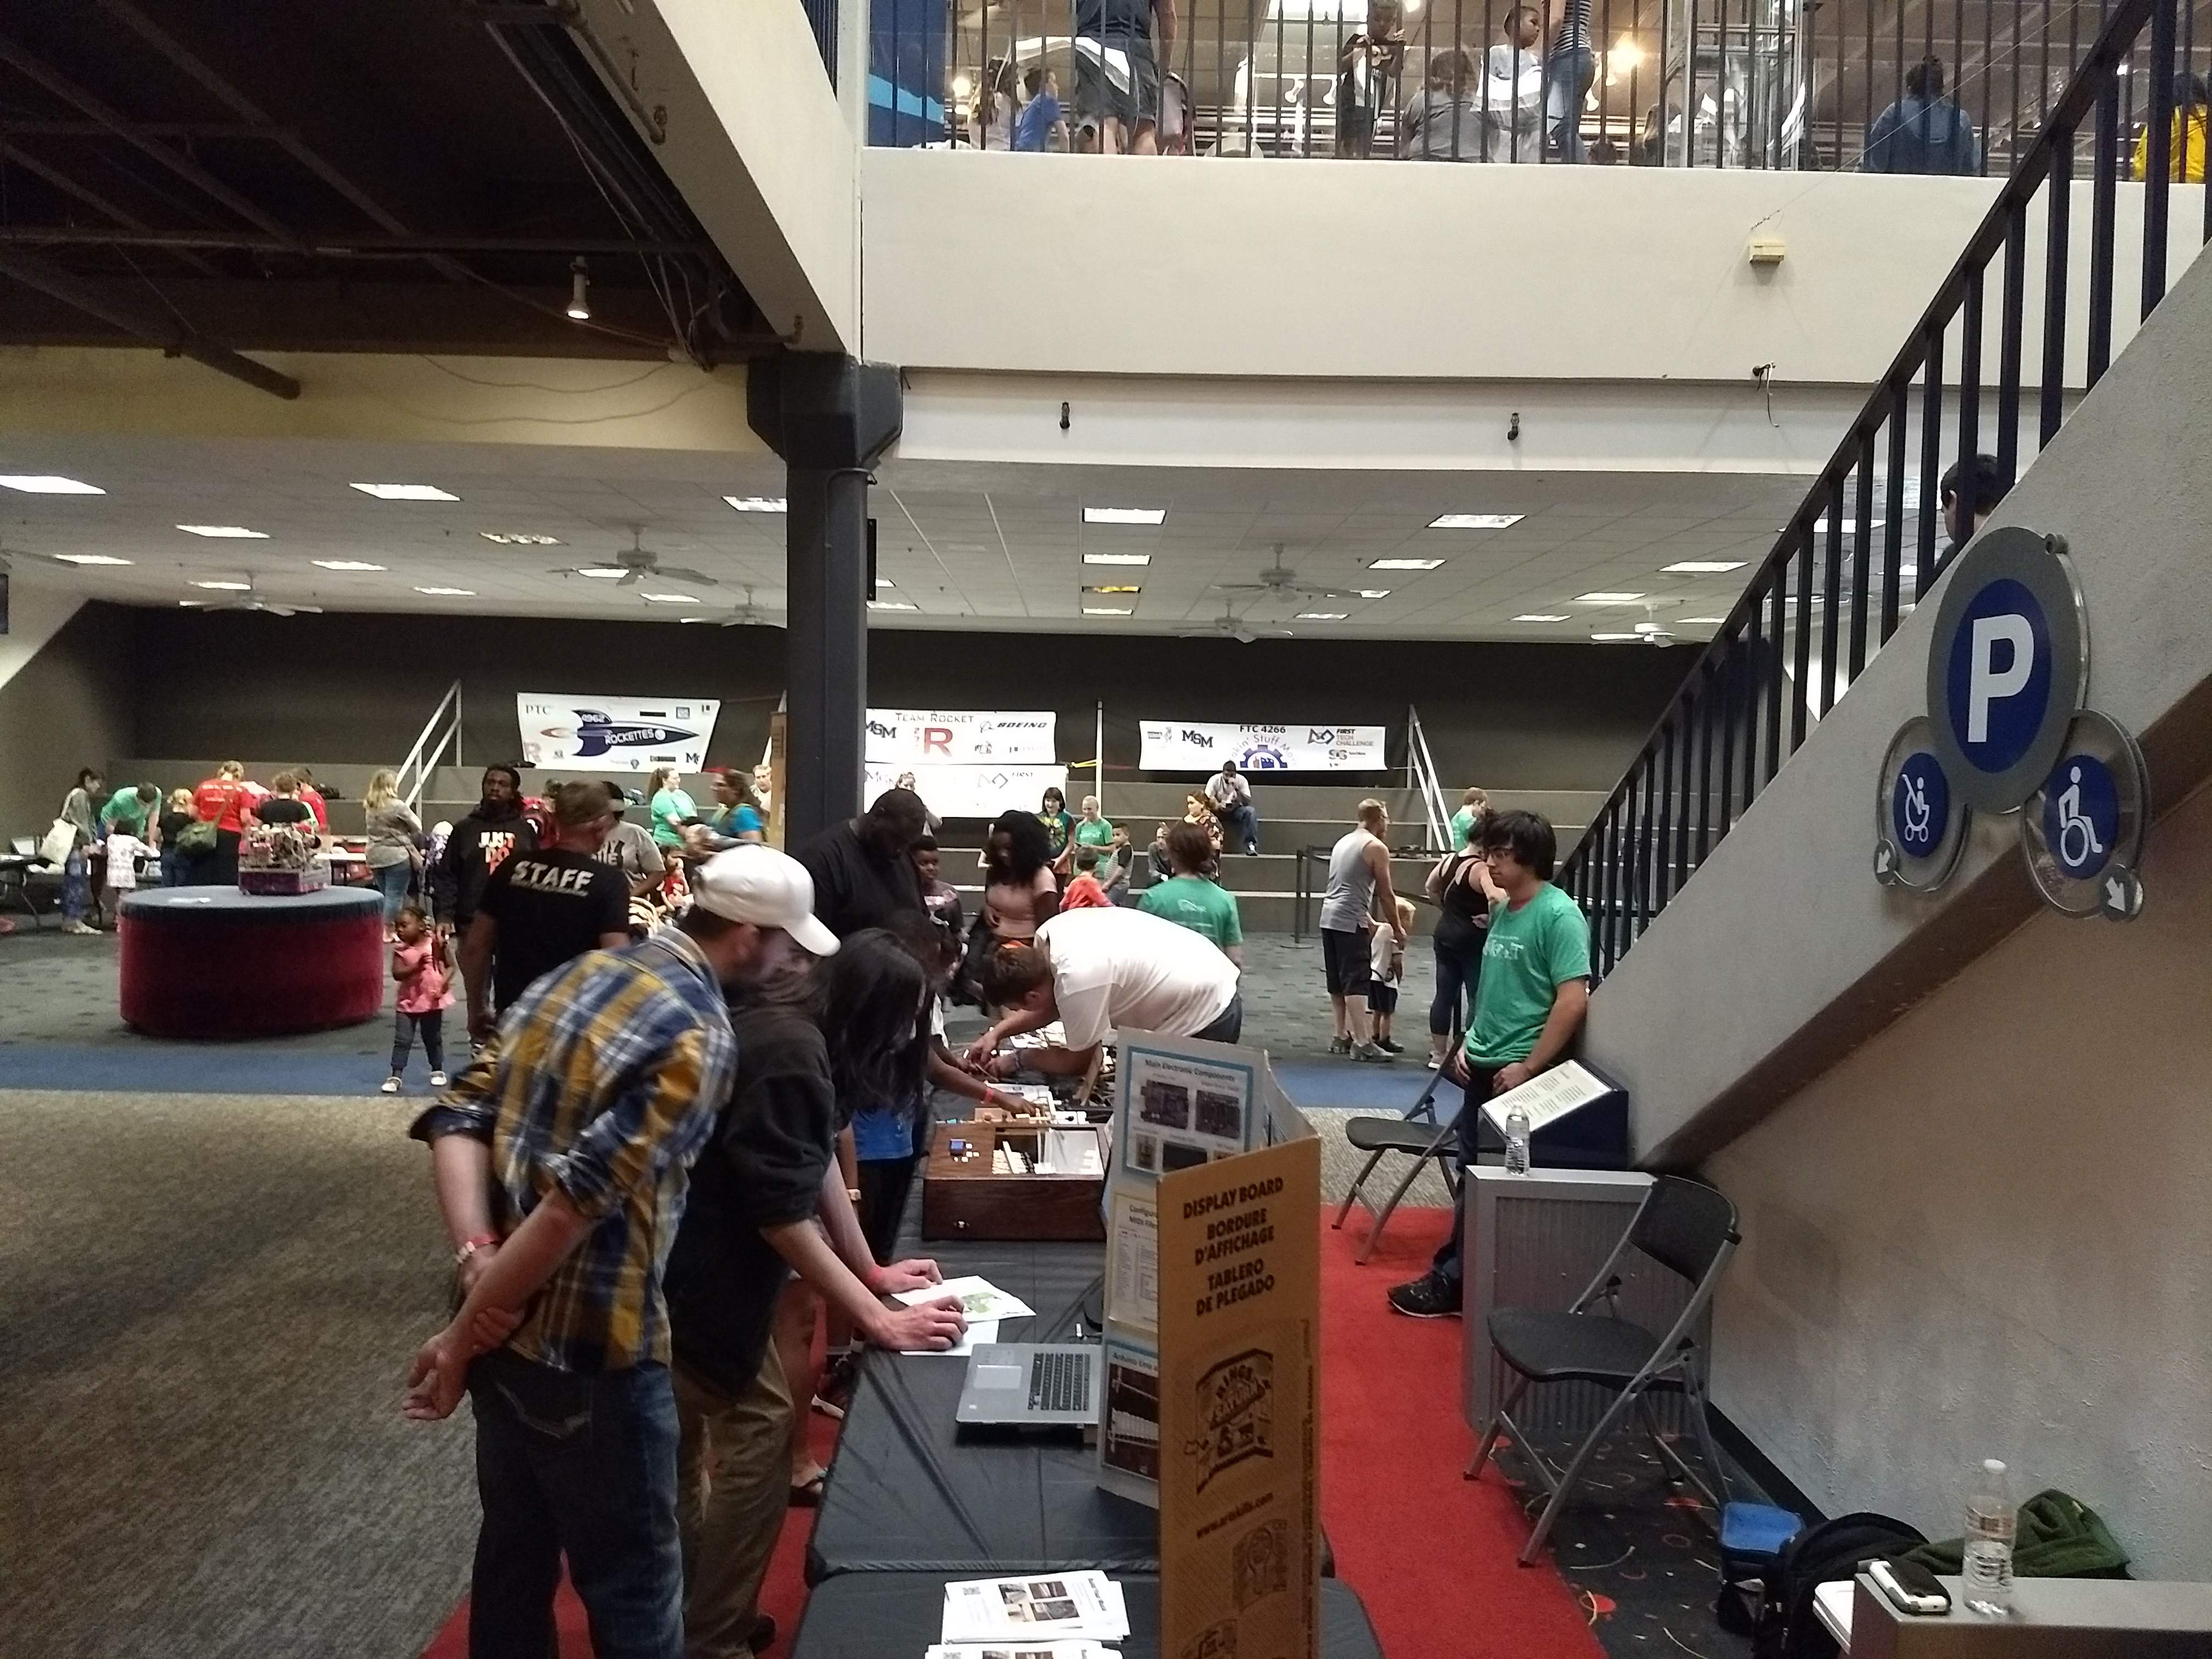
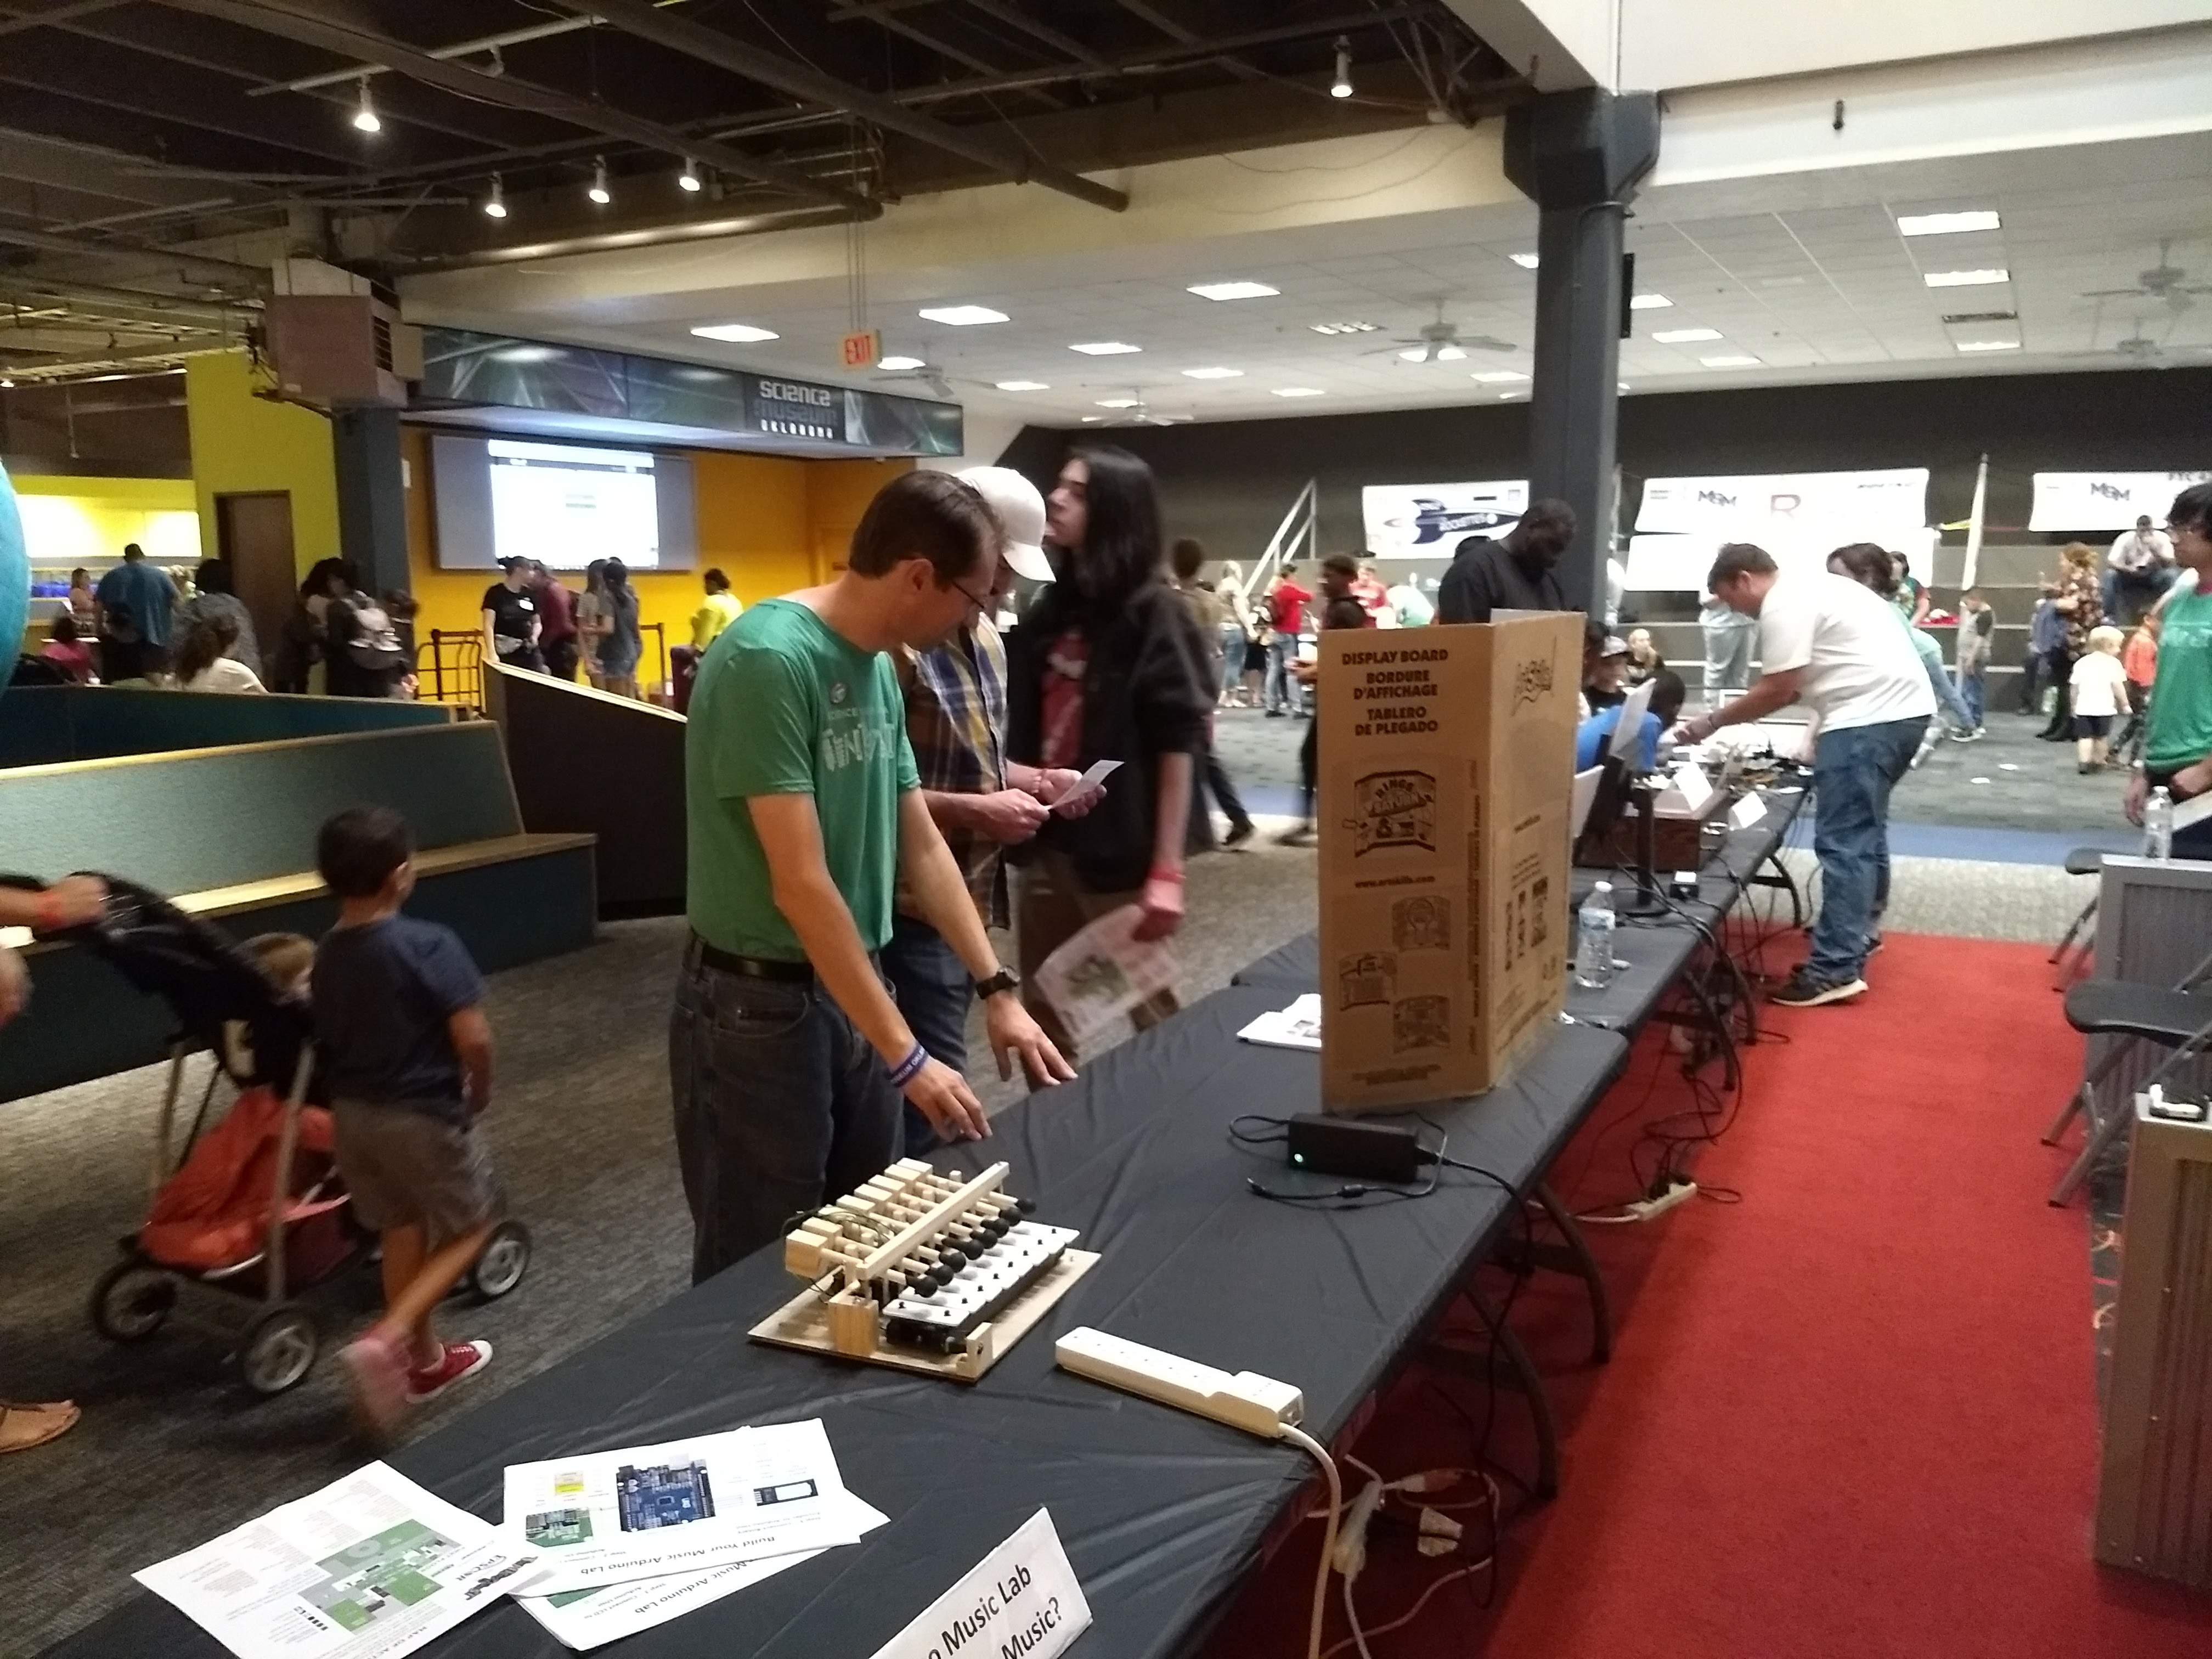
Here are some pictures of the exhibit throughout the day:

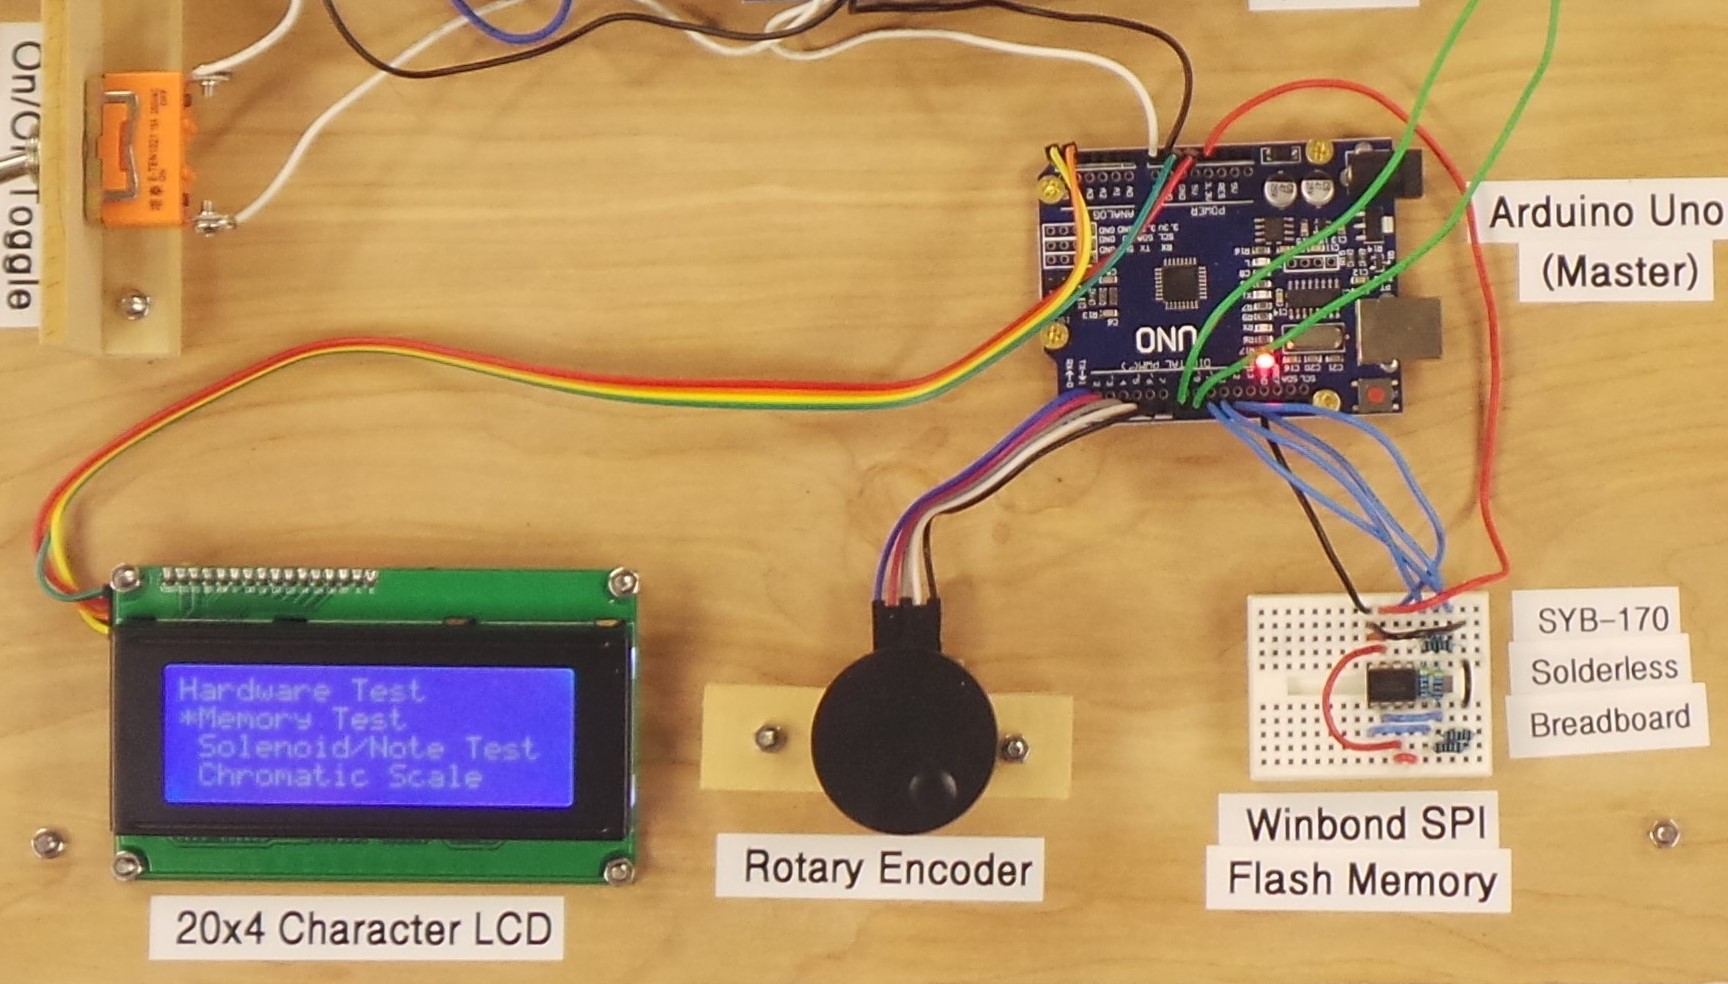
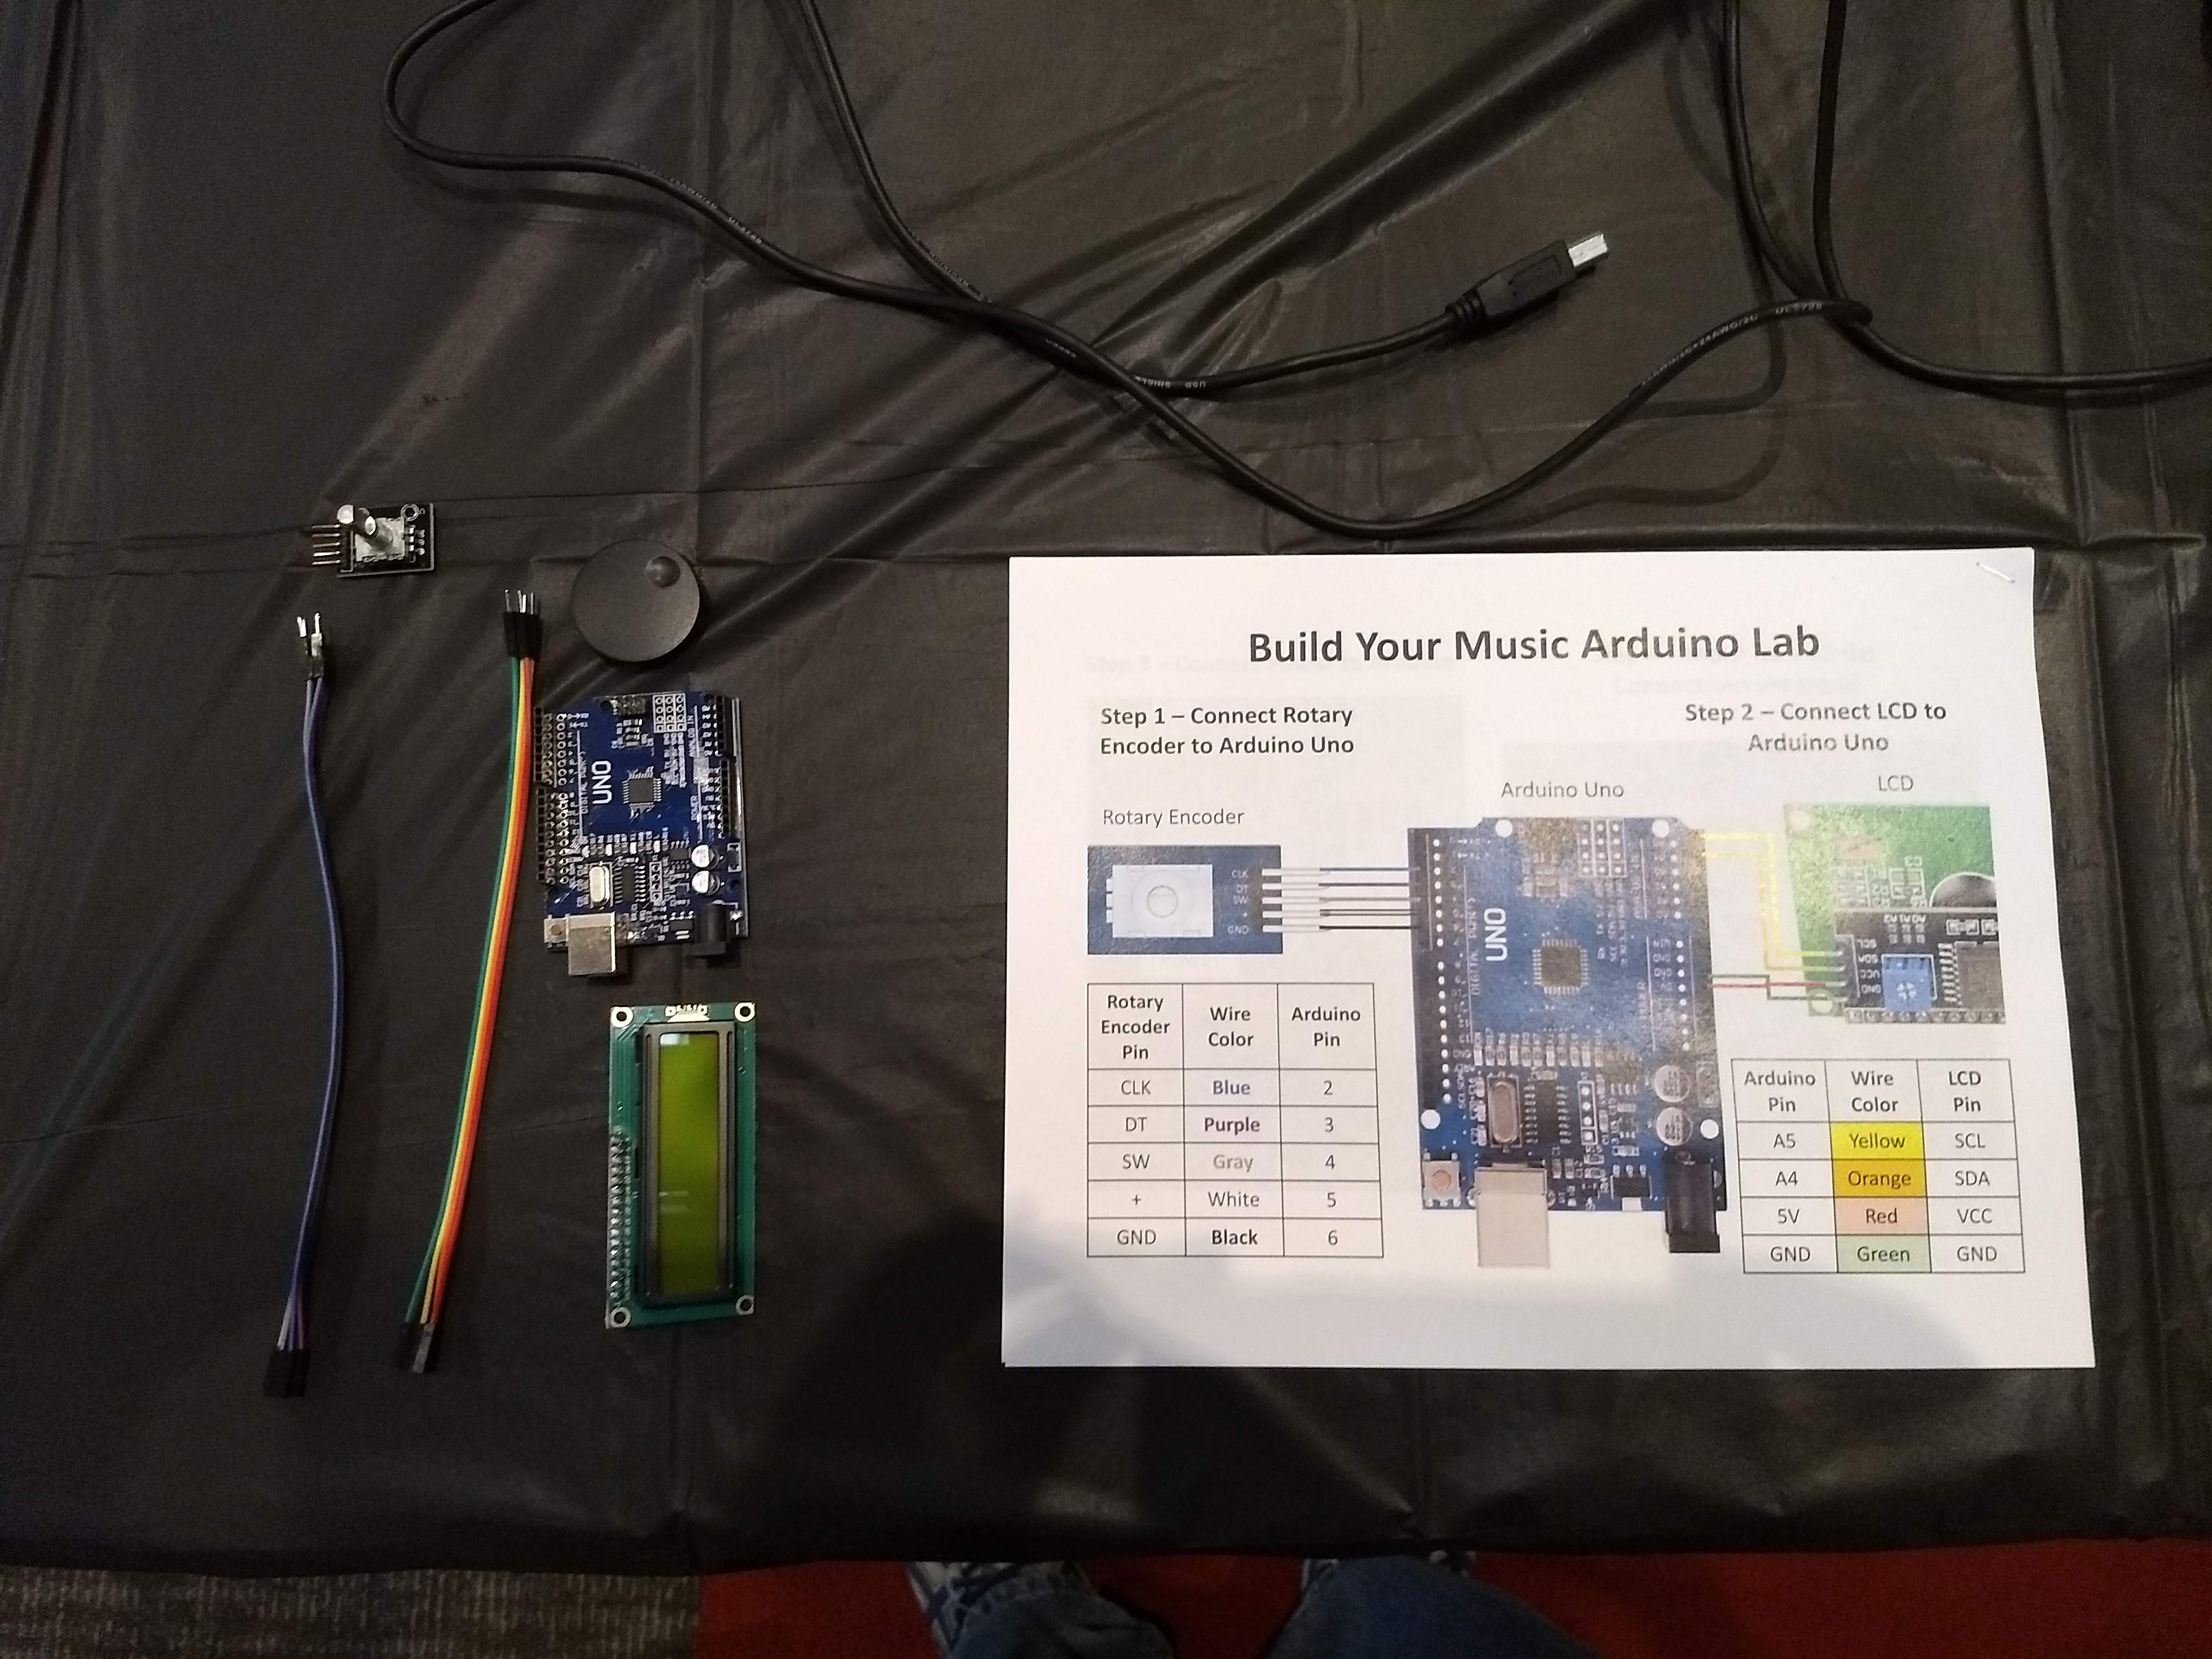
This was also my first chance to try out my new Arduino Music Lab.  Overall, the lab went very well, and the lab end of the table was constantly busy with kids wanting to put together their own Arduino parts.  I did have a few lessons learned.  First is that you can never test your stuff too much before putting it in front of people.  I built two of the “xylophone assembly” part of the lab, and verified that both were working Friday night and Saturday morning.  You can even see the xylophone portion of the lab working in the video tour.  However, one of the first guests who tried to do this lab went through the instructions, but still wasn’t able to make it work.  They had all the wiring right, but for some reason, the xylophone portion of the lab was not playing any songs.  I couldn’t get it to work myself.  Fortunately, I had two of the xylophone assembly, and so I could direct the person to the one at the other end of the table, so they could complete the lab and hear it play music.

The other thing I noticed is that even though I thought I simplified the lab as much as possible, it was still difficult for many kids to put the pieces together correctly.  Part of it was that the wires and pin labels were so small.  I suppose I could have redesigned the lab to use banana plugs, but then kids wouldn’t be putting together actual Arduino parts.  Also, midway through the day the jumper wire pins started breaking off and getting stuck in the Arduino header pins.  Sometimes we could pull them out with a wire stripper, but often the pins broke too far in.  When that happened, we had to take the broken parts out of service.  By the end of the day, there were still a few functional pieces, and the last people were still able to complete the lab.  But a lesson for next time could be to bring more spare parts.

I was impressed with the patience of many kids in putting the Arduino pieces together.  And some worked at it a long time until they got it right.  Some were working at it for 10-15 minutes, again, a long time when there are so many other things to see at the museum.

I was very happy to have had several volunteers throughout the day helping me with my exhibit.  Altogether, there were 8 extra people working the exhibit.  Thank you to all of you who helped, and thank you especially to Norbert and Dean who spent several hours out of their day helping with all the visitors, almost as if it were their own exhibit.  The Arduino Music Lab needed a lot of help, with all the small wires, and there is no way that I could have done all this by myself.

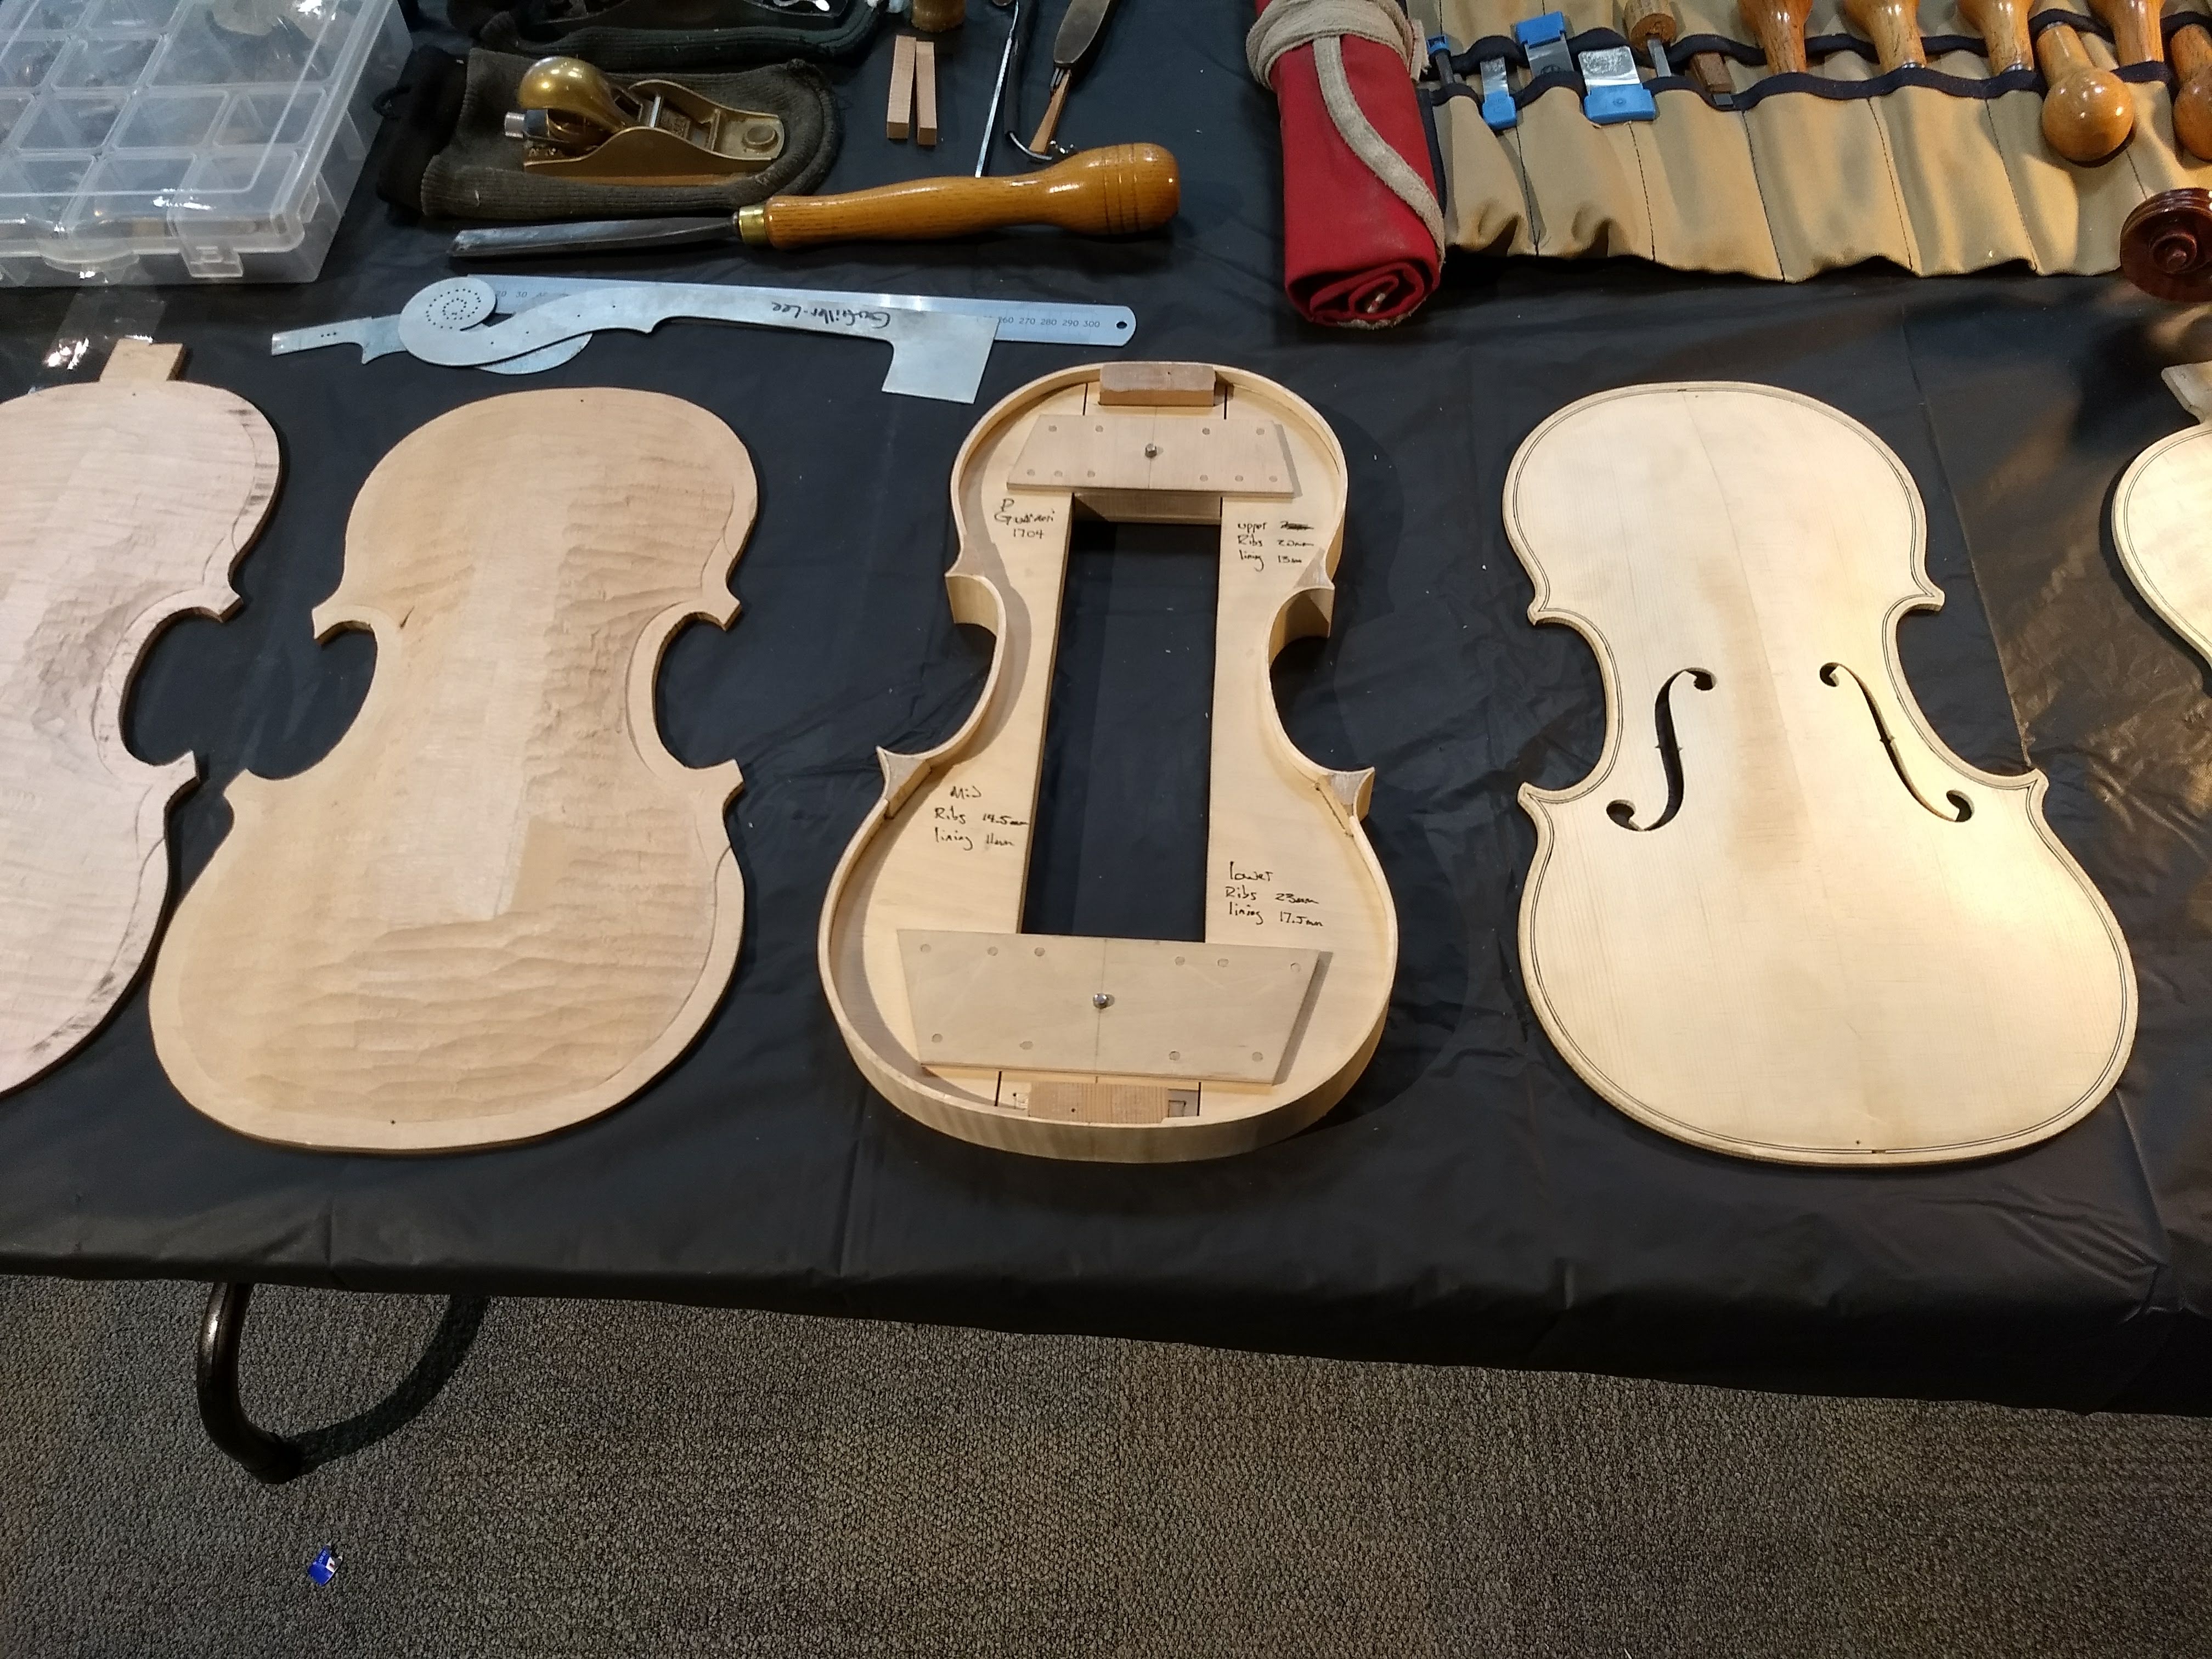
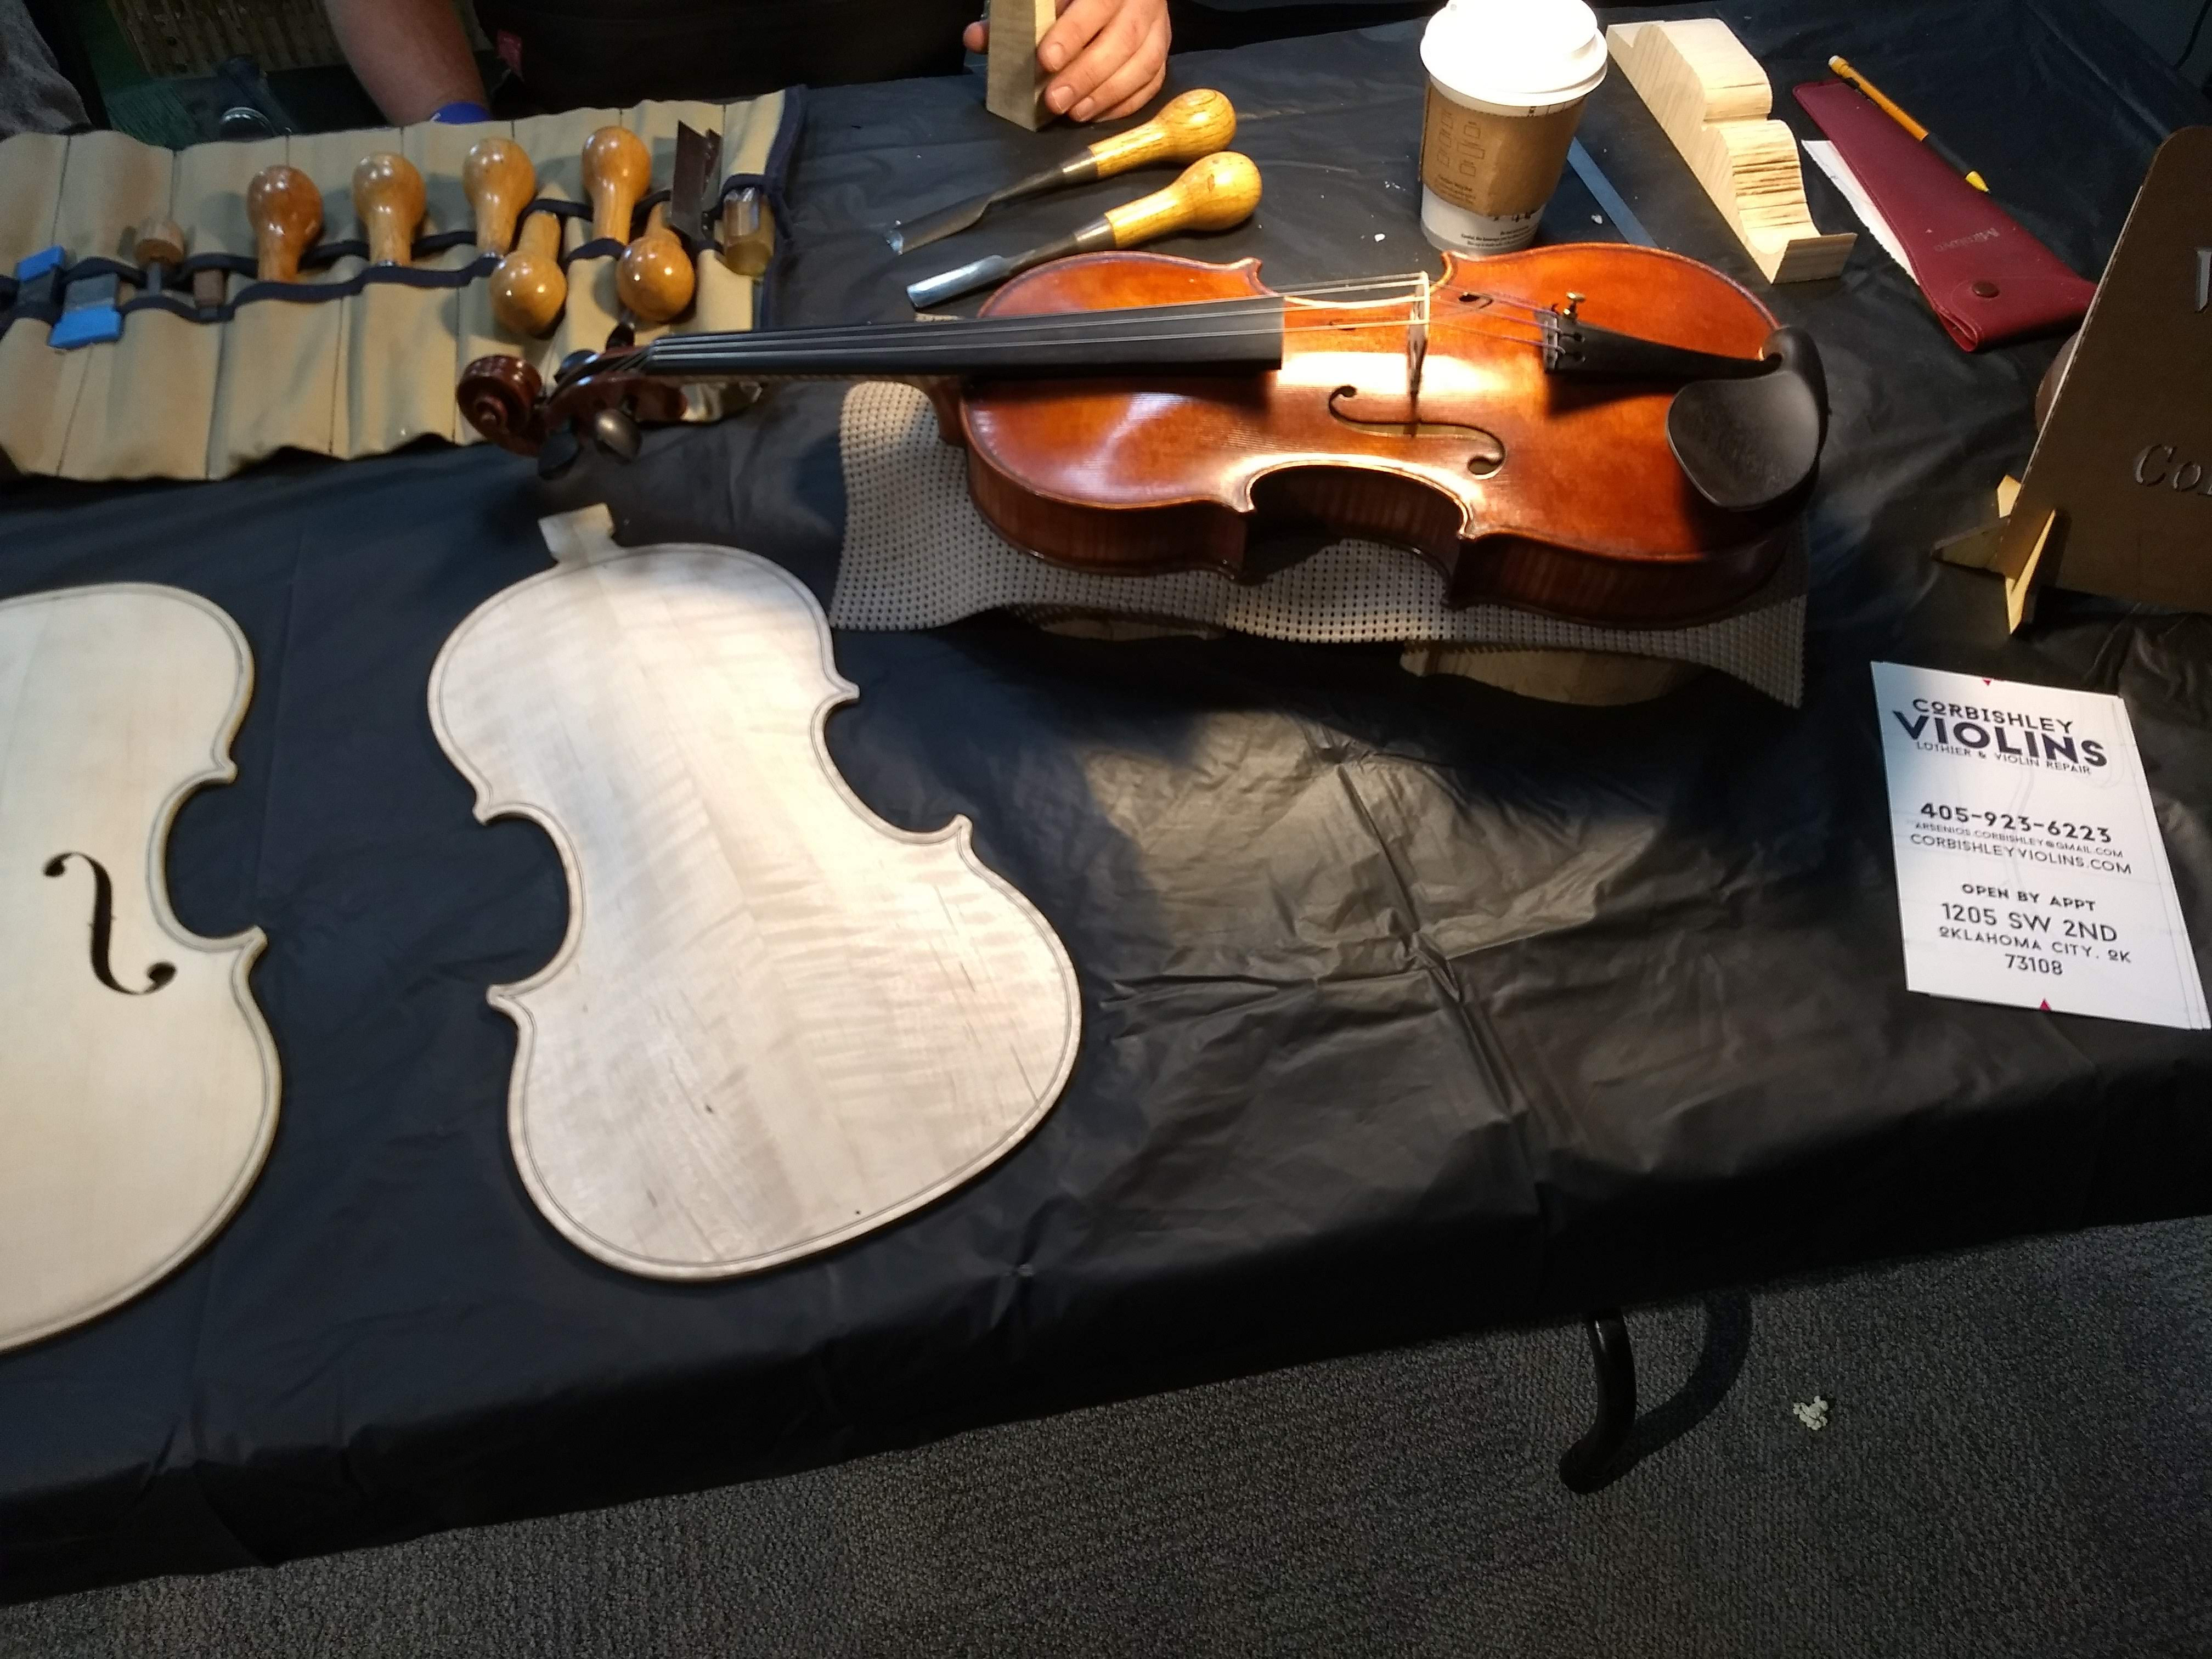
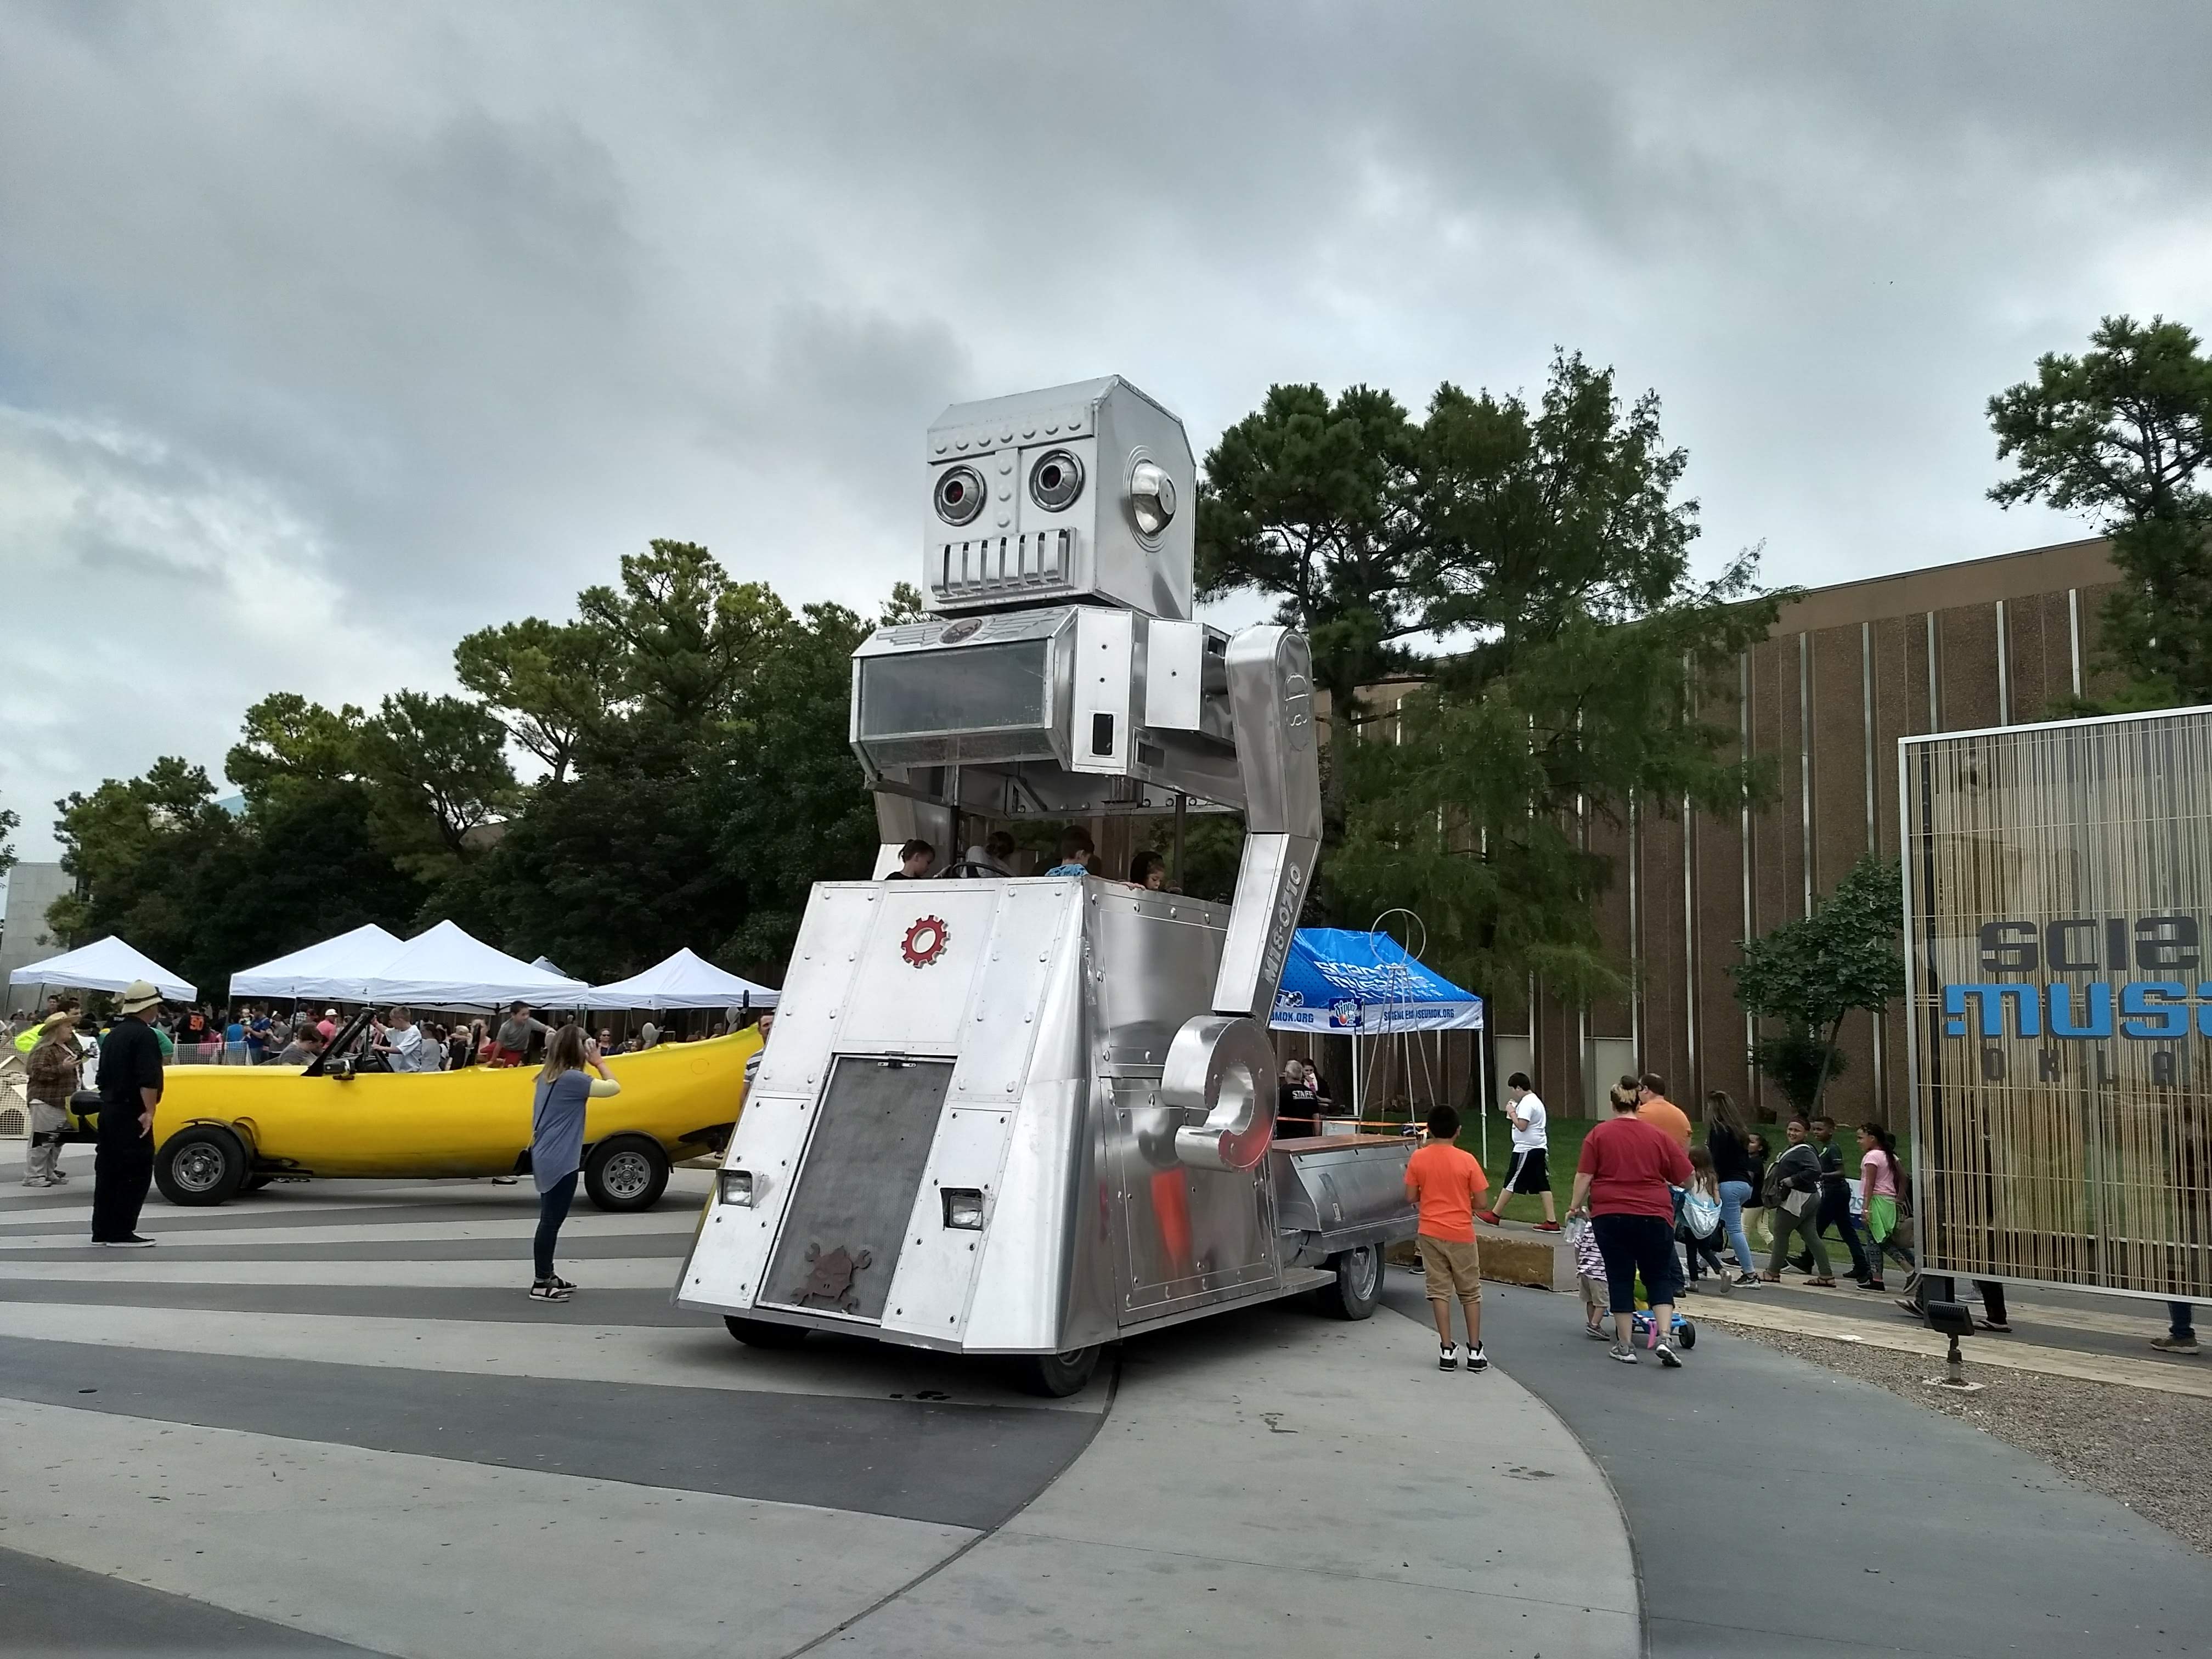
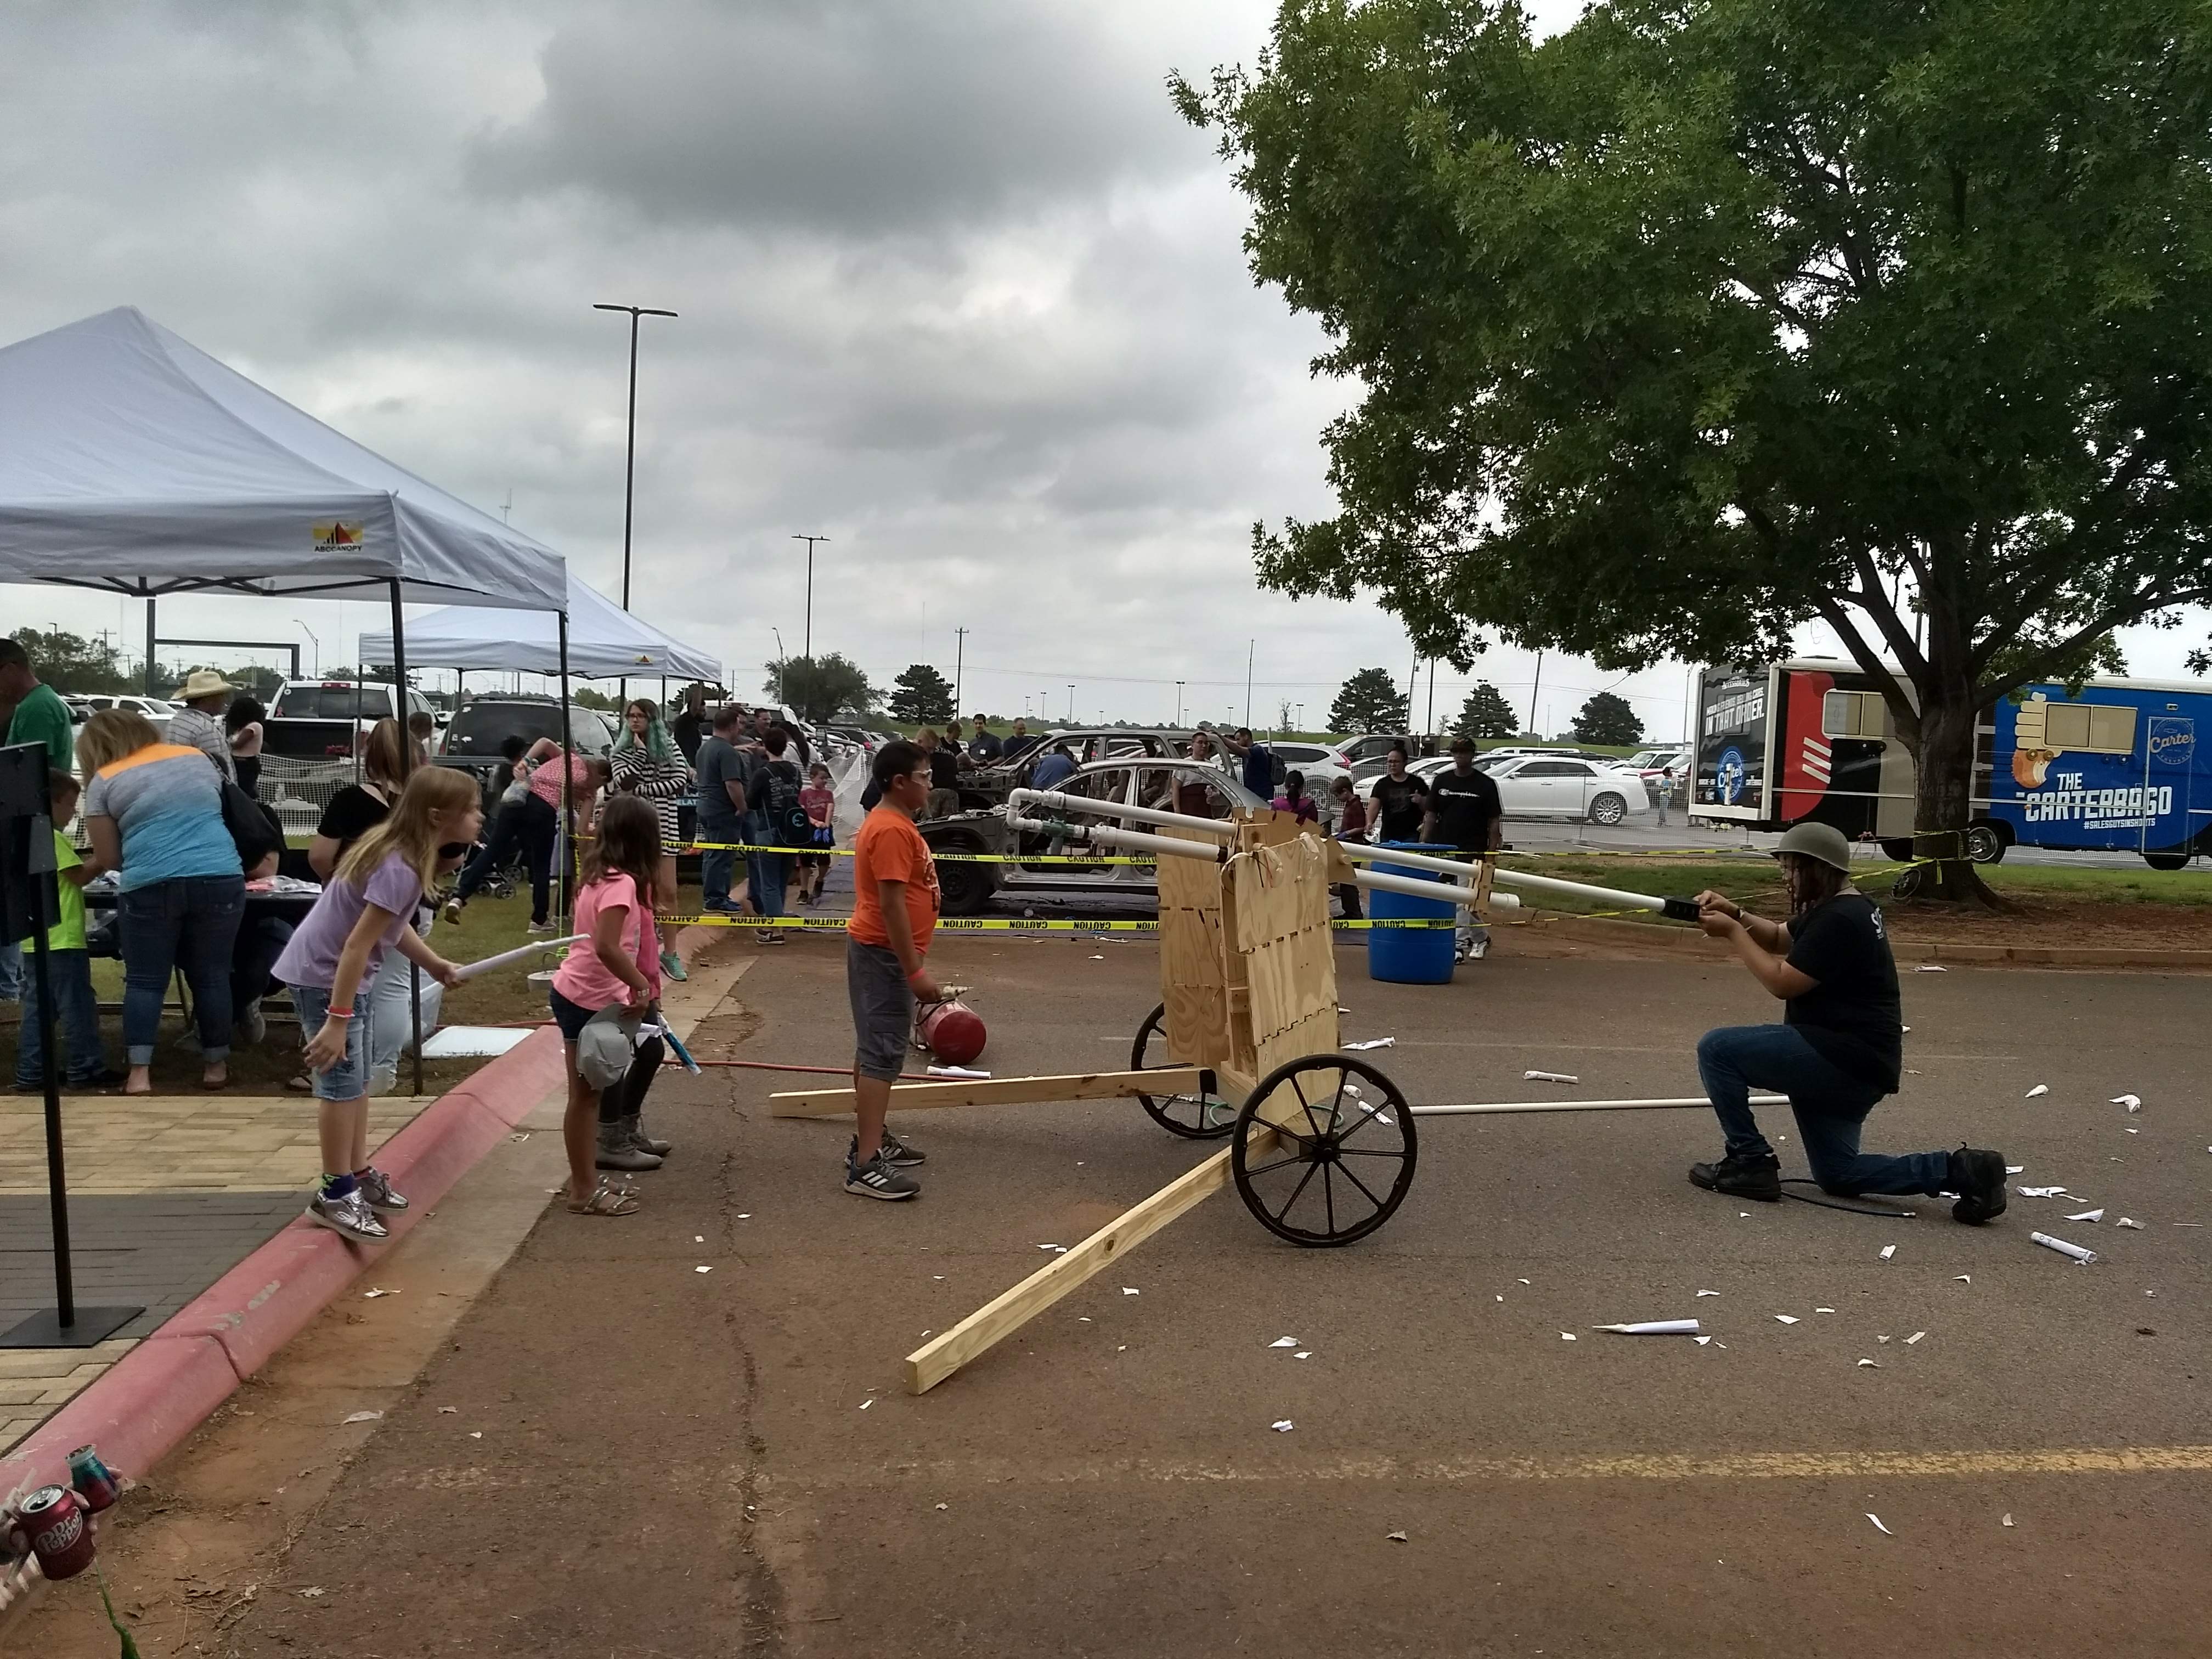
With all the volunteers helping, I was able to leave my exhibit a few times during the day to wander about the museum, and see the other exhibits and special activities.   I saw a lot of other interesting exhibits at Tinkerfest including, Cranky Contraptions, Violin Making, a Robot Car, a Banana Car, Air Powered Rockets, Dog House Building, and Disassembing Cars.  I also had a chance to play the Theremin.

So what’s next for Build Your Music?  At this point, I don’t know exactly.  After weeks of preparing, a long day on my feet, and my day job awaiting when I got home, it’s probably time to rest a little.  But it might not be too long before I start thinking about Tinkerfest 2019.

A In front of exhibit


Arduino Music Lab

There is a new Build Your Music hands-on lab, that allows participants to assemble Arduino components, connect them to a xylophone, and play a few simple songs.  The intent of this lab is to give newcomers an opportunity to handle Arduino components for themselves, and to inspire them to create their own Arduino projects.

I will be including this lab as part of my exhibit at the Science Museum of Oklahoma Tinkerfest, Saturday, September 29.

For details and instructions on creating and demonstrating this lab for yourself, see the Music Lab Tutorial.

SMO Tinkerfest 2018

Build Your Music will be exhibing at the Science Museum of Oklahoma Tinkerfest, Saturday, August 29, 2018,  The event is open from 9:00 AM to 4:00 PM and admission is free.  In addition to all the regular museum exhibits there will be guest tinkerers throughout the museum grounds, with hands-on demonstrations and activities.

According to the SMO Web-site:

Tinkerfest 2018 will include taking apart two entire cars, 3D prototyping, bicycle maintenance, cake and cupcake decorating, candle making, cardboard car building, carpentry, DJ/turntablist, dog house construction, Dremel pumpkin carving, driving robots, edible slime, taking apart electronics, fluid painting, foil sculpting, an instrument playground,  Lego Sumo, light painting, Morse code bracelets, origami, pancake art, planispheres, plastic fusion, theremins, resin casting, rocket launching, Rube Goldberg machines, snap circuits, shadow play, soldering, spinning fabrics and fibers, using math to make music, violin making, weaving, wind energy — and more!

This event was not originally in my plans, but while I was at Maker Faire Tulsa, I was invited by some of the SMO staff to be a guest exhibitor at Tinkerfest, and told that the event is expected to be at least double the size of the Maker Faire.  For Tinkerfest, I plan to exhibit:

  • The main Robotic Xylophone
  • The test board showing the parts inside
  • Laptop Computer and Monitor showing this website
  • A brand new hands-on “Arduino Music Lab” where visitors will be able to assemble a pre-programmed Arduino, Rotary Encoder, and LCD, and when they connect to an 8-note xylophone (with solenoids, motor driver board, etc.) it will play a few simple songs.  See the Music Lab tutorial for more on this.

If you are in the Oklahoma City area, come on out to Tinkerfest, September 29!

A Number One YouTube Hit?

It is an interesting study to look at what videos are the most popular on YouTube.  The most viewed video on YouTube ever is the music video “Despacito” by Luis Fonsi featuring Daddy Yankee with over 5 billion views (that’s almost one view for every person in the world).  In fact, 93 of the top 100 viewed YouTube videos are music videos by recording artists.

My family has enjoyed watching videos by The Piano Guys on YouTube.  The Piano Guys make paino and/or cello recordings of both contemporary and classical songs in very picturesque settings.  Their most popular video is A Thousand Years with over 135 million views.

A few people at Maker Faires have asked me if I have seen the Marble Machine by Wintergaten.  This is a huge wooden contraption that plays music by bouncing marbles off resonator bars.  As of this writing, this video has over 82 million views.

Compared to all of the above, my Build Your Music videos are pretty small peanuts.  A lot of people think the robotic xylophone is a cool project, but it’s not the “amazing, I’ve never seen this before” that it takes to go viral.  I will also be the first to admit that I just don’t have the resources that it takes to make truly professional videos like the ones that I reference above.

The other day, I went to my YouTube page, just see see which videos were getting the most views.  Not surprisingly, the majority of my videos are still in the single digits.  I was thinking that the most viewed video would be my introductory video which is shown on the Home page of this website.  However, I was quite surprised when I saw that my most viewed video was the xylophone playing Mr. Bojangles.  With only 700-some views it is still not anything to brag about.  But is is interesting to note that it has almost 6 times as many views as what I considered the “main” video of this project.

Youtube Total Video Views - crop

I started digging into the YouTube analytics, thinking that perhaps there was some blogger that had picked up on this video, and was showing it embedded from an external website.  However, I saw that 97% of views were on YouTube watch page (in other words, people finding the video directly on YouTube).  I also noticed there was never a sudden spike or peak in number of views.  The views seemed to be fairly evenly spread out going back to February when I first posted the video.

MrB Play Locations

You might be wondering why I have the name “Billy Joel” after the song name in the video title.  Well for all of the music videos, I try put the name of the artist or composer after the name of the song.  Back when I was in college, I had a roommate who listened to Billy Joel almost non-stop.  On one of his CD’s, he sang the song Mr. Bojangles.  So being not exactly the most literate person in popular music, for all these years, I had it in my mind that Billy Joel was the one who wrote Mr. Bojangles.

While investigating why this particular video had so many more views than the others, I did a little research and learned that the song Mr. Bojangles was actually written by Jerry Jeff Walker for his 1968 album by the same title.   But since that time, that song has been recorded by over 50 different artists, including Billy Joel.

I did a Google search for “Mr. Bojangles Billy Joel”.  Sure enough the video of my xylophone playing this song was the number one result.

Mr B Google - crop

Likewise, when I do YouTube search for the same words, my project video again comes up as the #1 hit.  It looks like I am not the only one who associated the song Mr. Bojangles with Billy Joel.  Anyone who searches for this song and this artist together with find the video by Build Your Music.

Mr B YouTube - crop

Normally, when I put content out there on this website, I go to great effort to make sure that everything is accurate.  I will always correct mistakes when I become aware of them.  But in this case, I think I will just leave the song Mr. Bojangles with the name Billy Joel.  It’s pretty cool when a mistake works out in your favor.  This misunderstanding of song attribution is giving me exposure that I would never have expected.  I wouldn’t want to mess it up.  Am I right?

Reflections on Maker Faire Tulsa

Maker Faire Tulsa 2018 is now behind us, and it was a resounding success.  Thank you to all the volunteers at the Maker Faire, as well as to Fab Lab Tulsa for sponsoring the event.  I’m sure it took a tremendous amount of work to put all this together.  But it was worth it, for all the people who turned out.  Altogether there were over 70 different exhibitors.

As for my own exhibit, “Build Your Music” the day went very well.  From 10am to 5pm it was almost not-stop, talking to people, and showing off my works.  It was fun to talk with so many different people throughout the day, from young children who just want to see the music played, to other Arduino enthusaists who want to know all the details of how the mechanism and electronics work.  With all the people, it was hard to even find time to eat my lunch.

For those of you who were not there, below are some pictures of the exhibit.

IMG_20180825_092039108

IMG_20180825_091924363

IMG_20180825_092132993

IMG_20180825_092117898

For the first time ever, I did a Facebook Live Stream Broadcast.  I did this broadcast after I was set up, and prior to the Faire opening.  Below is the recording of my Live Stream where I talk about the Maker Faire, my “Build Your Music” project, and my reasons for coming to the Maker Faire.

Below is a video recording of the exhibit.

I also did a Live Stream Tour of the exhibit, but it was in portrait mode, and so I replaced this one with the video above.

If you watched my first Live Stream Broadcast, you might have heard me say that a Maker Faire is not like a county fair, where people try to win a blue ribbon.  Ironically, to my surprise, towards the end of the Faire, one of the organizers came up to me and gave me a blue ribbon for “Maker of Merit”.  He said that there were only ten exhibits that recieved this ribbon.

IMG_20180825_165927086

All in all a very good experience.  I was pretty tired by the time I got back home to Ardmore Saturday night, but it was very worthwhile going.

SPI Flash or SD Card?

I’m not sure how many people are following Build Your Music, but I have a question I want to pose to the community.  For the song data storage, should I use Winbond SPI Flash or an SD Card with Data Logger Shield in my final design?  The robotic xylophone is currently made using Winbond SPI Flash as the data storage.  I originally chose this option because it was cheaper than a Data Logger Shield and SD card, and I felt that 1 MB of memory was more than sufficient for this type of data.  However, I have since realized some drawbacks with going this route:

  1. Many of the on-line retailers that used to sell the Winbond SPI Flash in the DIP8 form factor no longer carry this part. Neither Adafruit nor AliExpress, (both places that I have bought this from before) is selling this part any more.  In fact, when I do a Google search now, the only place I can find still selling this part is E-bay.
  2. Using the SPI Flash as I have been doing requires Windows-based software to decompile MIDI files, and then load the data into the Flash memory in a format that will be read by the Arduino and used to play the xylophone. This isn’t that big of a deal when I am just using the software for myself.  However, when I think of going the next step, of making the software available so that others can put music on their own robotic xylophone, I realize that I am going to have to put a lot more work into the software, debugging it, making it more usable, etc., before I could be confident that others could use it trouble-free.

At the same time, there are some advantages to using an SD Card:

  1. I have found an Arduino library MD_MidiFile which can read a MIDI file from an SD card and generate MIDI events “on-the-fly”. That means that I could copy a MIDI file directly to the SD card, and have the Arduino play it on the xylophone.  Then there would be no need for this separate custom-developed Windows-based software.
  2. The amount of Arduino code I would need to write, document, and publish would be significantly less if I used an SD Card with the MD_MidiFile library.
  3. The SD Card seems to be much more commonly used in other Arduino DIY projects.
  4. I can find a Data Logger shield on AliExpress for only $2, and an SD card on Amazon for $6-$10. This compares with about $2 for the Winbond SPI Flash chip, and around $1 for the Solderless Breadboard, resistors, and capacitor.  So, the cost adder is really only about $5-$10, which is probably worth it, when considering how much less custom code would need to be developed and maintained.

If you have been looking at the instructions on-line, you will see that the parts list, and instructions for building the physical xylophone are already there, but the software is not there yet.

My question to the community is this: Should I continue along my current path, and spend a lot of time debugging, commenting, and documenting the software needed to make the xylophone work with Winbond SPI Flash?  Or should I switch the design to use an SD Card, make the necessary changes to the parts list and assembly instructions, and then document and publish a much simpler Arduino code?

Please share your thoughts with me in the comments or via the Contact form.


SPI Flash Setup
Test Setup using Winbond SPI Flash
SD Setup 2
Test Setup using Data Logger Shield and SD Card

New Tutorials Available

Build Your Music now has additional tutorials available.   The purpose of these tutorials is to give you the reader a better understanding of how the different components of the robotic xylophone work.  The tutorials also include example Arduino code which you may use for other DIY projects.  The following tutorials are now live:

  • User Interface – Shows how to use the I2C Character LCD and a Rotary Encoder to create a navigable menu or other user interface for an Arduino project.
  • Mechanism – A close-up view of the solenoid and mallet mechanism which strikes the xylophone keys to play the notes.
  • Motor Driver – Shows how to use multiple L293D Motor Driver Shields in a Master/Slave configuration to drive any number of solenoids from a single Arduino Uno.

Remember to Like us on Facebook.  Keep checking back for more updates.

More Song Videos Available

Build Your Music is the robotic xylophone that can play any song of your choosing. Videos of more than 100 different songs of various genres are now available on the website: https://buildmusic.net/more-songs/

With songs from classical to movies, from the jazz age to the pop songs of yesterday and today, you will surely find something of interest to you. Check it out, and make sure to Like the Facebook page.

Reminder, only 3 more days until the Denton Mini Maker Faire.