
Once the lab has been prepared, now comes the fun part. It is time to bring it to your audience and have them assemble and build their own music.
Download and print the Arduino Music Lab Instructions. This contains the the steps that participants need to do to complete the lab successfully.
The first step is to wire the LCD and Rotary Encoder onto the Arduino Uno, using the M-F Jumper Wires. The pins of each are connected as per below:

After wiring these components together, power-up the Arduino using the USB cable and charger. If you did everything right, there will be text shown on the LCD: “Select a Song”, and you will be able to turn the Rotary Encoder to change the song. If this is not what happens, then most likely the wiring is wrong.

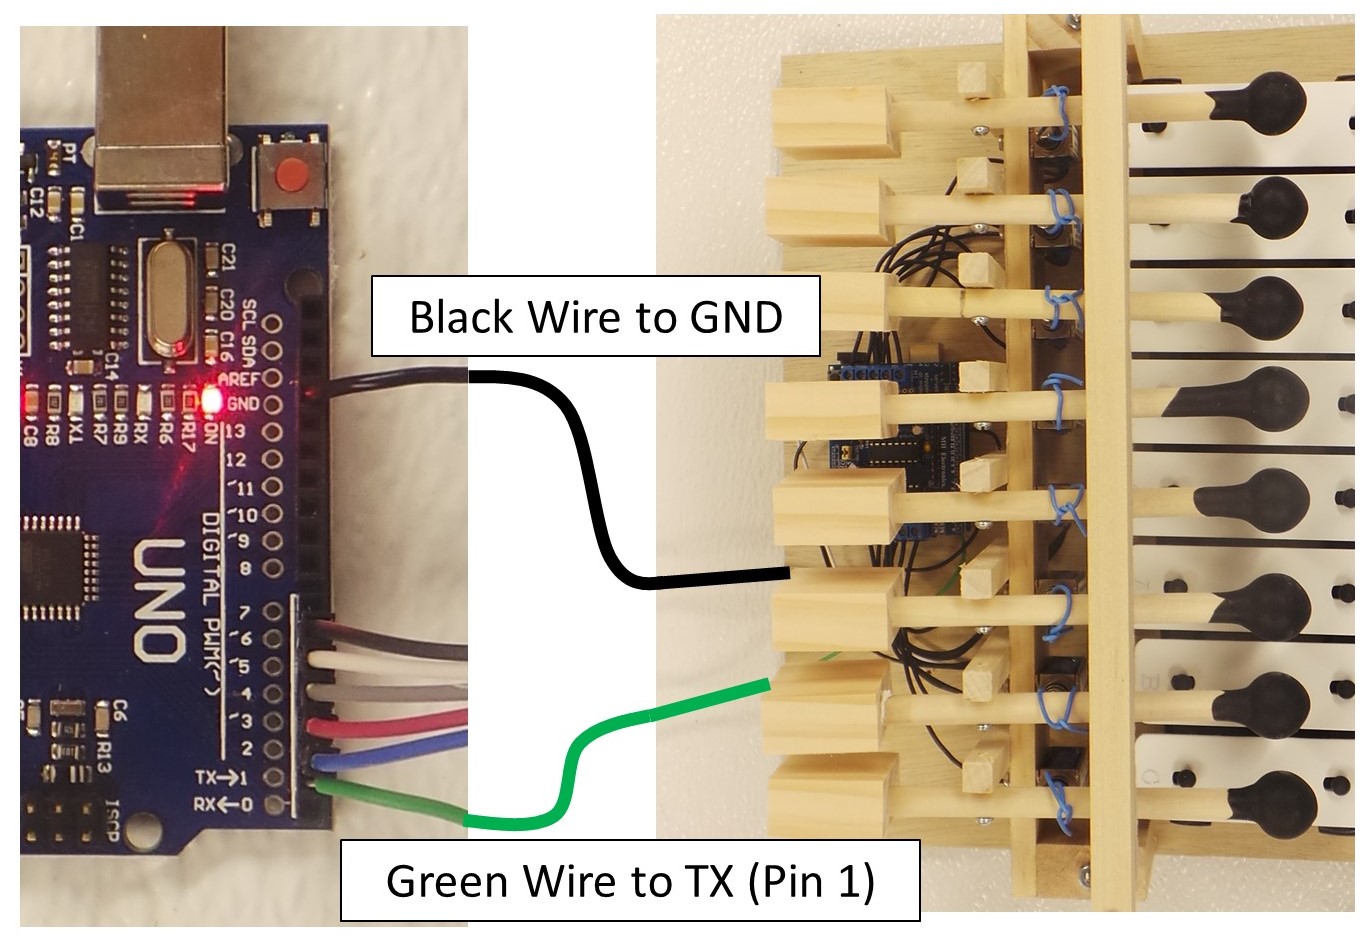
Once you know that the LCD and Rotary Encoder are working correctly, connect the Arduino to the Xylophone Assembly. The Green wire connects to the serial TX (pin 1), while the Black wire connects to GND. Actually, the black wire can connect to any unused pin becuase the program sets all unused pins to LOW, effectively making them function as ground pins.
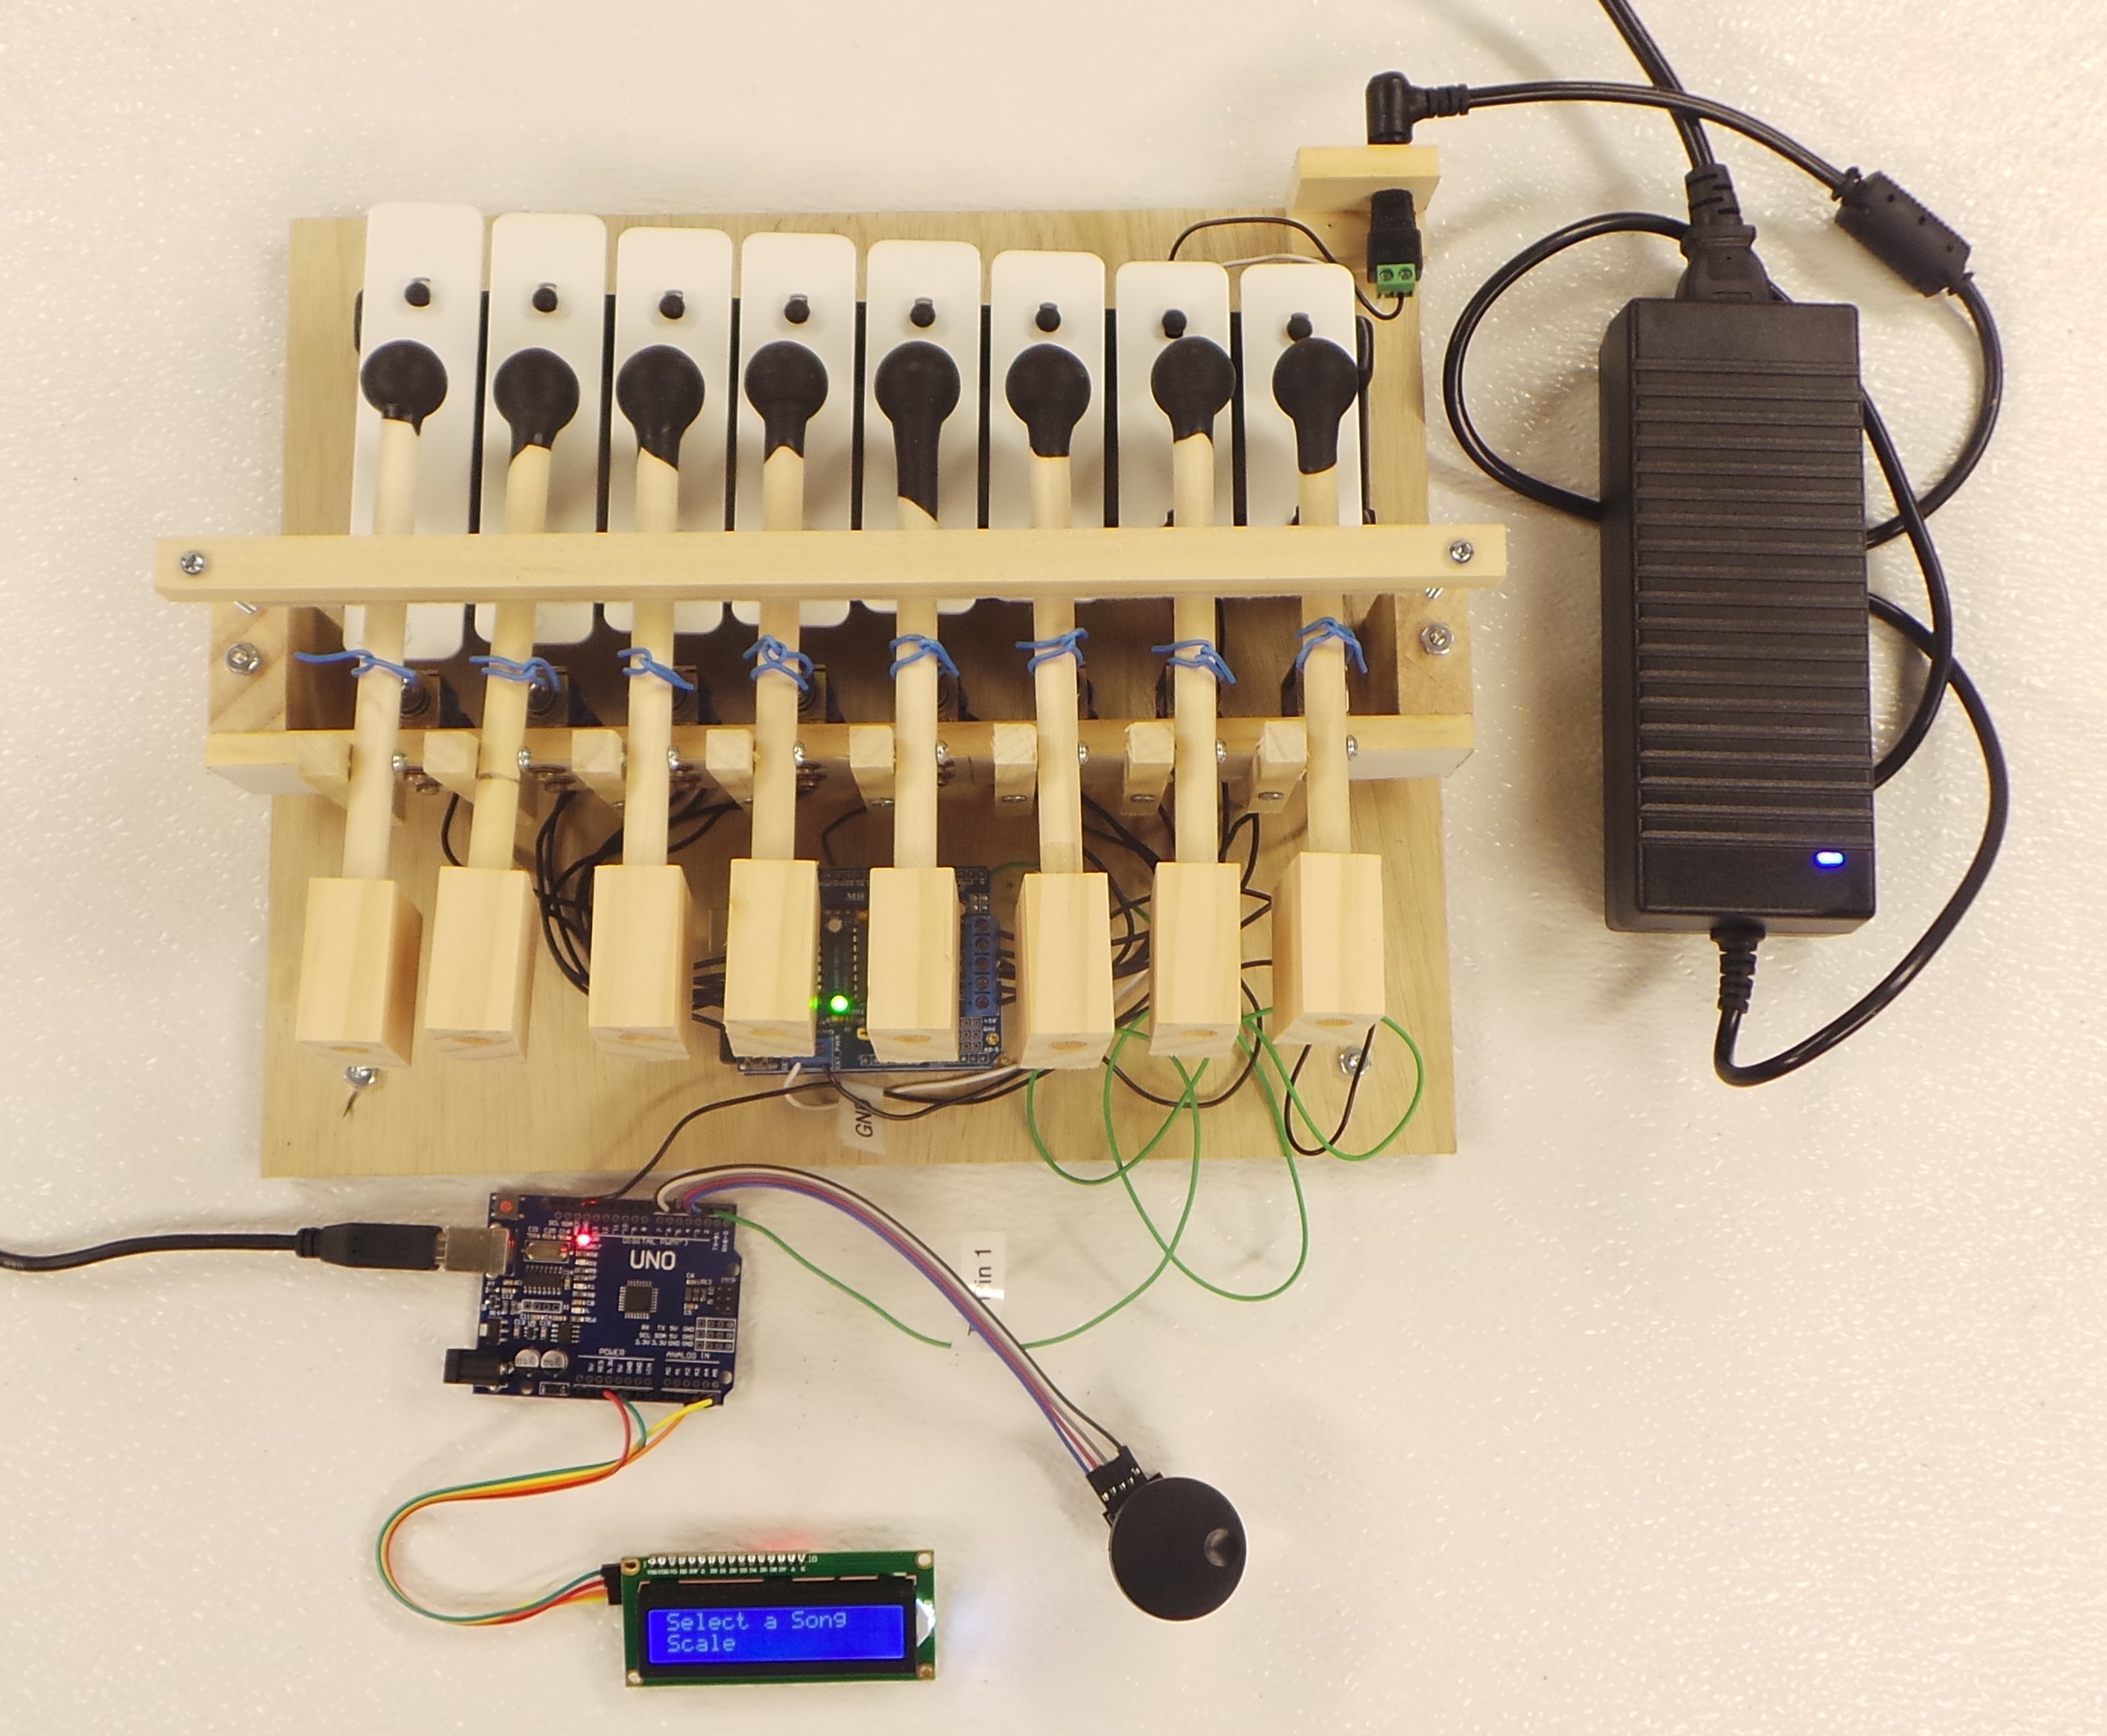
When everything is connected, the Arduino Music Lab will look like below.
If you did everything right, when you click the rotary encoder, it will play a song, similar to the following:
C-Scale
Spring from Vivaldi’s Four Seasons
Water Music by G.F. Handel
Congratulations! You have completed the Arduino Music Lab.
