
Once the enclosure if built, the next step is to build the mallets.
Parts Needed
- 3/8″ x 4 ft Wood Dowels (Qty 4)
- 3/4″ Dowel Caps with 3/8″ Hole (Qty 25)
- Can of Black Plasti-Dip
- Piece of 2×6 lumber, approximately 2 ft long
- 1-1/2″ x 3/4″ x 6 ft Select Pine Board
- 3/8″ x 3 ft Square Dowels (Qty 3)
- #6 x 3/4″ Machine Screws (Qty 25)
- #6-32 x 2-1/2″ Machine Screws and Nuts (Qty 4)
Note: Building the Mallets and Assembly requires drilling holes to a fair degree of precision. It is recommended that you build jigs to allow you to drill the holes at right angles, and in the correct location. See the Jigs page for details and instructions.
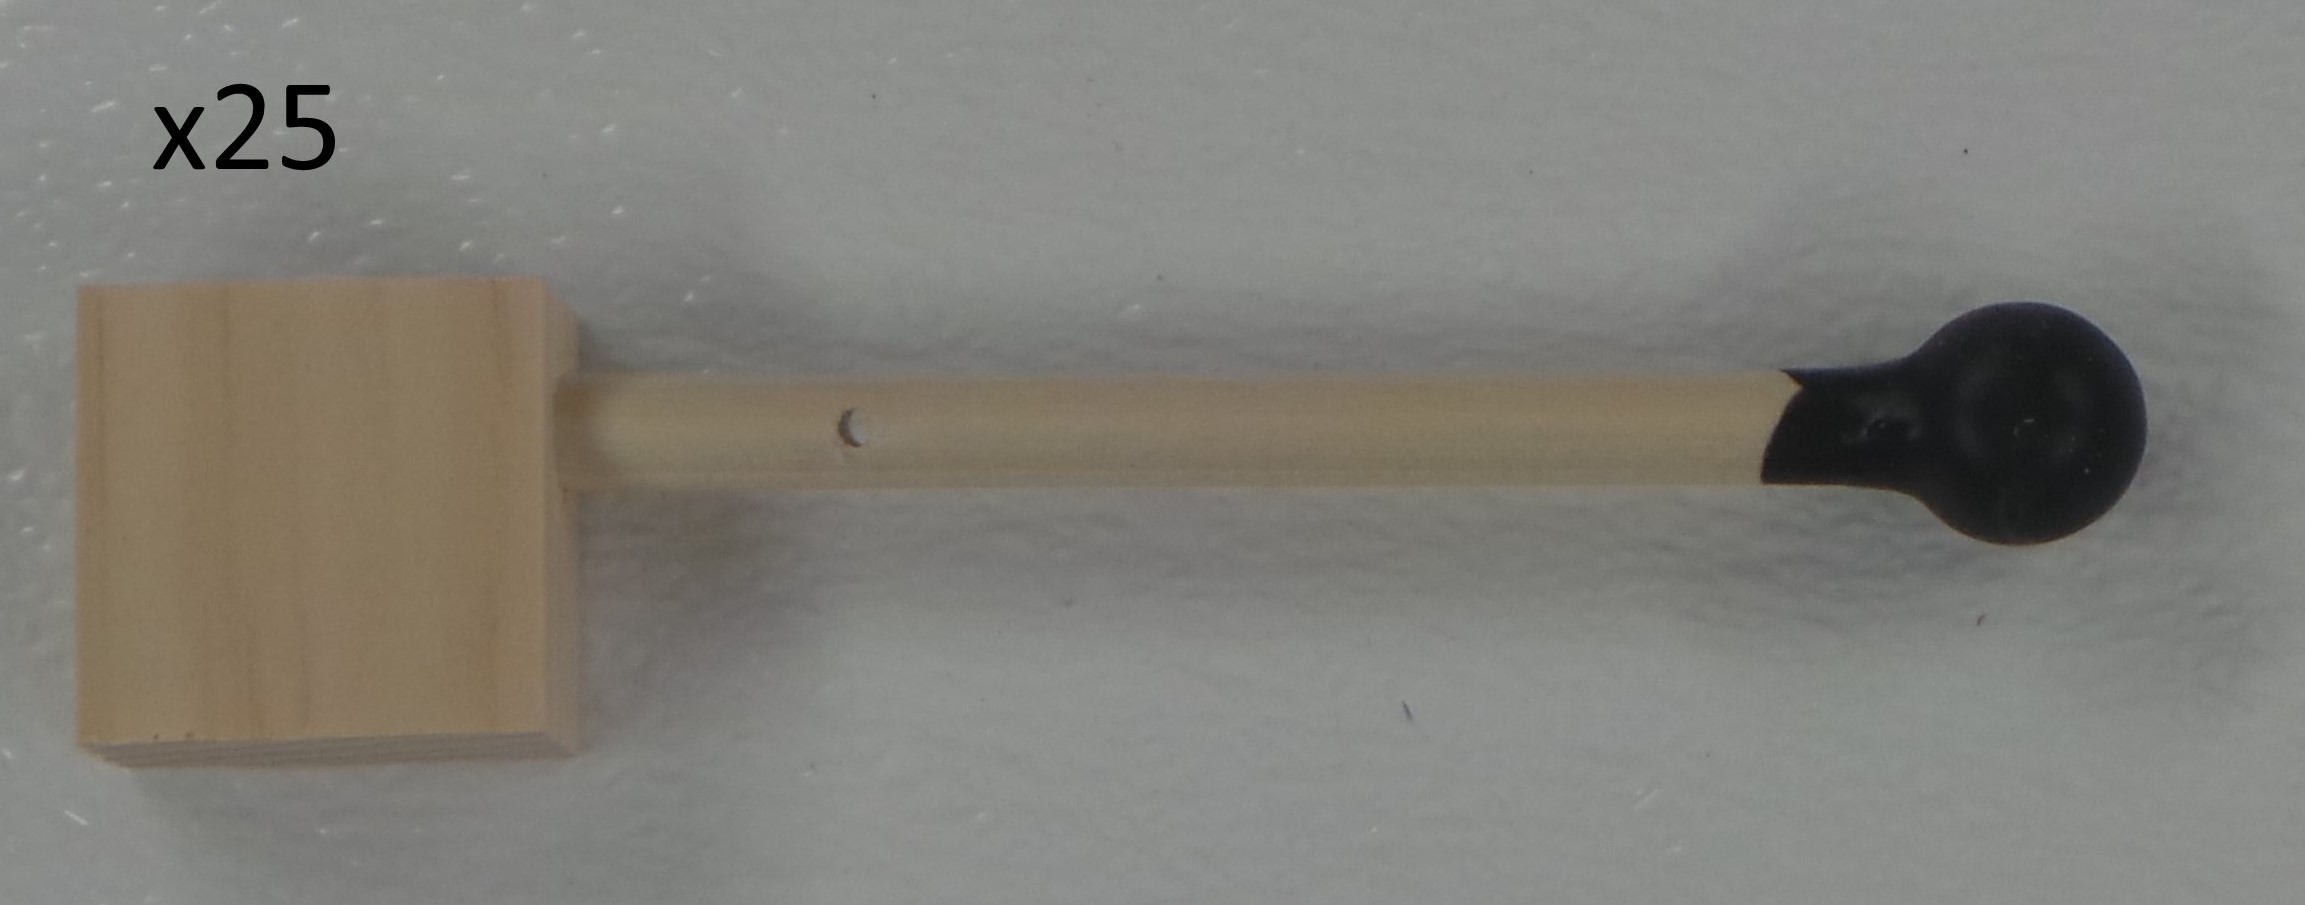
Step 1: Cut the 3/8″ Dowel Rods into 25 pieces, each of length 6-1/2″. Use the Jig to drill 9/64″ diameter holes 4″ from the end of each.
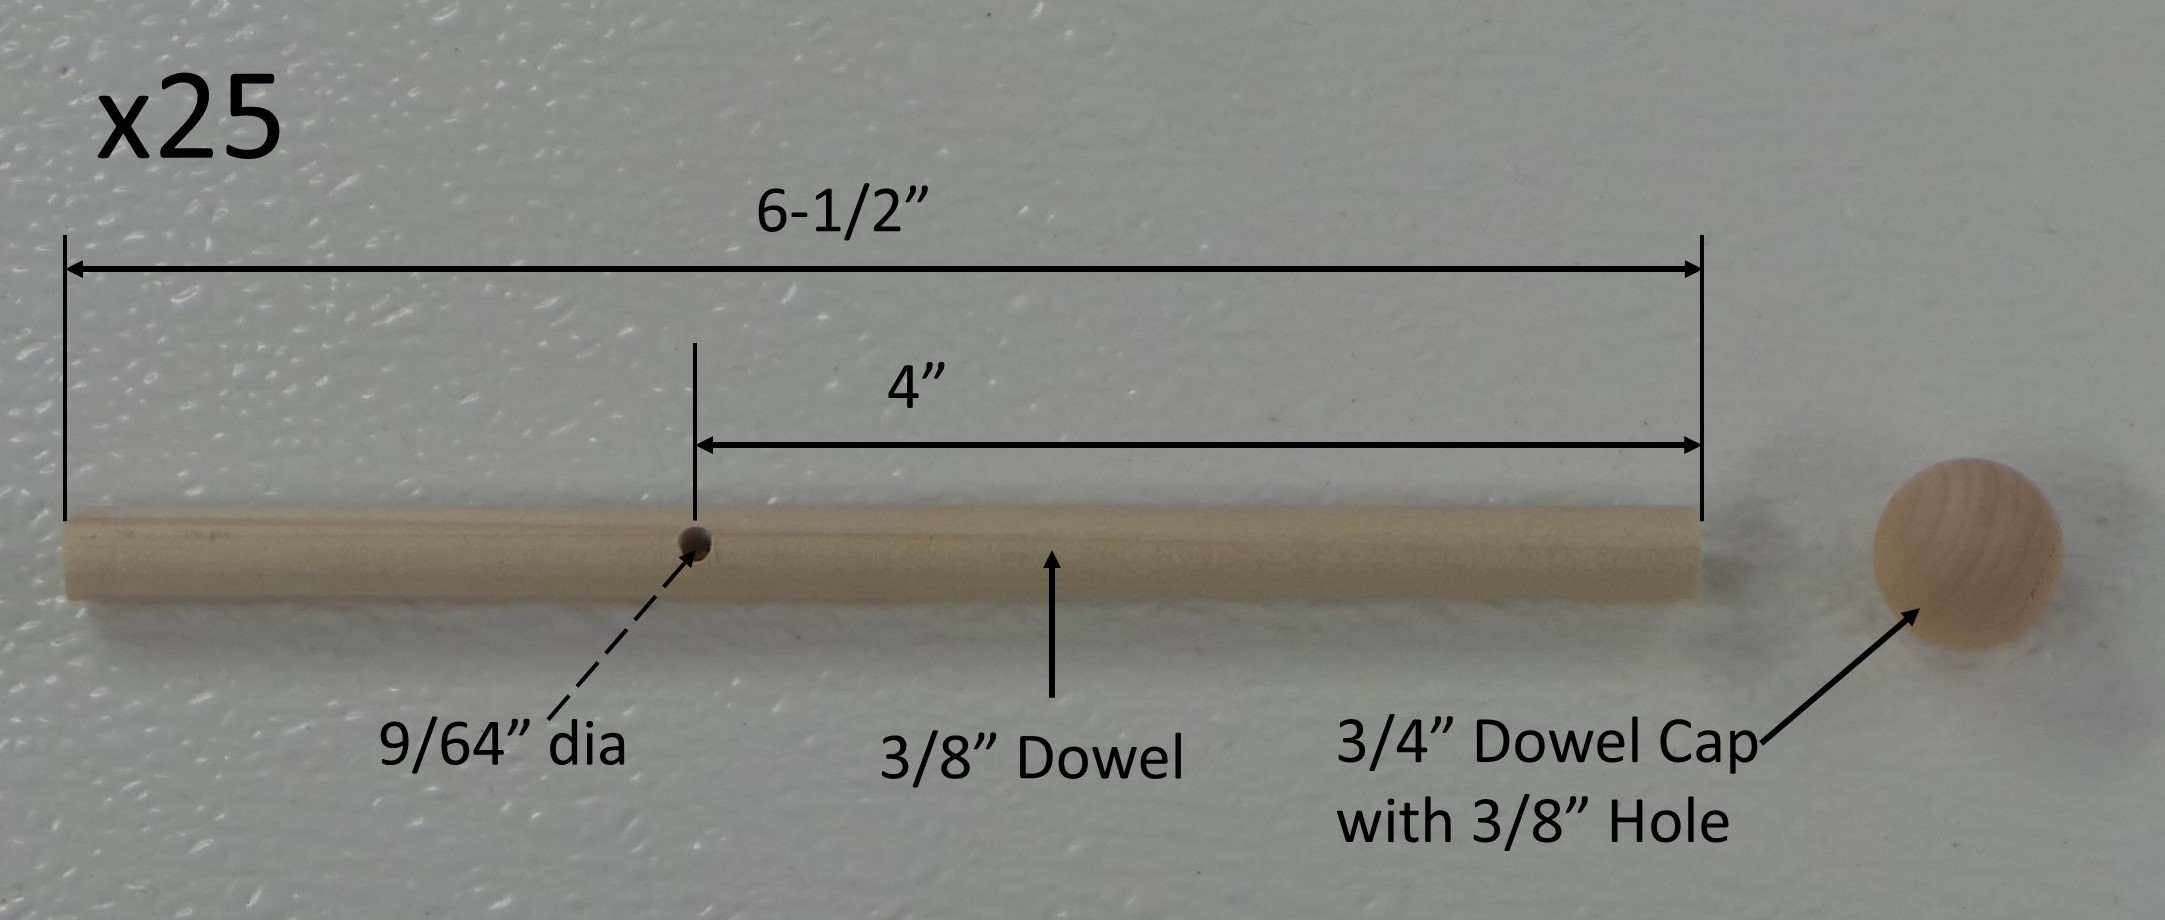
Step 2: Glue the Dowel Cap to the end of each Dowel. Make sure that the hole is 4″ from the end with the Dowel Cap. Also, make sure that the Dowel Cap is pushed all the way onto the tip of the Dowel. In some cases, you may need to lightly hammer the Dowel into the Dowel Cap.

Step 3: Dip the tip of each mallet into the can of Black Plasti Dip. Follow the instructions on the can, regarding how fast the part should be dipped and pulled out.
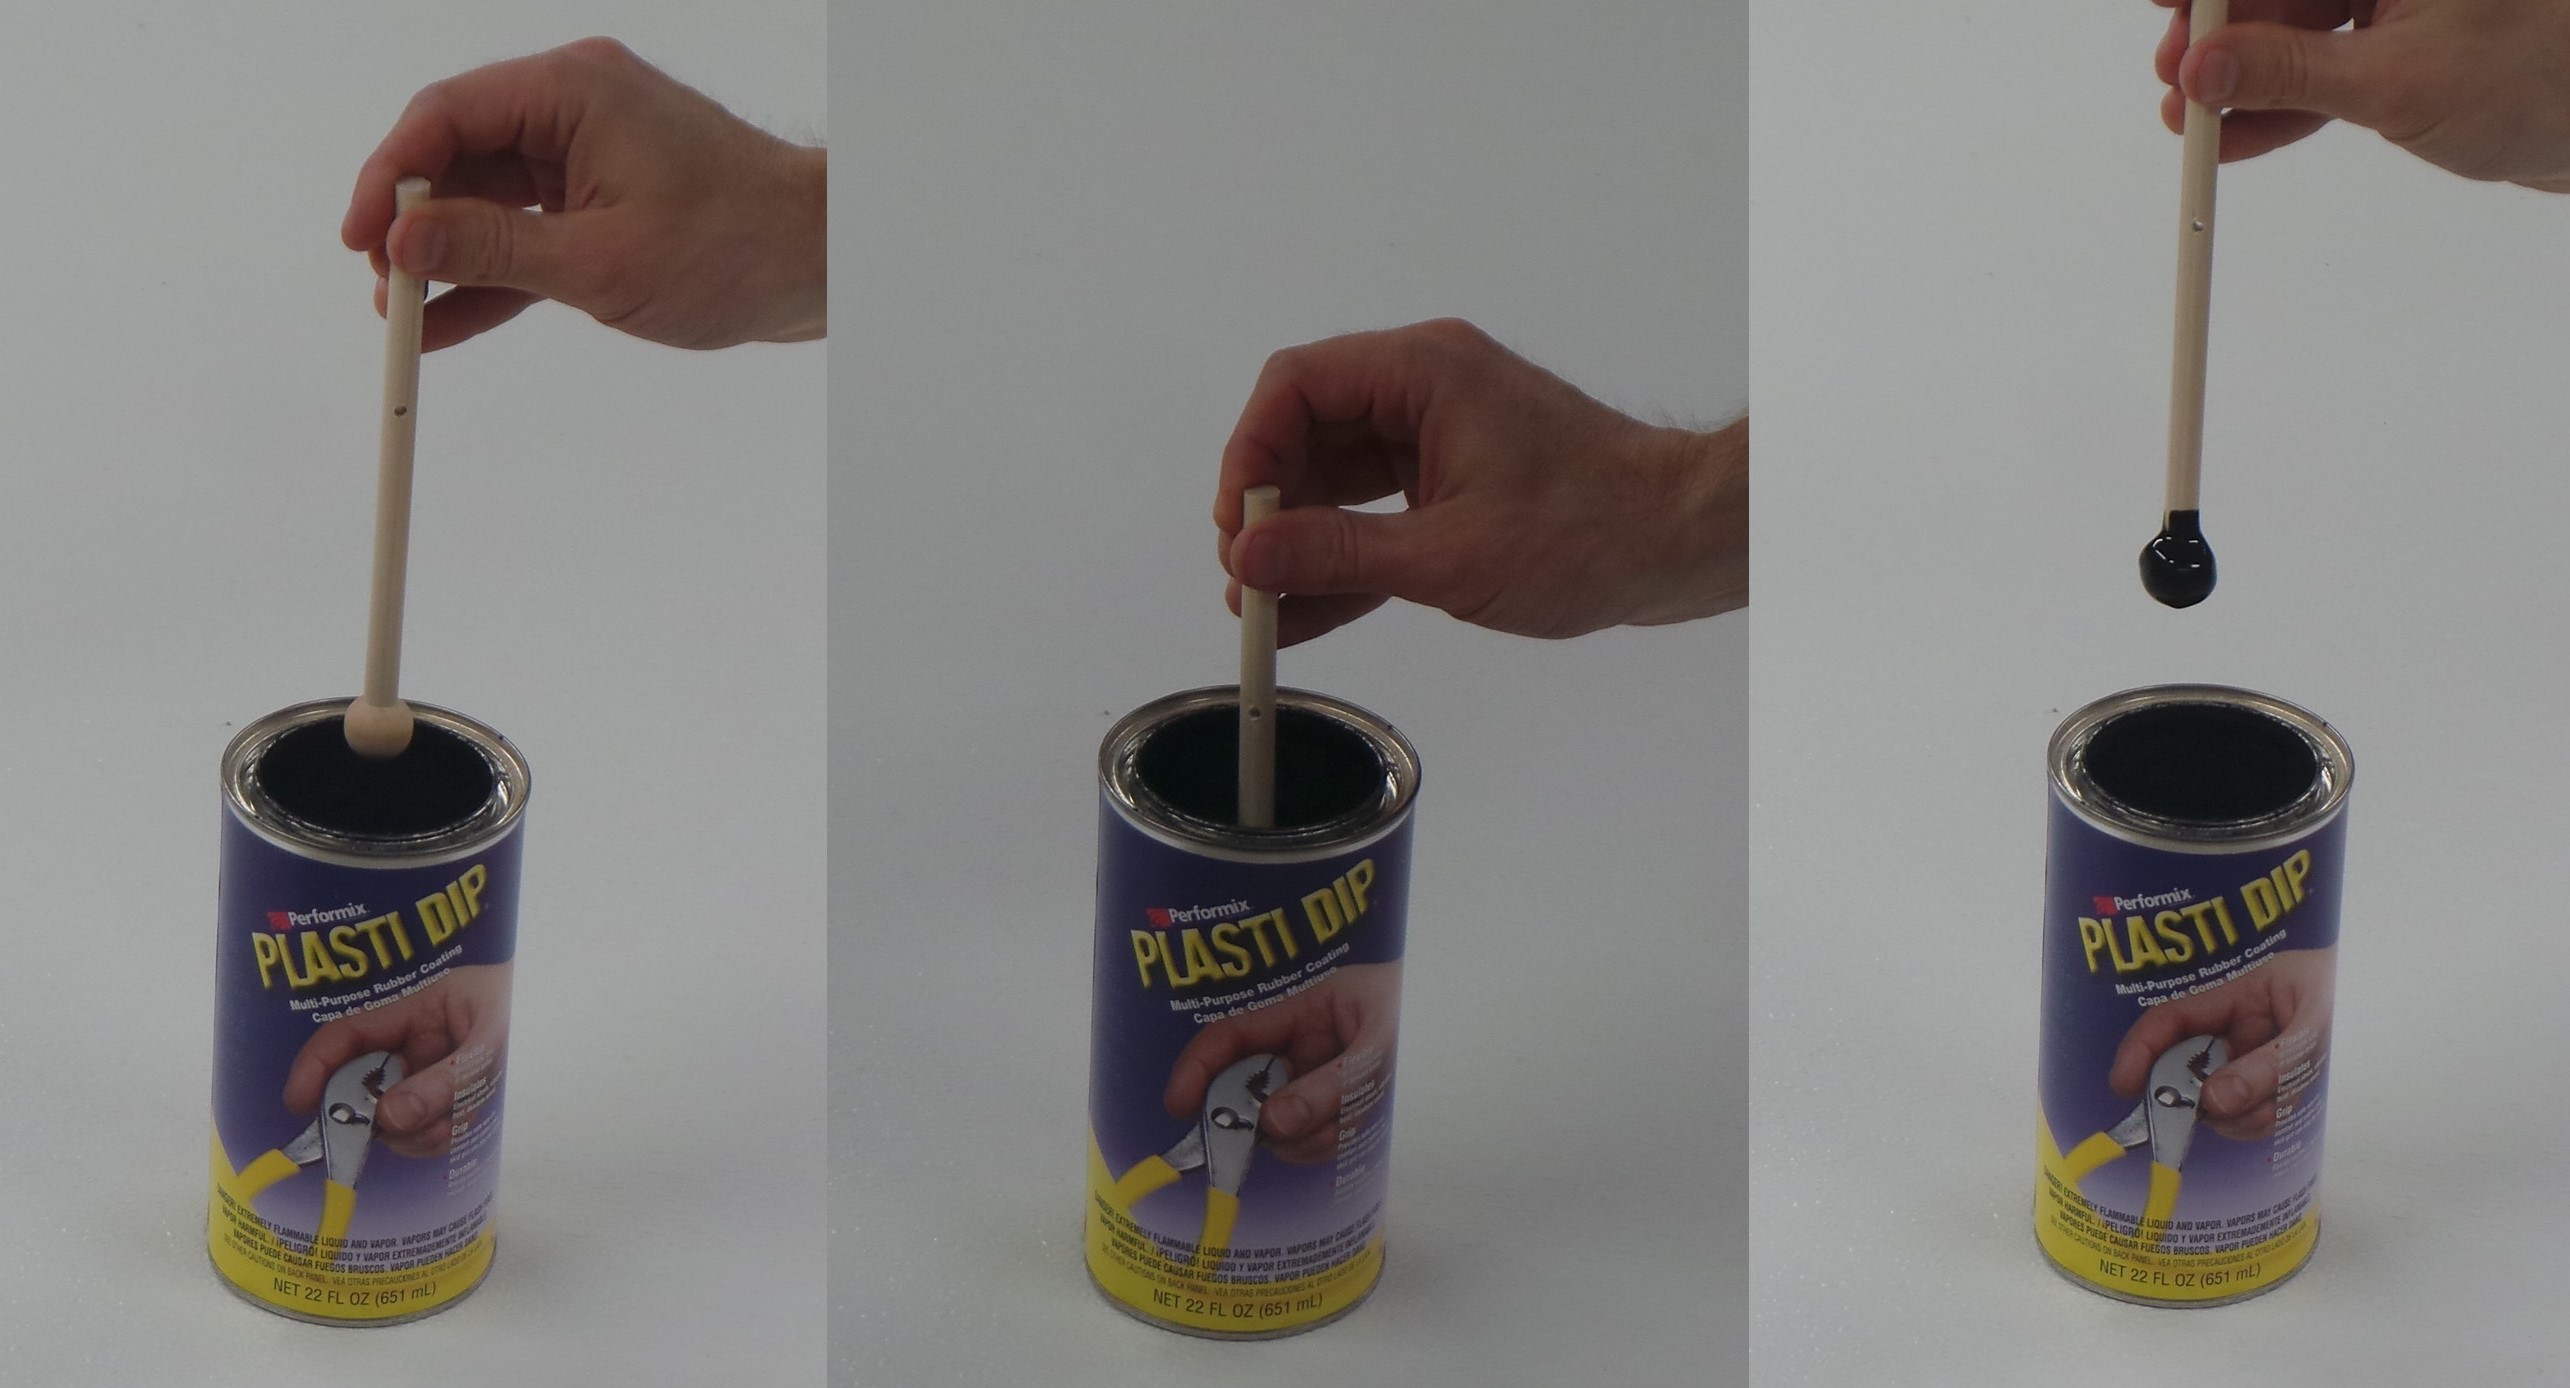
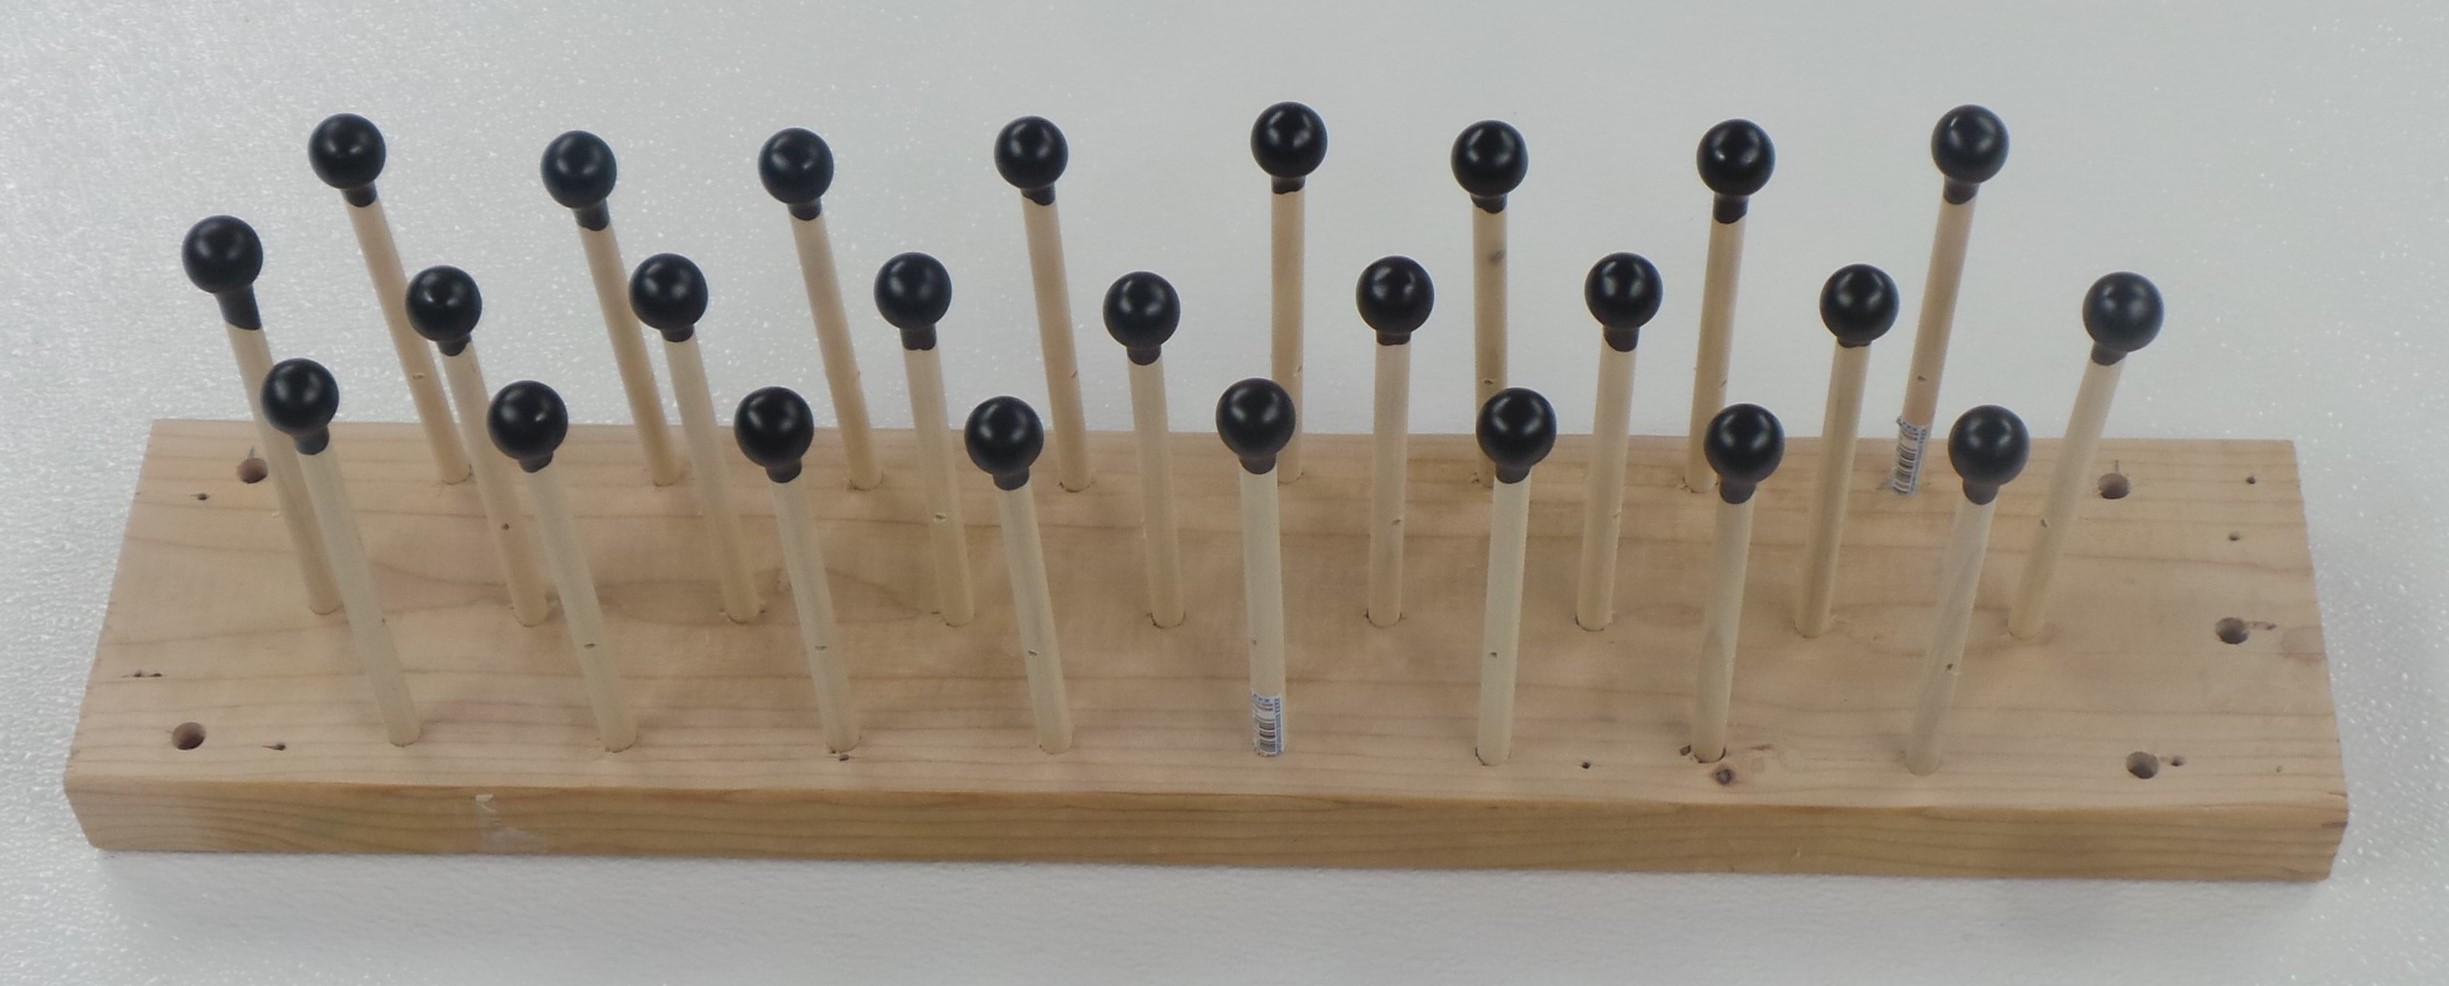
It is recommended that you take a piece of 2×6 lumber, and drill 3/8″ holes, so that the mallets can rest vertically while the Plasti Dip is drying. After each coat of Plasti Dip, allow the mallets to dry at least 1 hour, or whatever the instructions on the can specify. Apply a total of 4 coats of Plast Dip to the tip of each mallet.
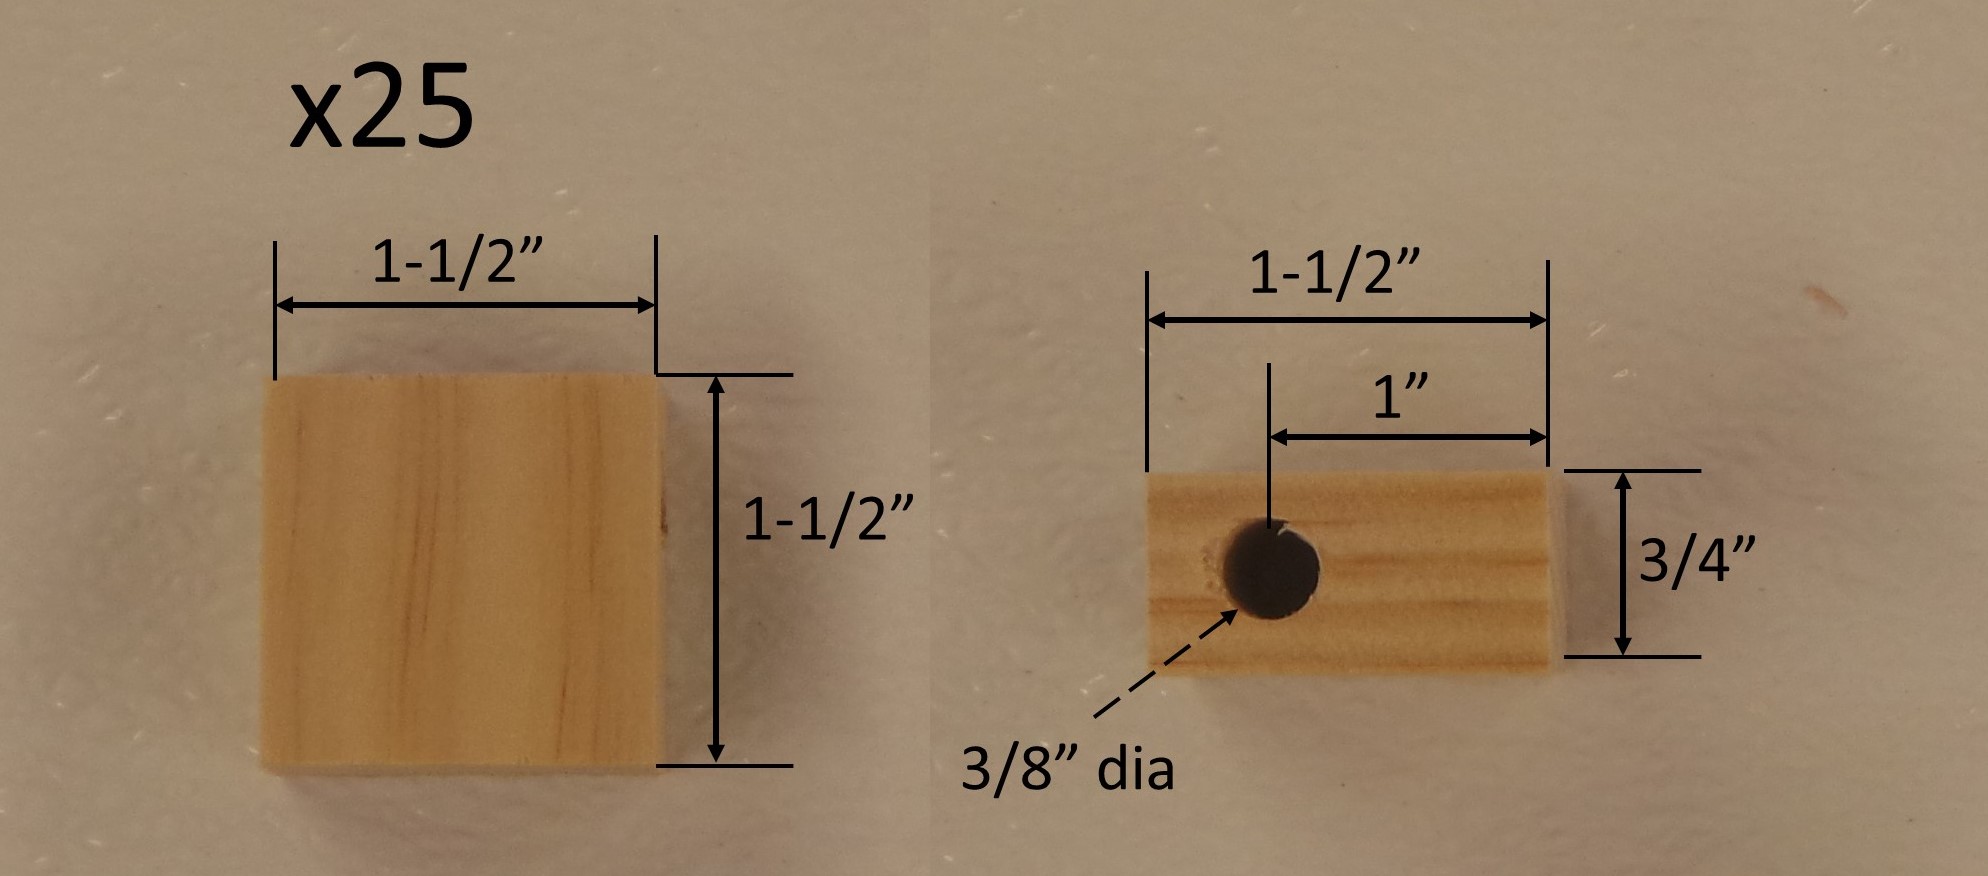
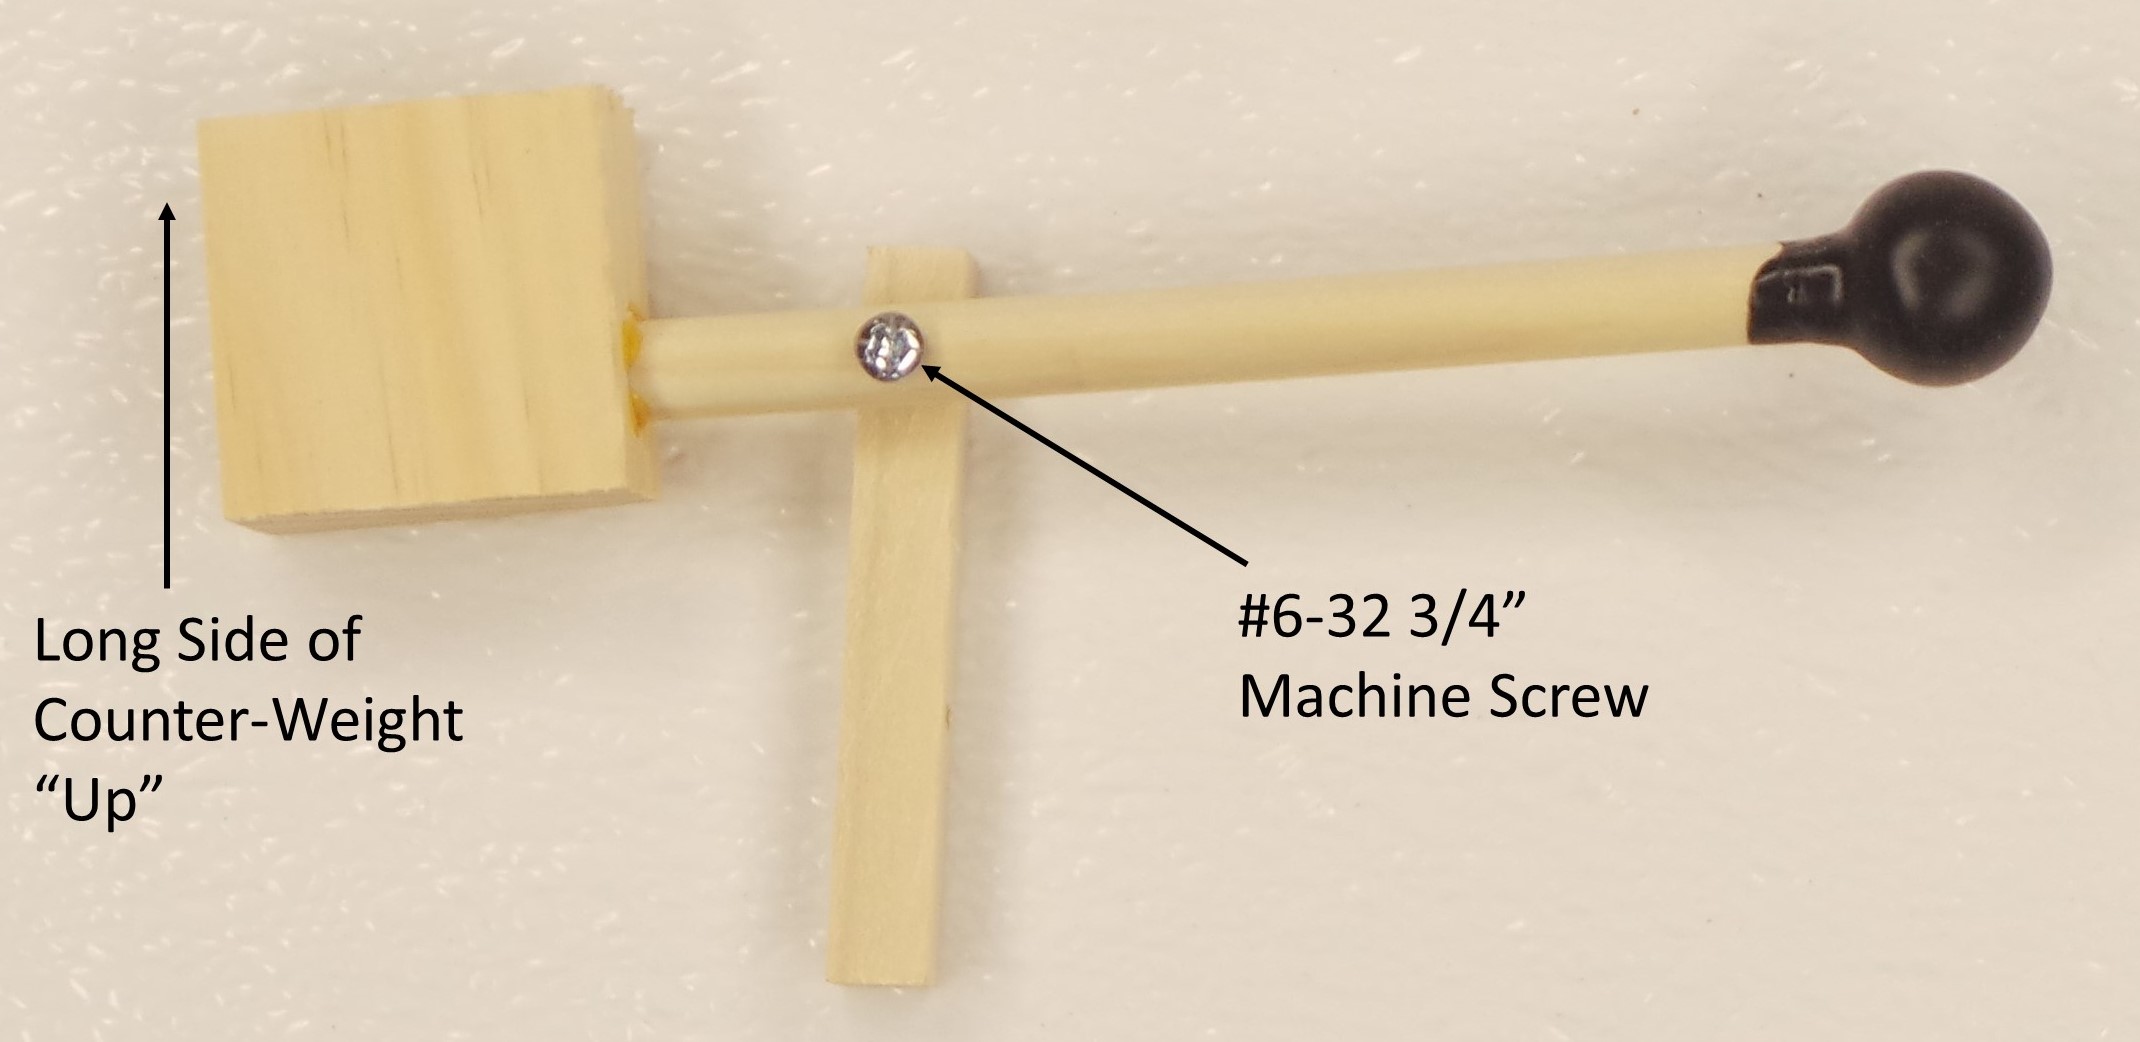
Step 4: Cut the 1-1/2″ x 3/4″ Select Pine Board into 25 pieces, each 1-1/2″ long. (In other words, make 25 1-1/2″ Squares.) Use the Jig to drill a 3/8″ hole 1″ from one of the ends. This is the “Counter-Weight” for each mallet head.
Step 5: Glue the Counter-Weight onto the other side of the Mallet. Use a #6-32 x 2-1/2″ machine screw to verify that the hole is at a right-angle to the Counter-Weight.

After this step, the mallets will look like the picture below.
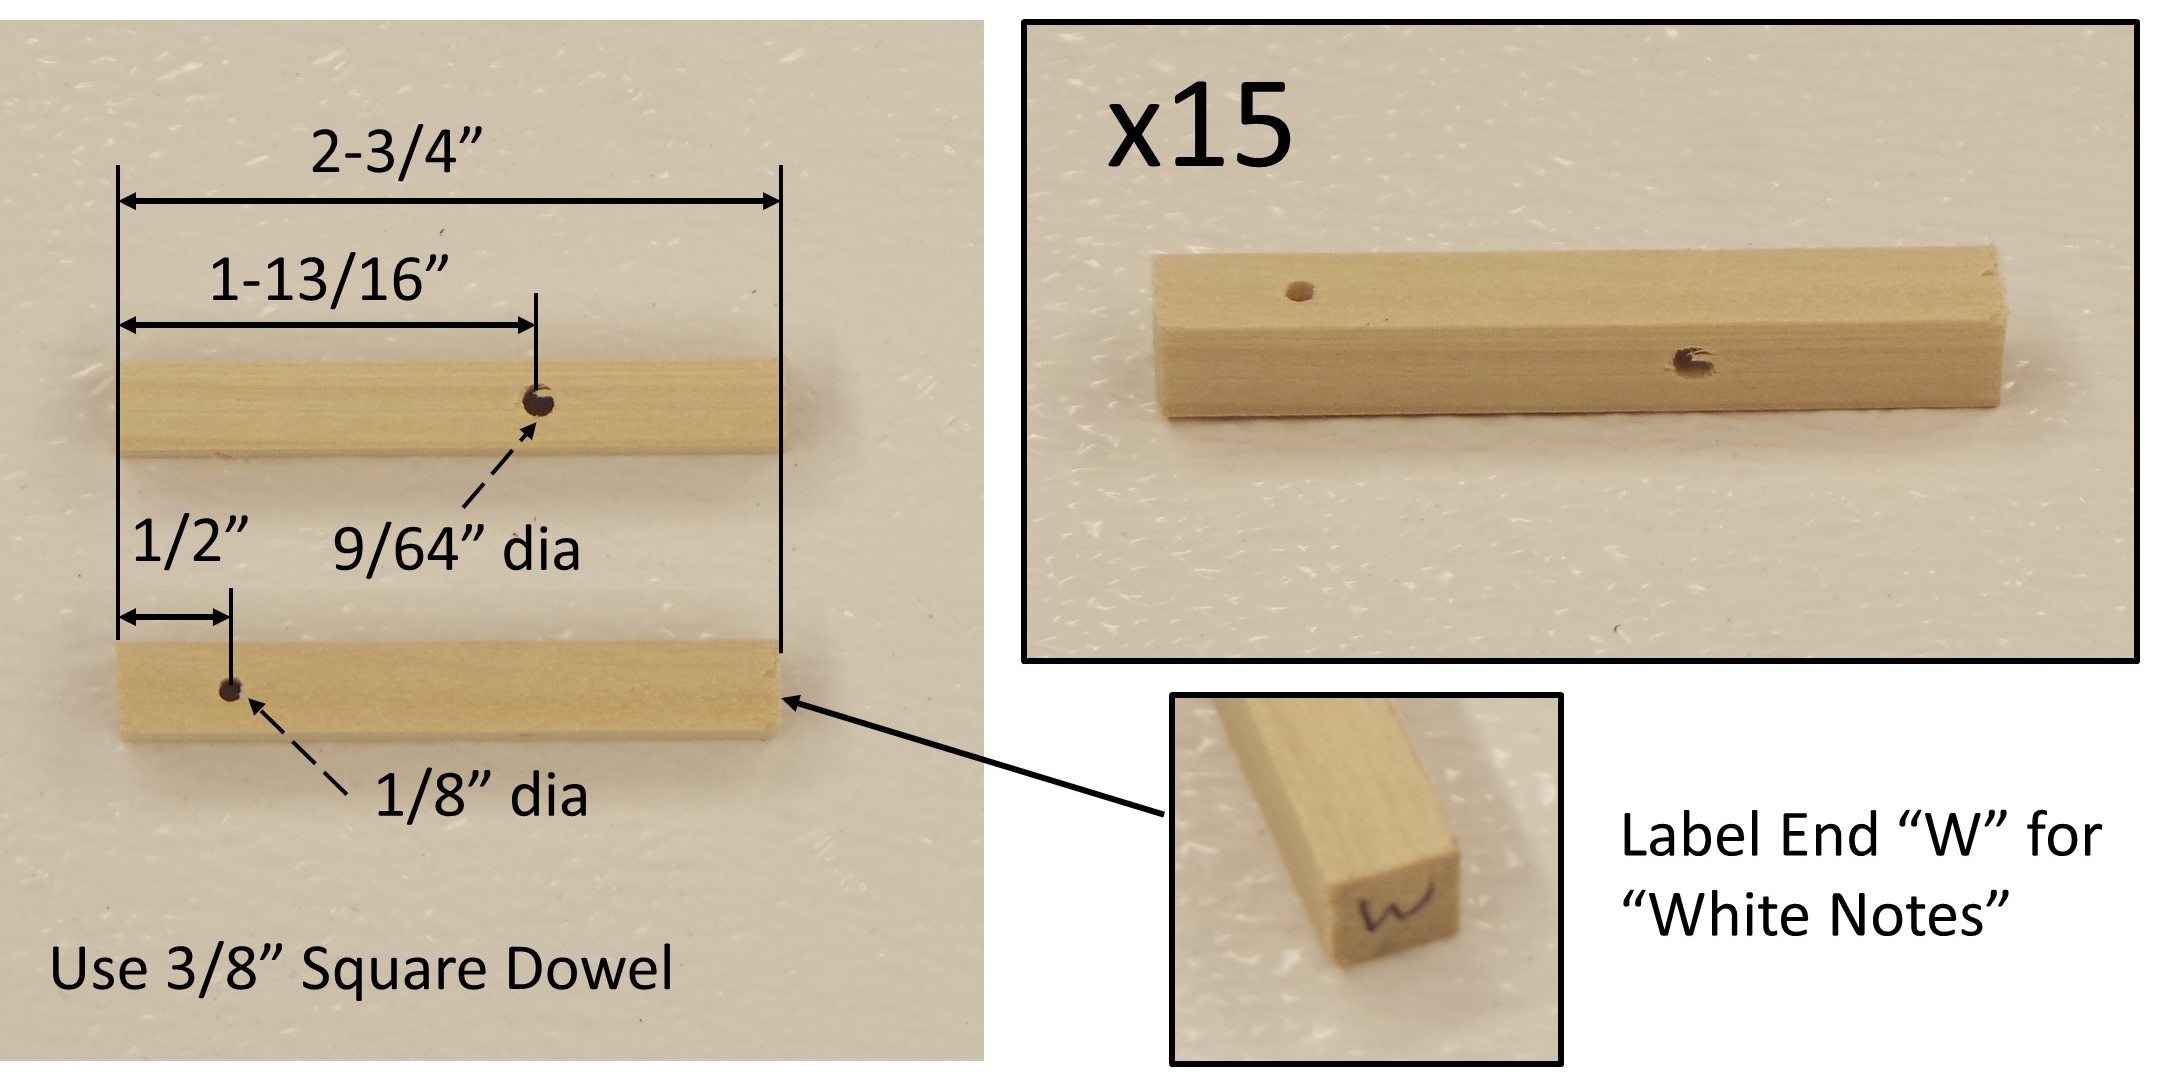
Step 6: Cut the 3/8″ Square Dowels into 25 lengths of 2-3/4″. 15 of these are used for the “White Notes” and 10 will be for the “Black Notes”. Use the jig to drill a 1/8″ hole 1/2″ from the end of each. On an adjacent side, drill a 9/64″ diameter hole 1-13/16″ from the end for the White Notes, or 1-11/16″ from the end for the Black Notes. Label the bottom of each with “W” or “B” so you will know whether each is used for the White or Black Notes. See picture below.

Step 7: Use a #6-32 x 3/4″ Machine Screw to secure each Mallet onto the 3/8″ Square Dowel. The Mallet should rotate around the machine screw in the 9/64″ hole, while the Machine Screw should be secure in the 1/8″ hole. Do not over-tighten. The Mallet needs to rotate freely.
Next: Solenoid Assembly
