
At the heart of the robotic xylophone is an Arduino Uno. (Actually, 5 Arduino Uno’s are used, as you see in the Motor Driver Tutorial.) If you are not familiar with the Arduino Uno, think of it this way: what Google is for Internet search, what gasoline is for transportation fuel, what the Ford F-150 is for pickups, and what 2×4’s are for construction framing, is what the Arduino Uno is for a programmable DIY microcontroller.
There are a lot of different microcontroller boards out there for hobby-level electronics projects, including the Raspberry Pi, the Beagle Bone, and the Basic STAMP. But the line that seems to be the most commonly used today, particularly in educational settings is the Arduino.
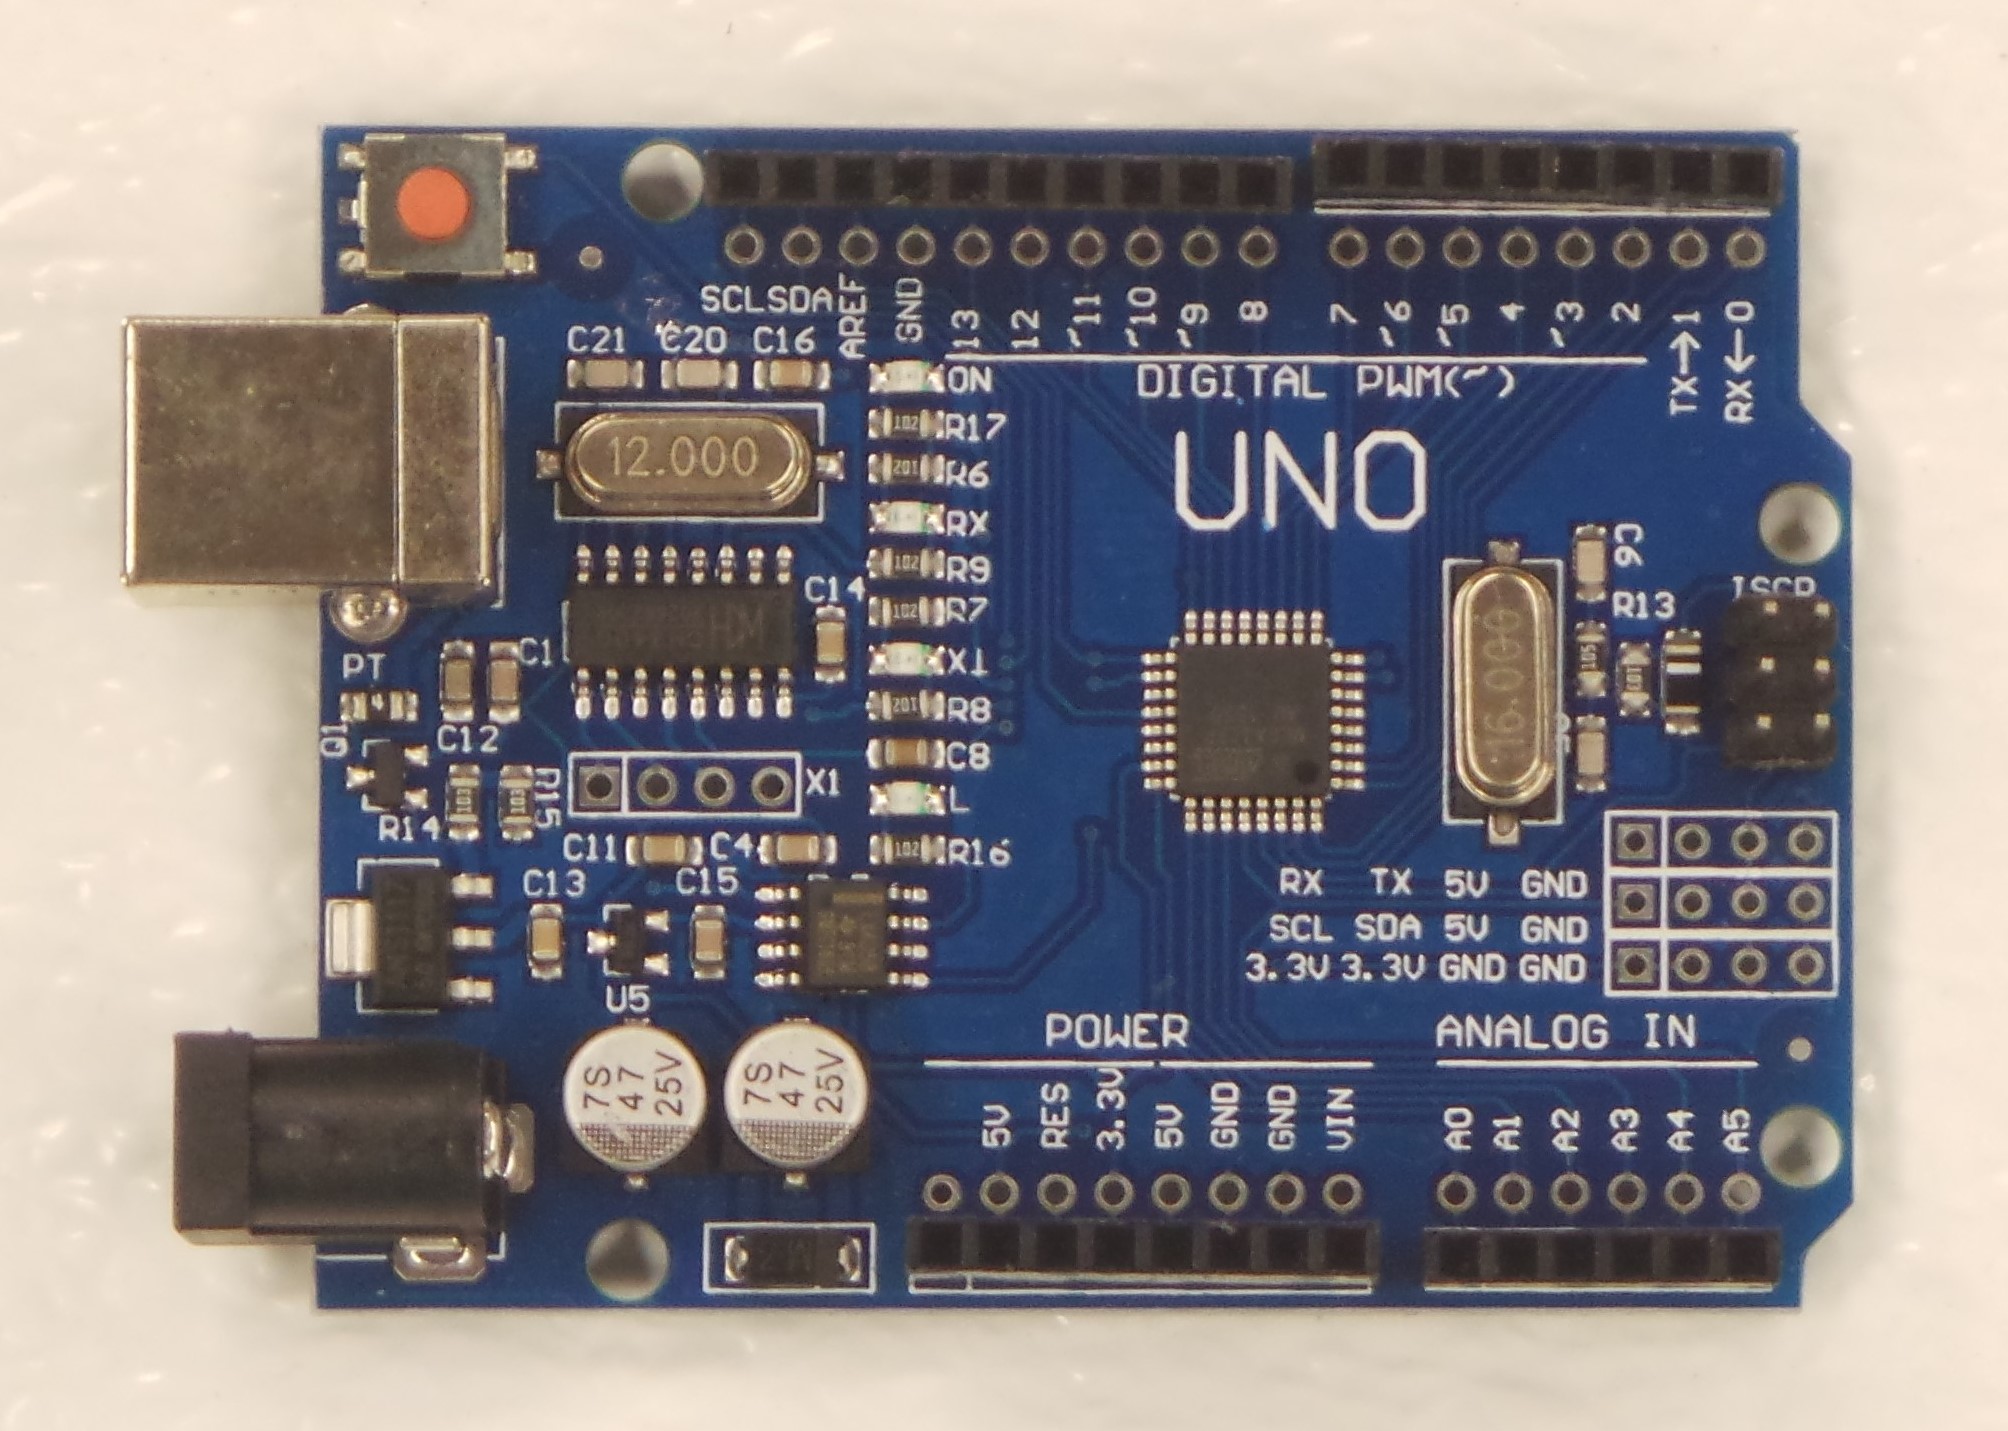
The Arduino comes in multiple variations, including the Uno, Gemma, Mega, Zero, and Nano. The one that you find most prominently (most examples, most commonly sold with kits) is the Arduino Uno, pictured below.
I chose to use the Arduino Uno because:
- It is the most recognizable of all these project boards
- It has sufficient capacity (e.g. RAM, Program Memory, clock speed, IO Pins, etc.) to do the job.
- One can attach peripherals to it with no soldiering
- It can be found in discounted/generic versions for very low cost
Some of the specifications of the Arduino Uno include:
- 32 KB of Program Memory
- 2 KB of RAM
- 20 Input/Output pins including
- Serial Transmit/Receive
- Interrupts
- Serial-Peripheral Interface (SPI)
- I2C
- Analog Read
- Pulse-Width Modulation (PWM)
- 6V – 16V Power Input
- 5V and 3.3V Power Supply
For more on the Arduino Uno, please consult the official Arduino Web-site, or simply do a Google search for “Arduino Uno”
Next: User Interface
