
Cutting and dillings the holes requires a fair degree of precision. A smooth, rectangular hole is needed for the LCD. Other holes need to be drilled through 3/8″ diameter square and round dowels, or through the ends of 1×2 boards. These holes all need to be perpendicular to the surface, and aligned to the right position. To facilitate drilling the holes correctly, three different jigs are built.
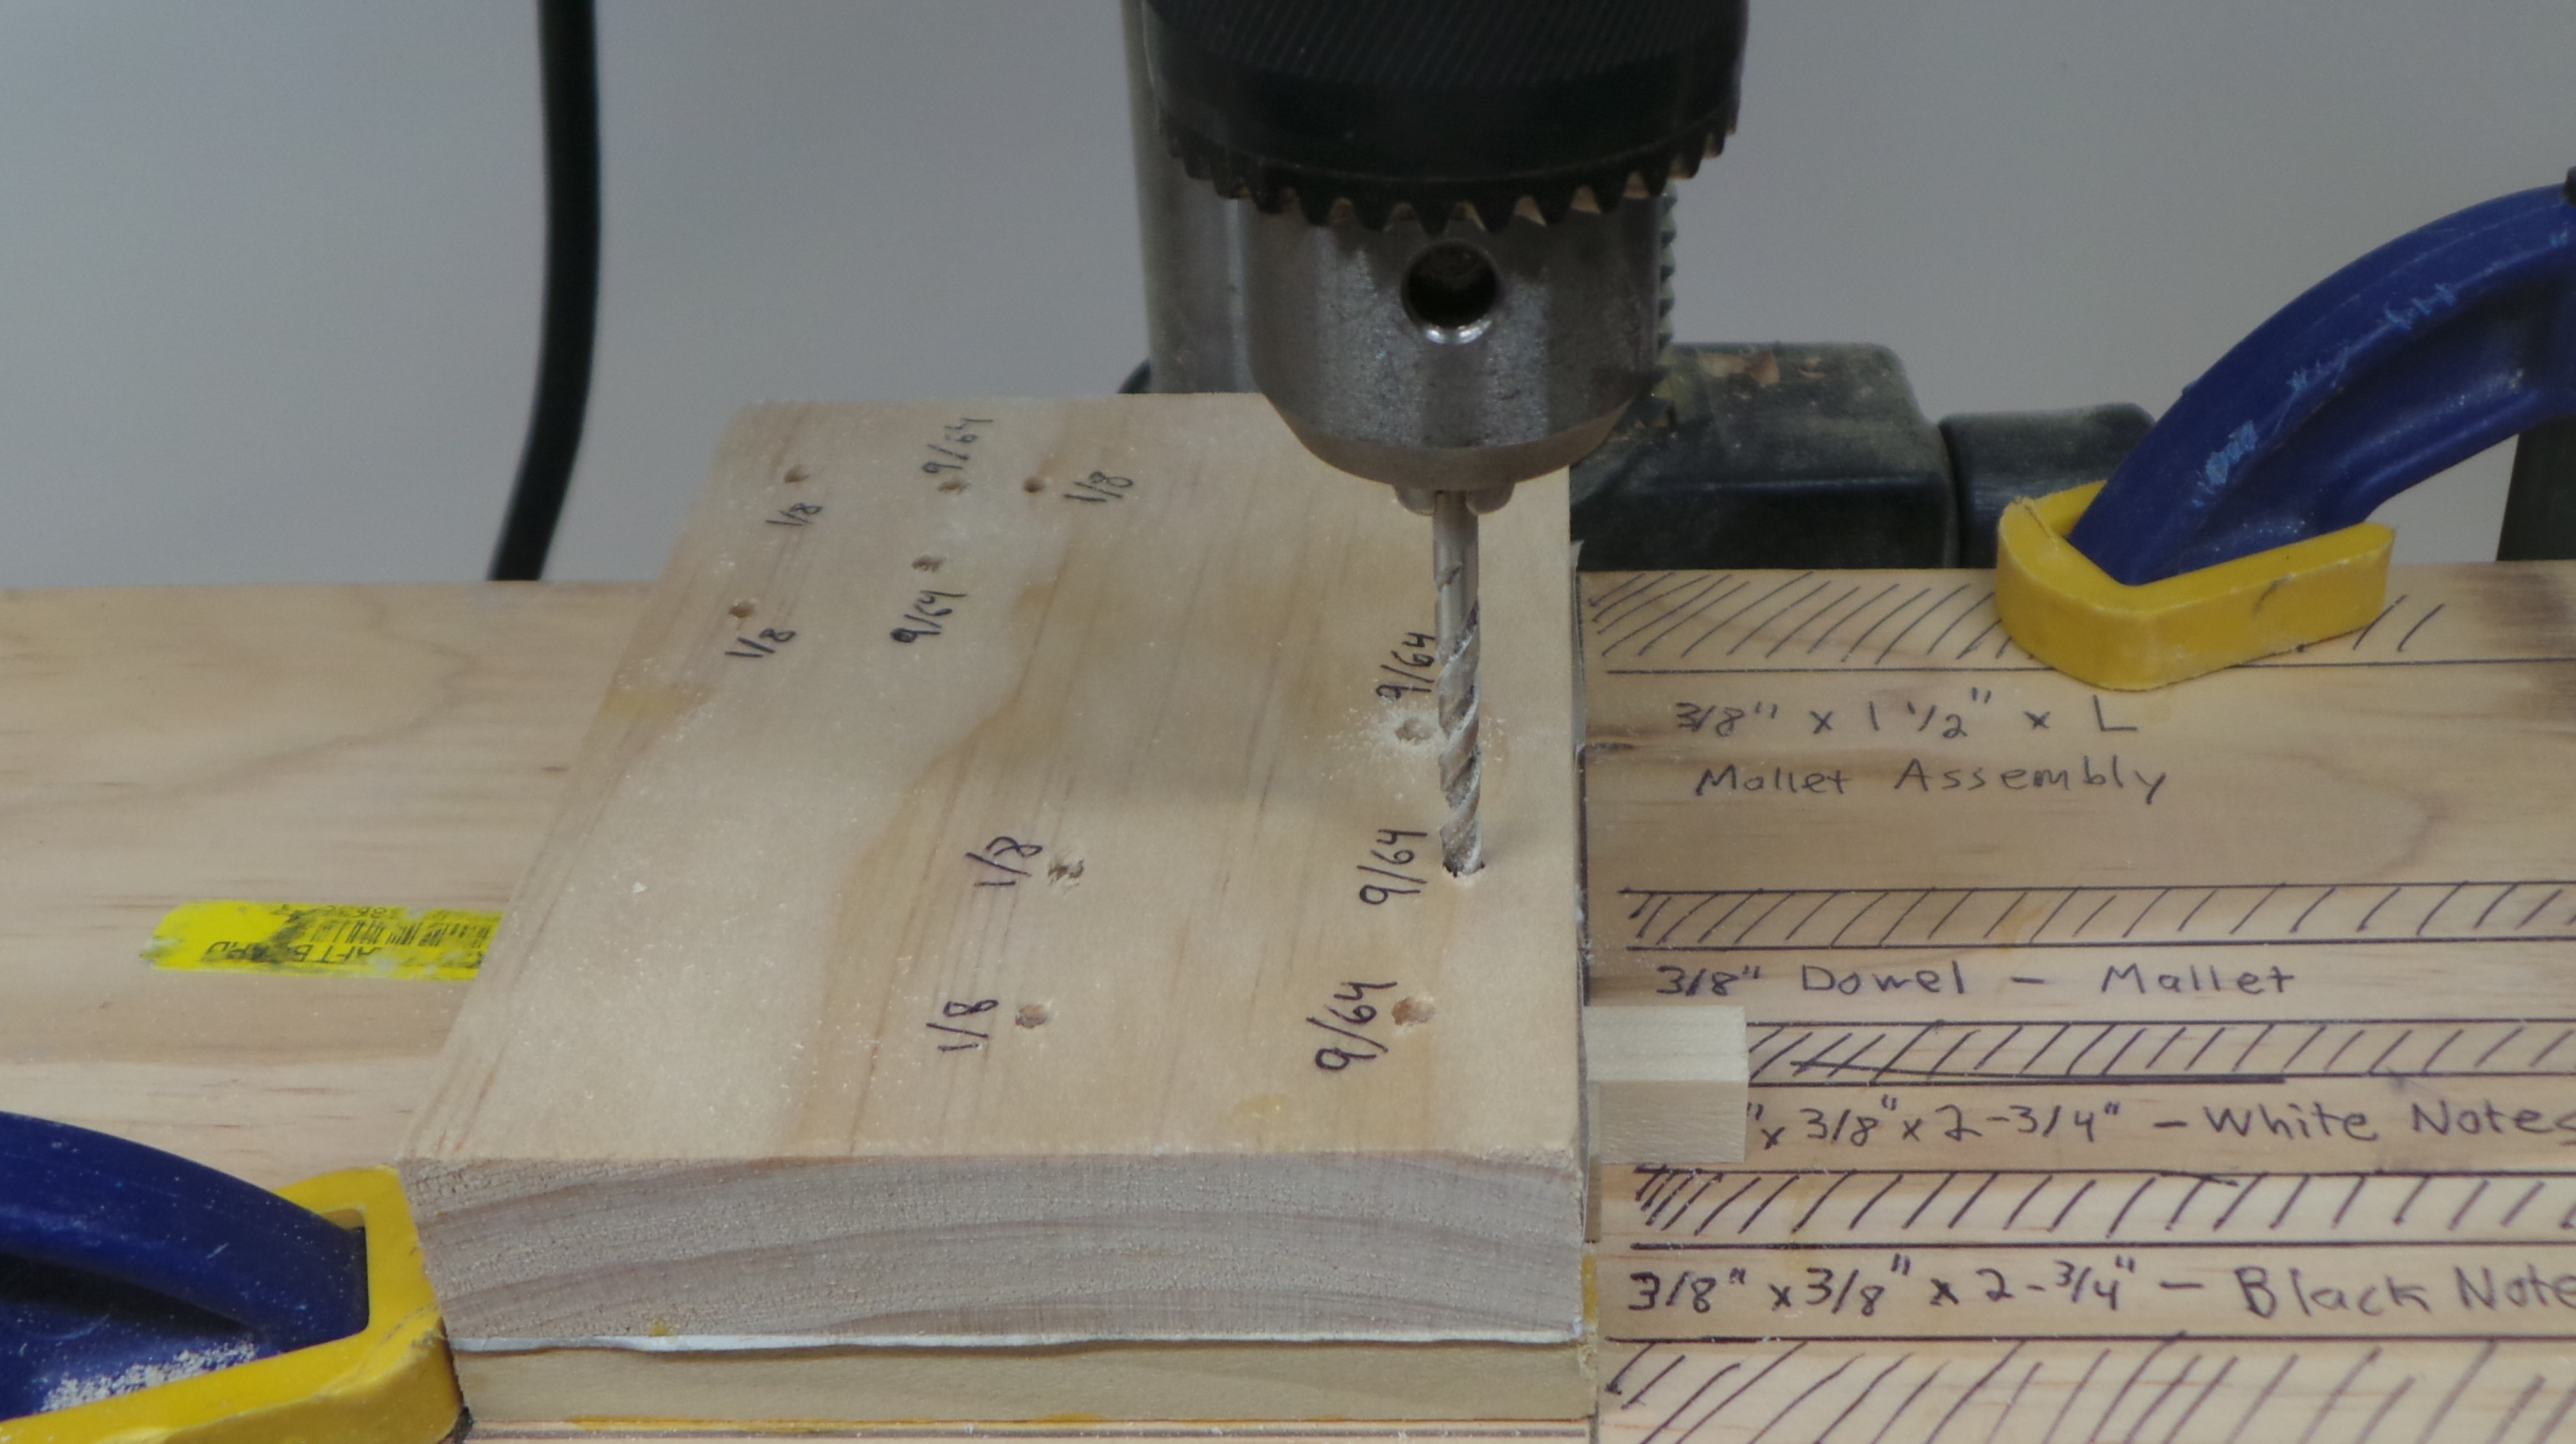
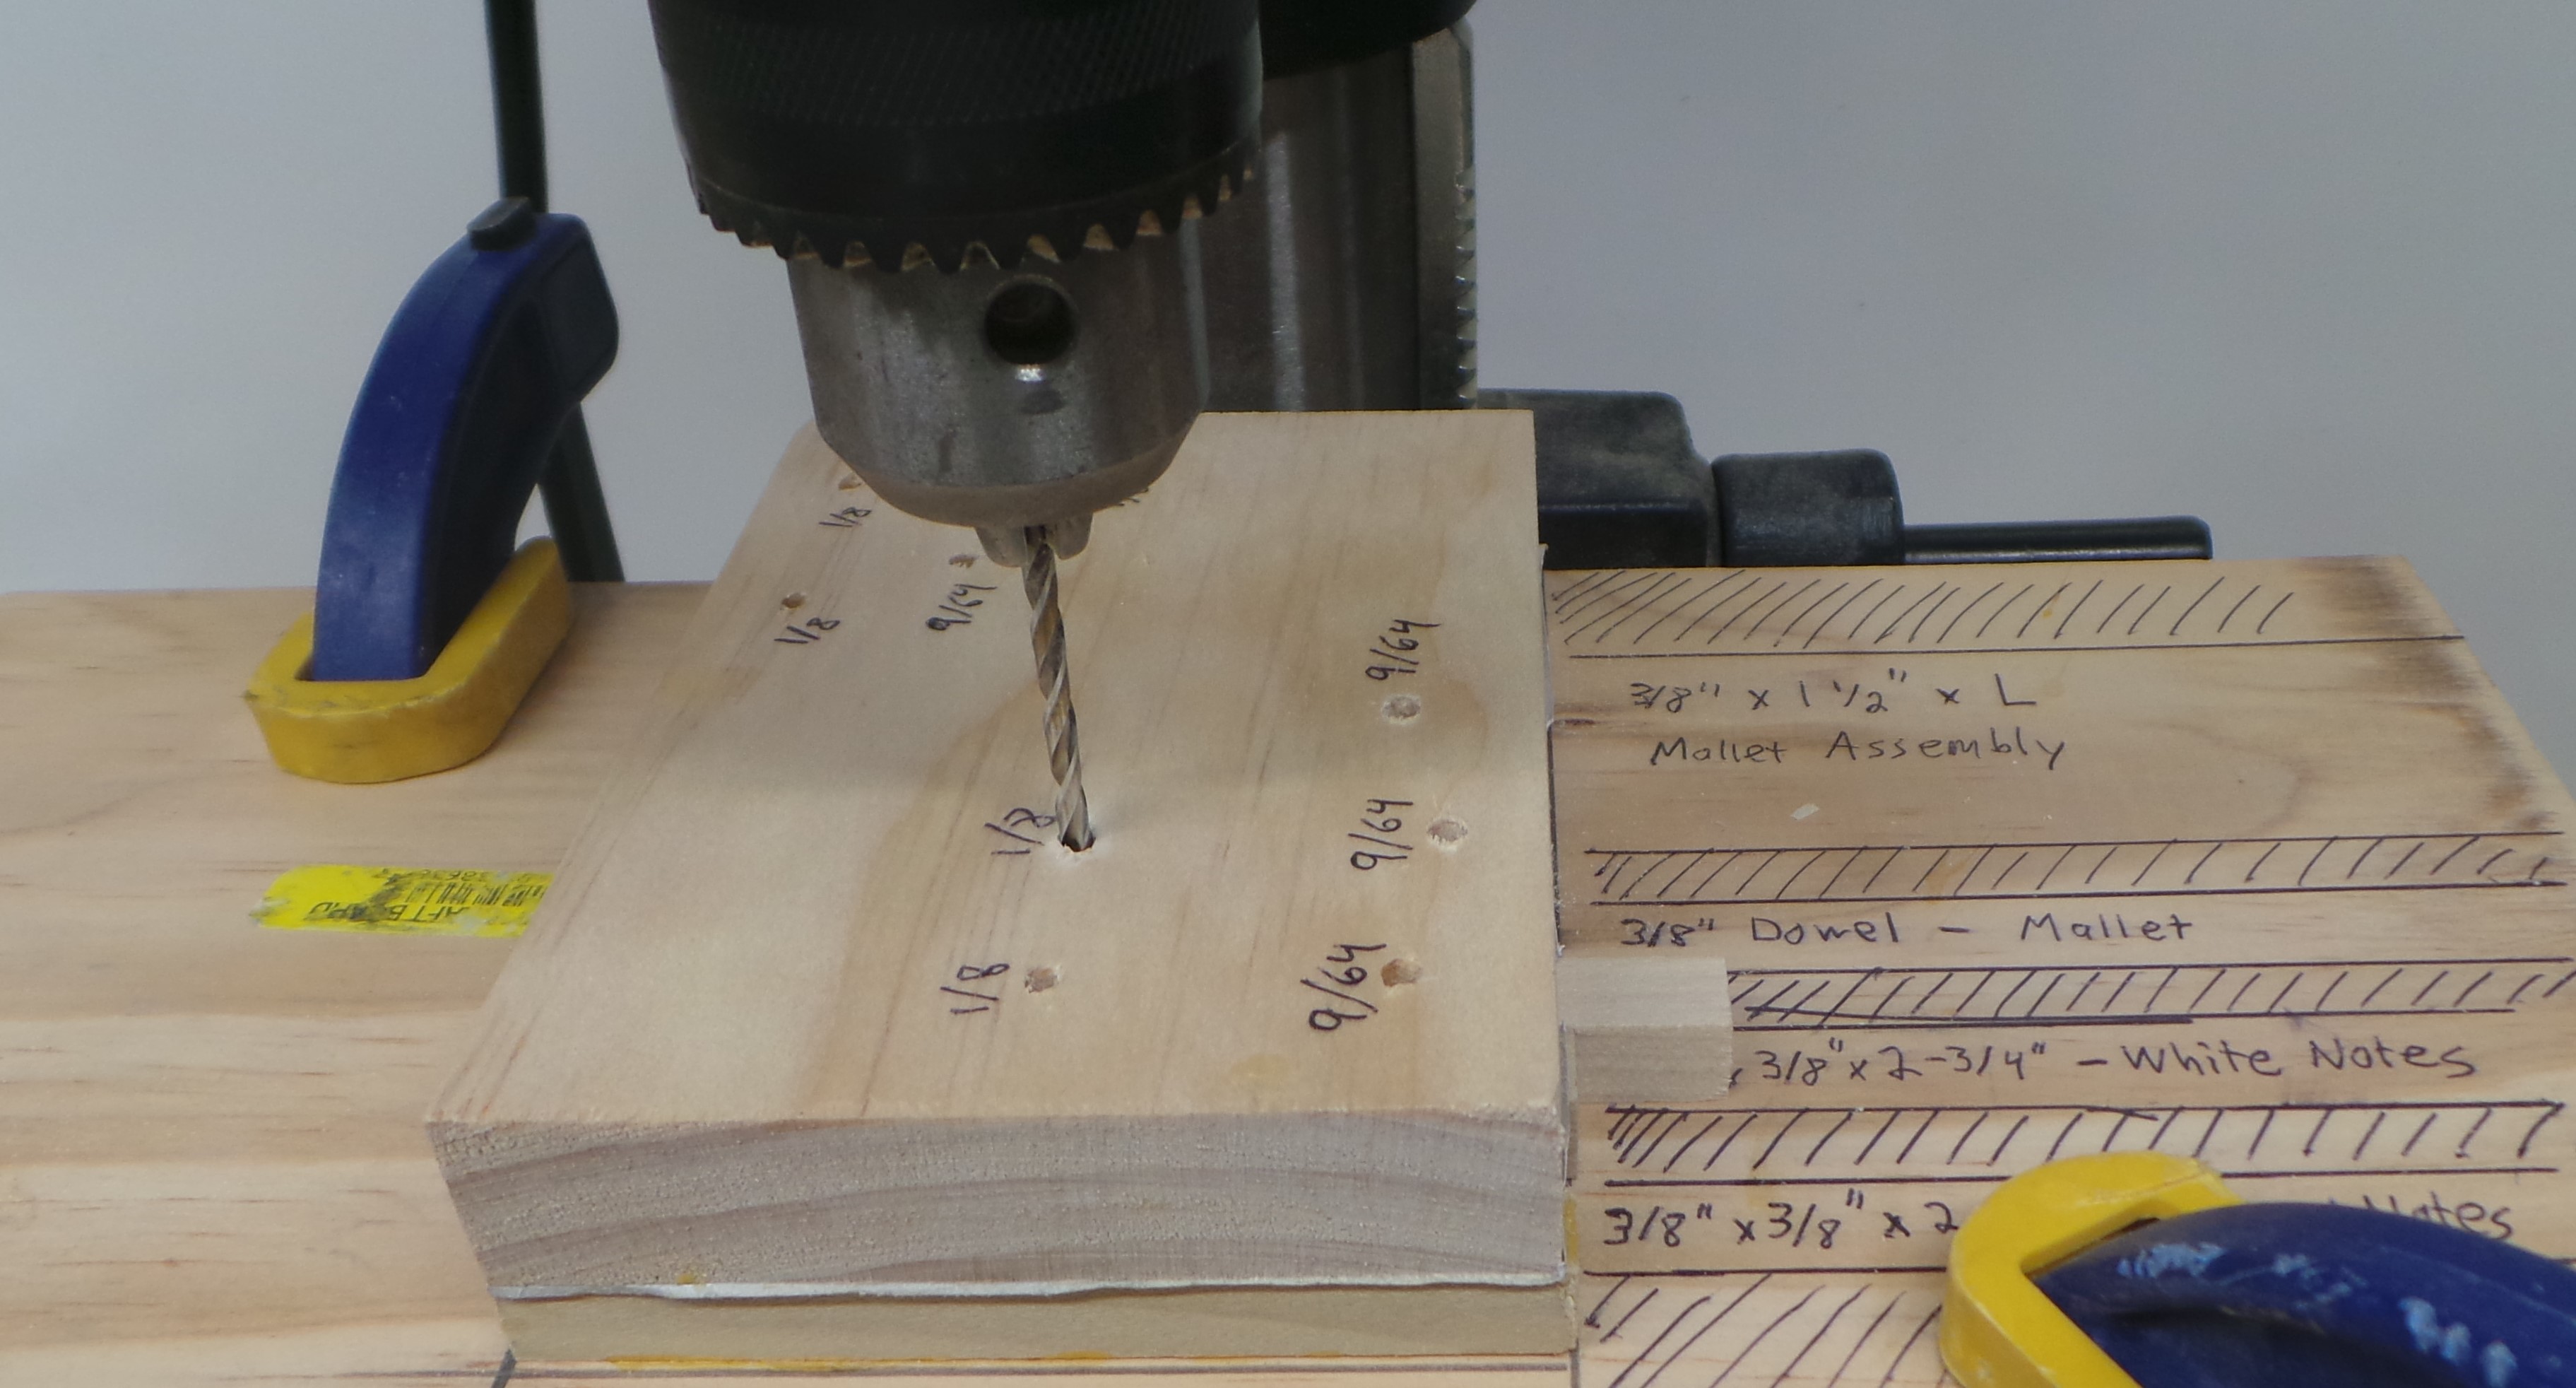
Jig “A” is used to drill holes in the 6-1/2″ x 3/8″ round dowels, and 2-3/4″ x 3/8″ square dowels used for the Mallet Handle and Mallet Support. (See Mallets page)
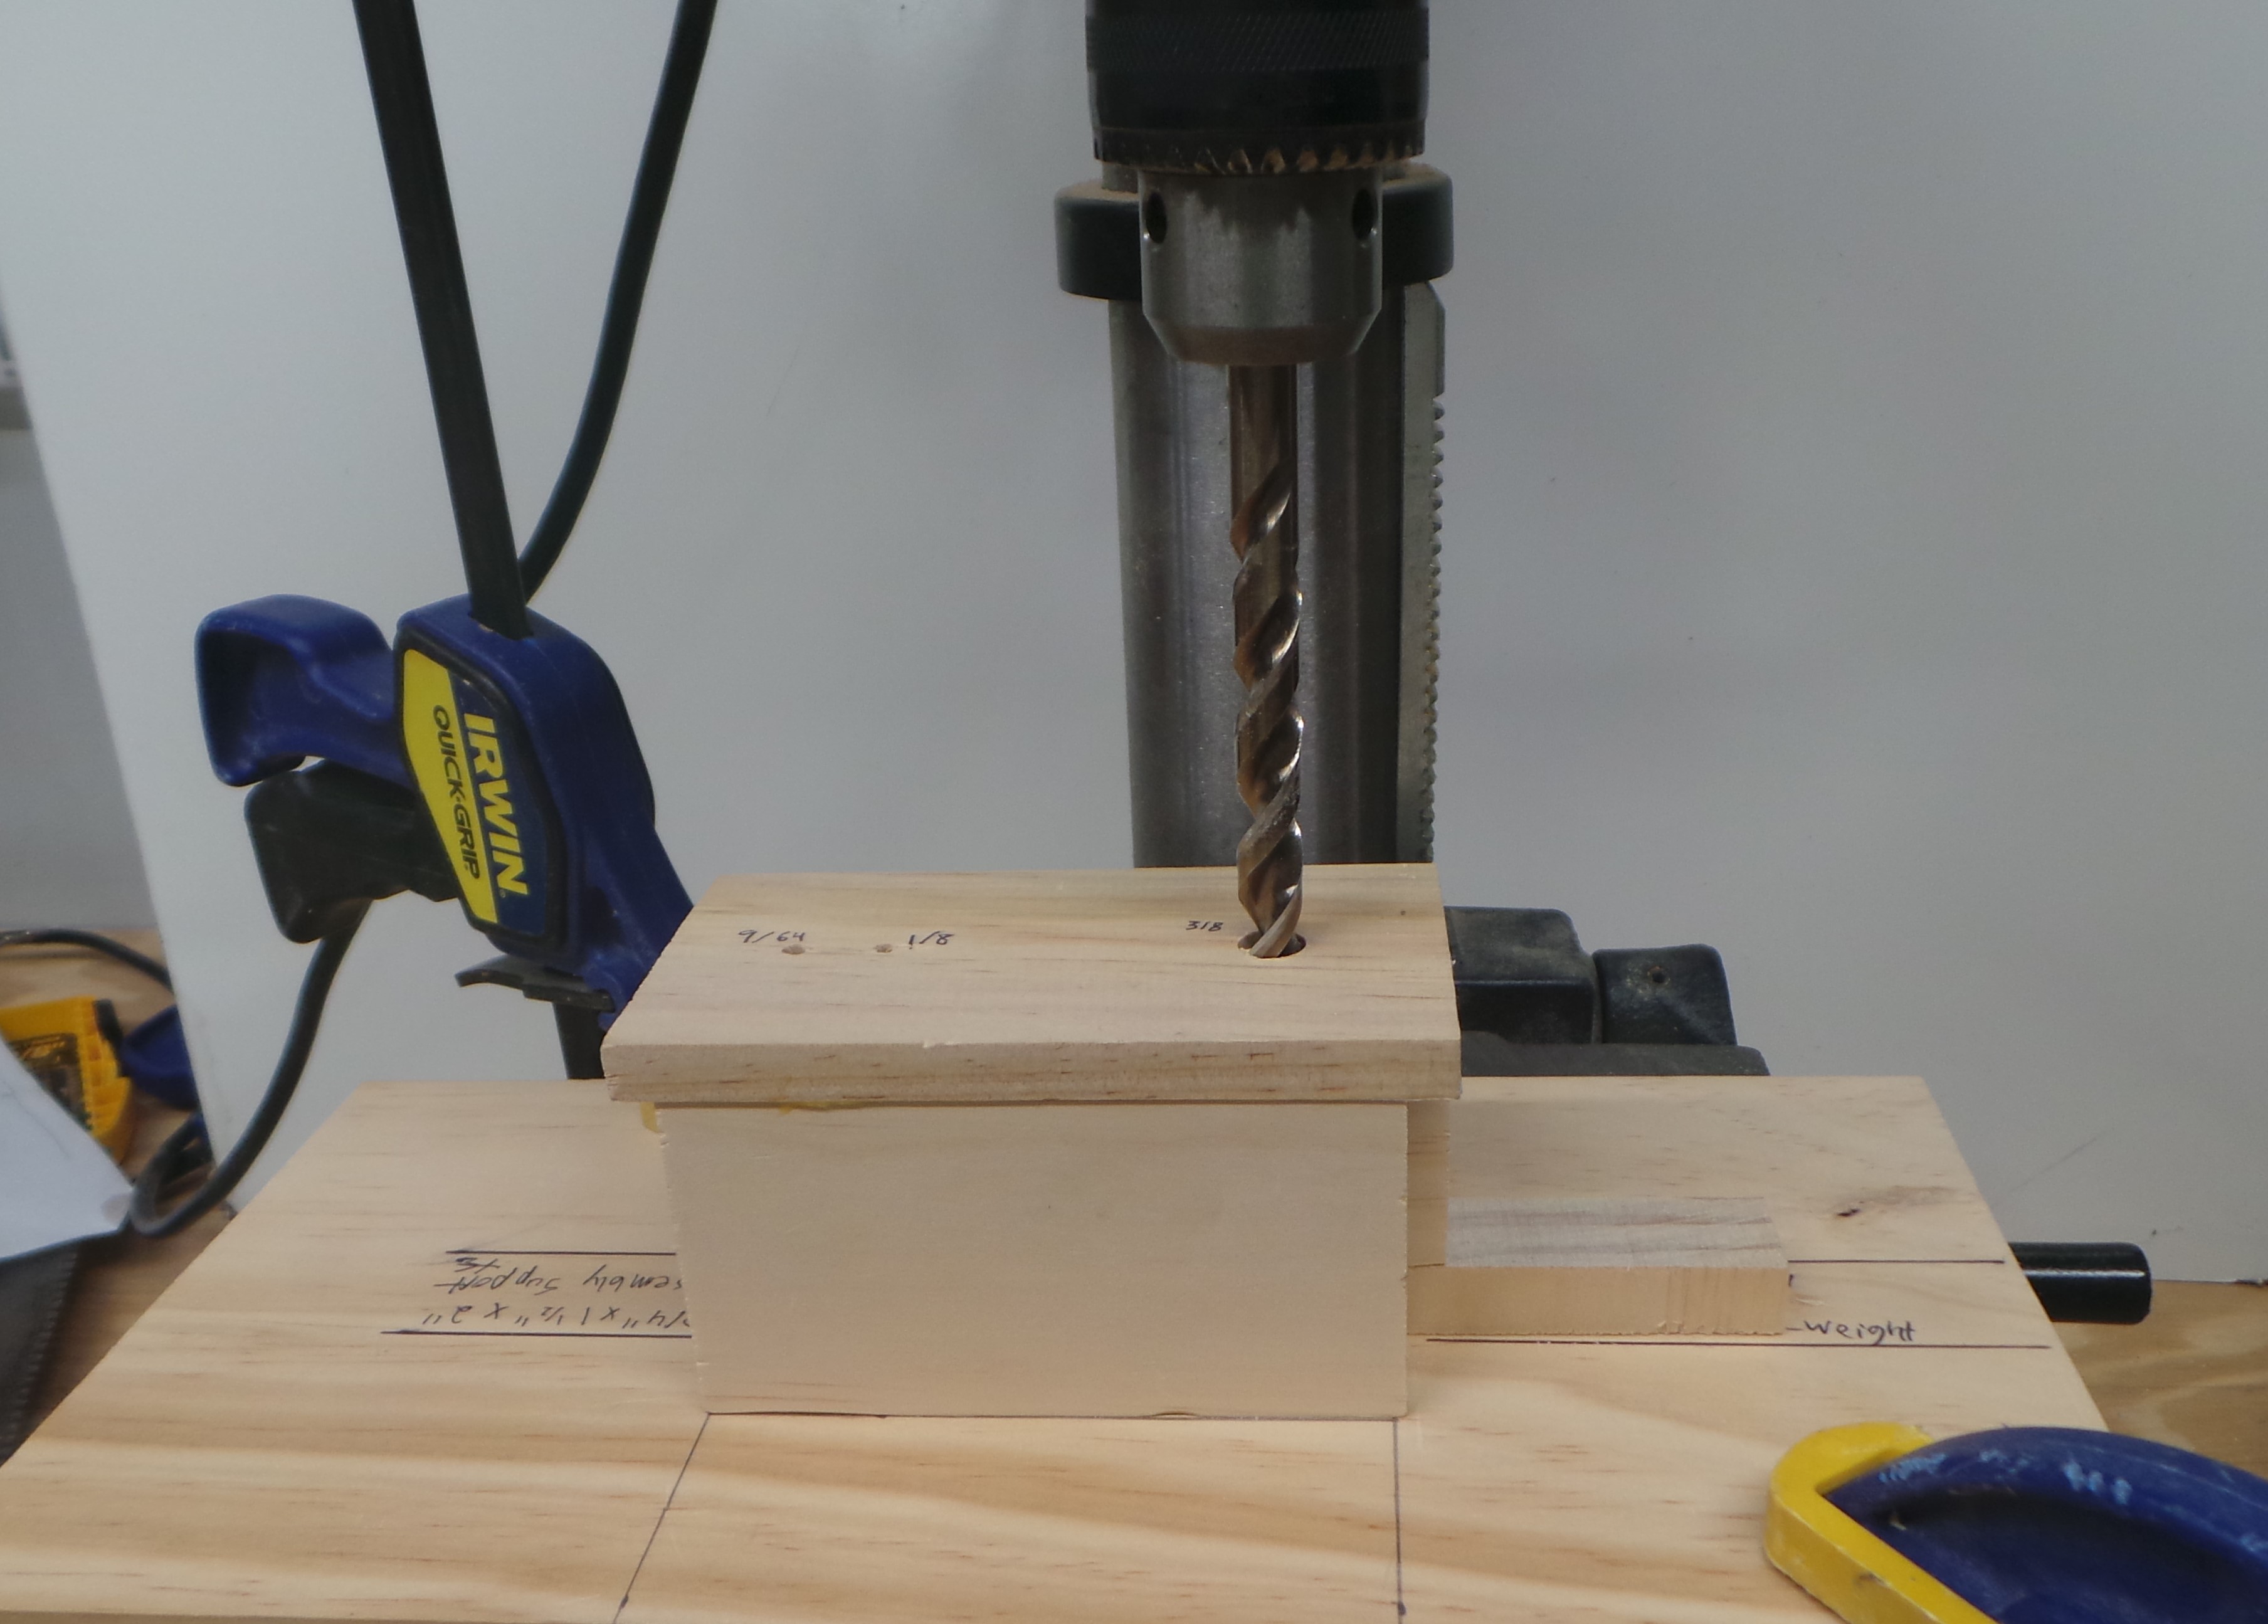
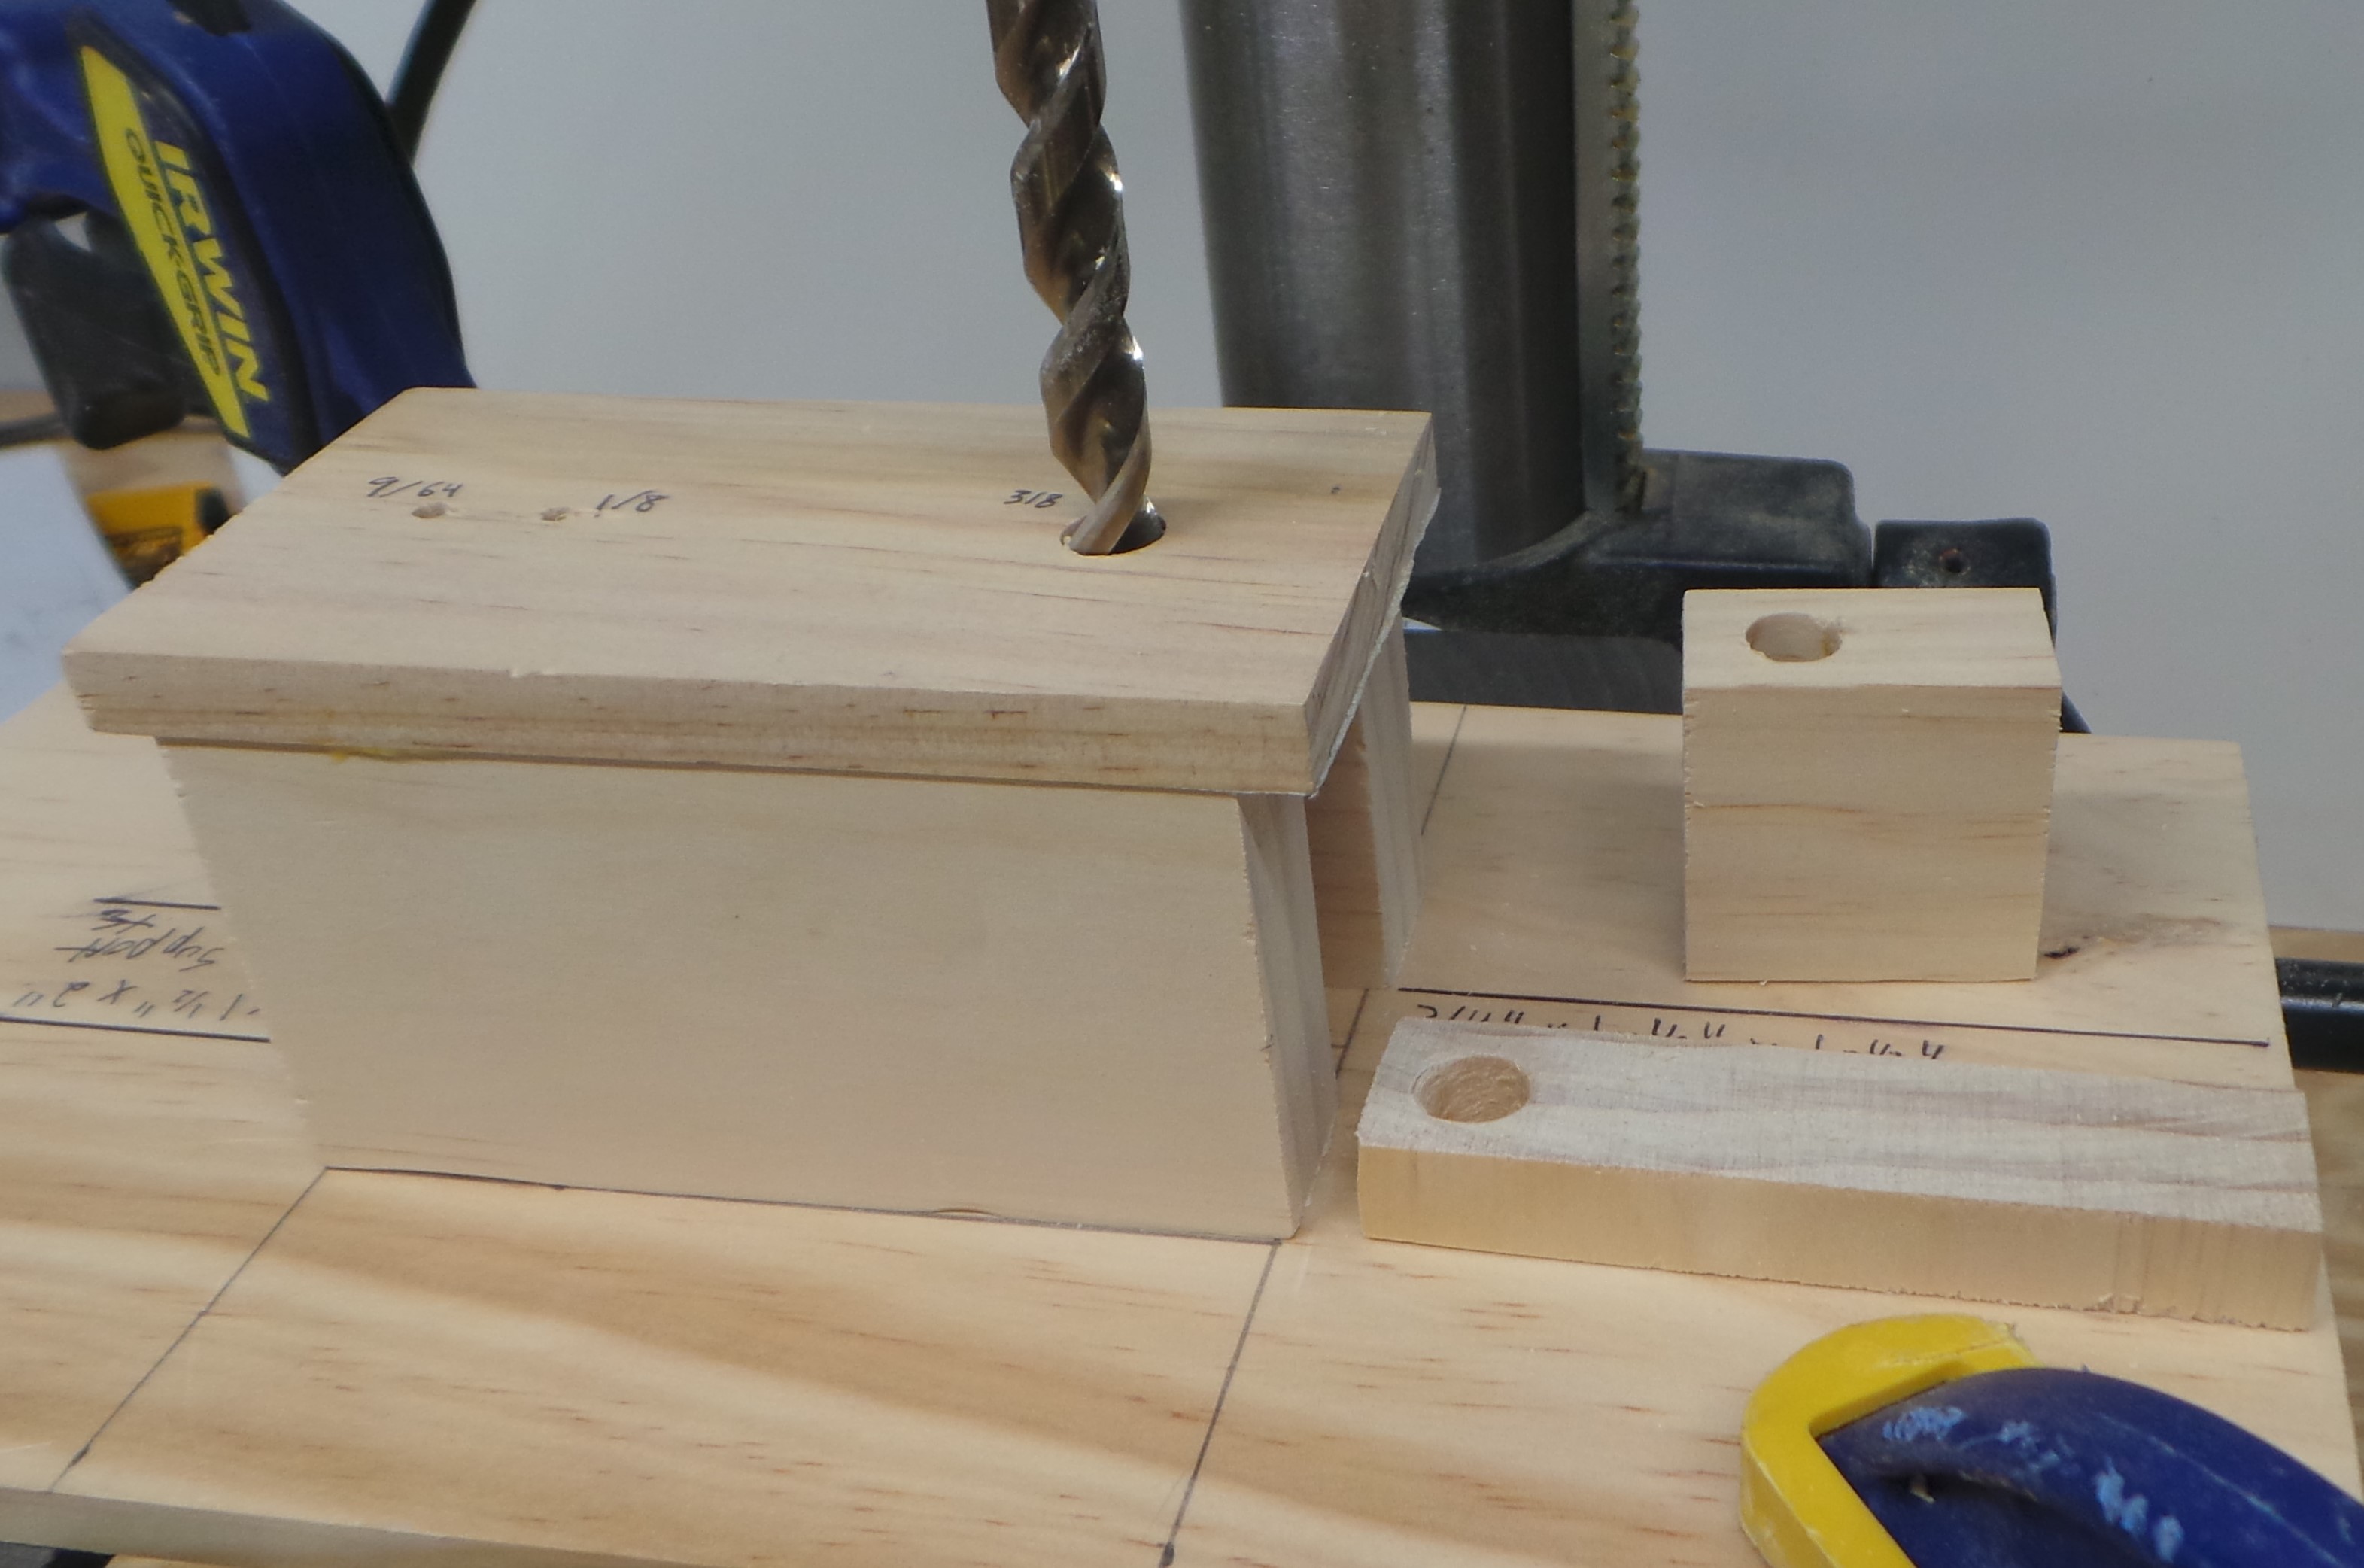
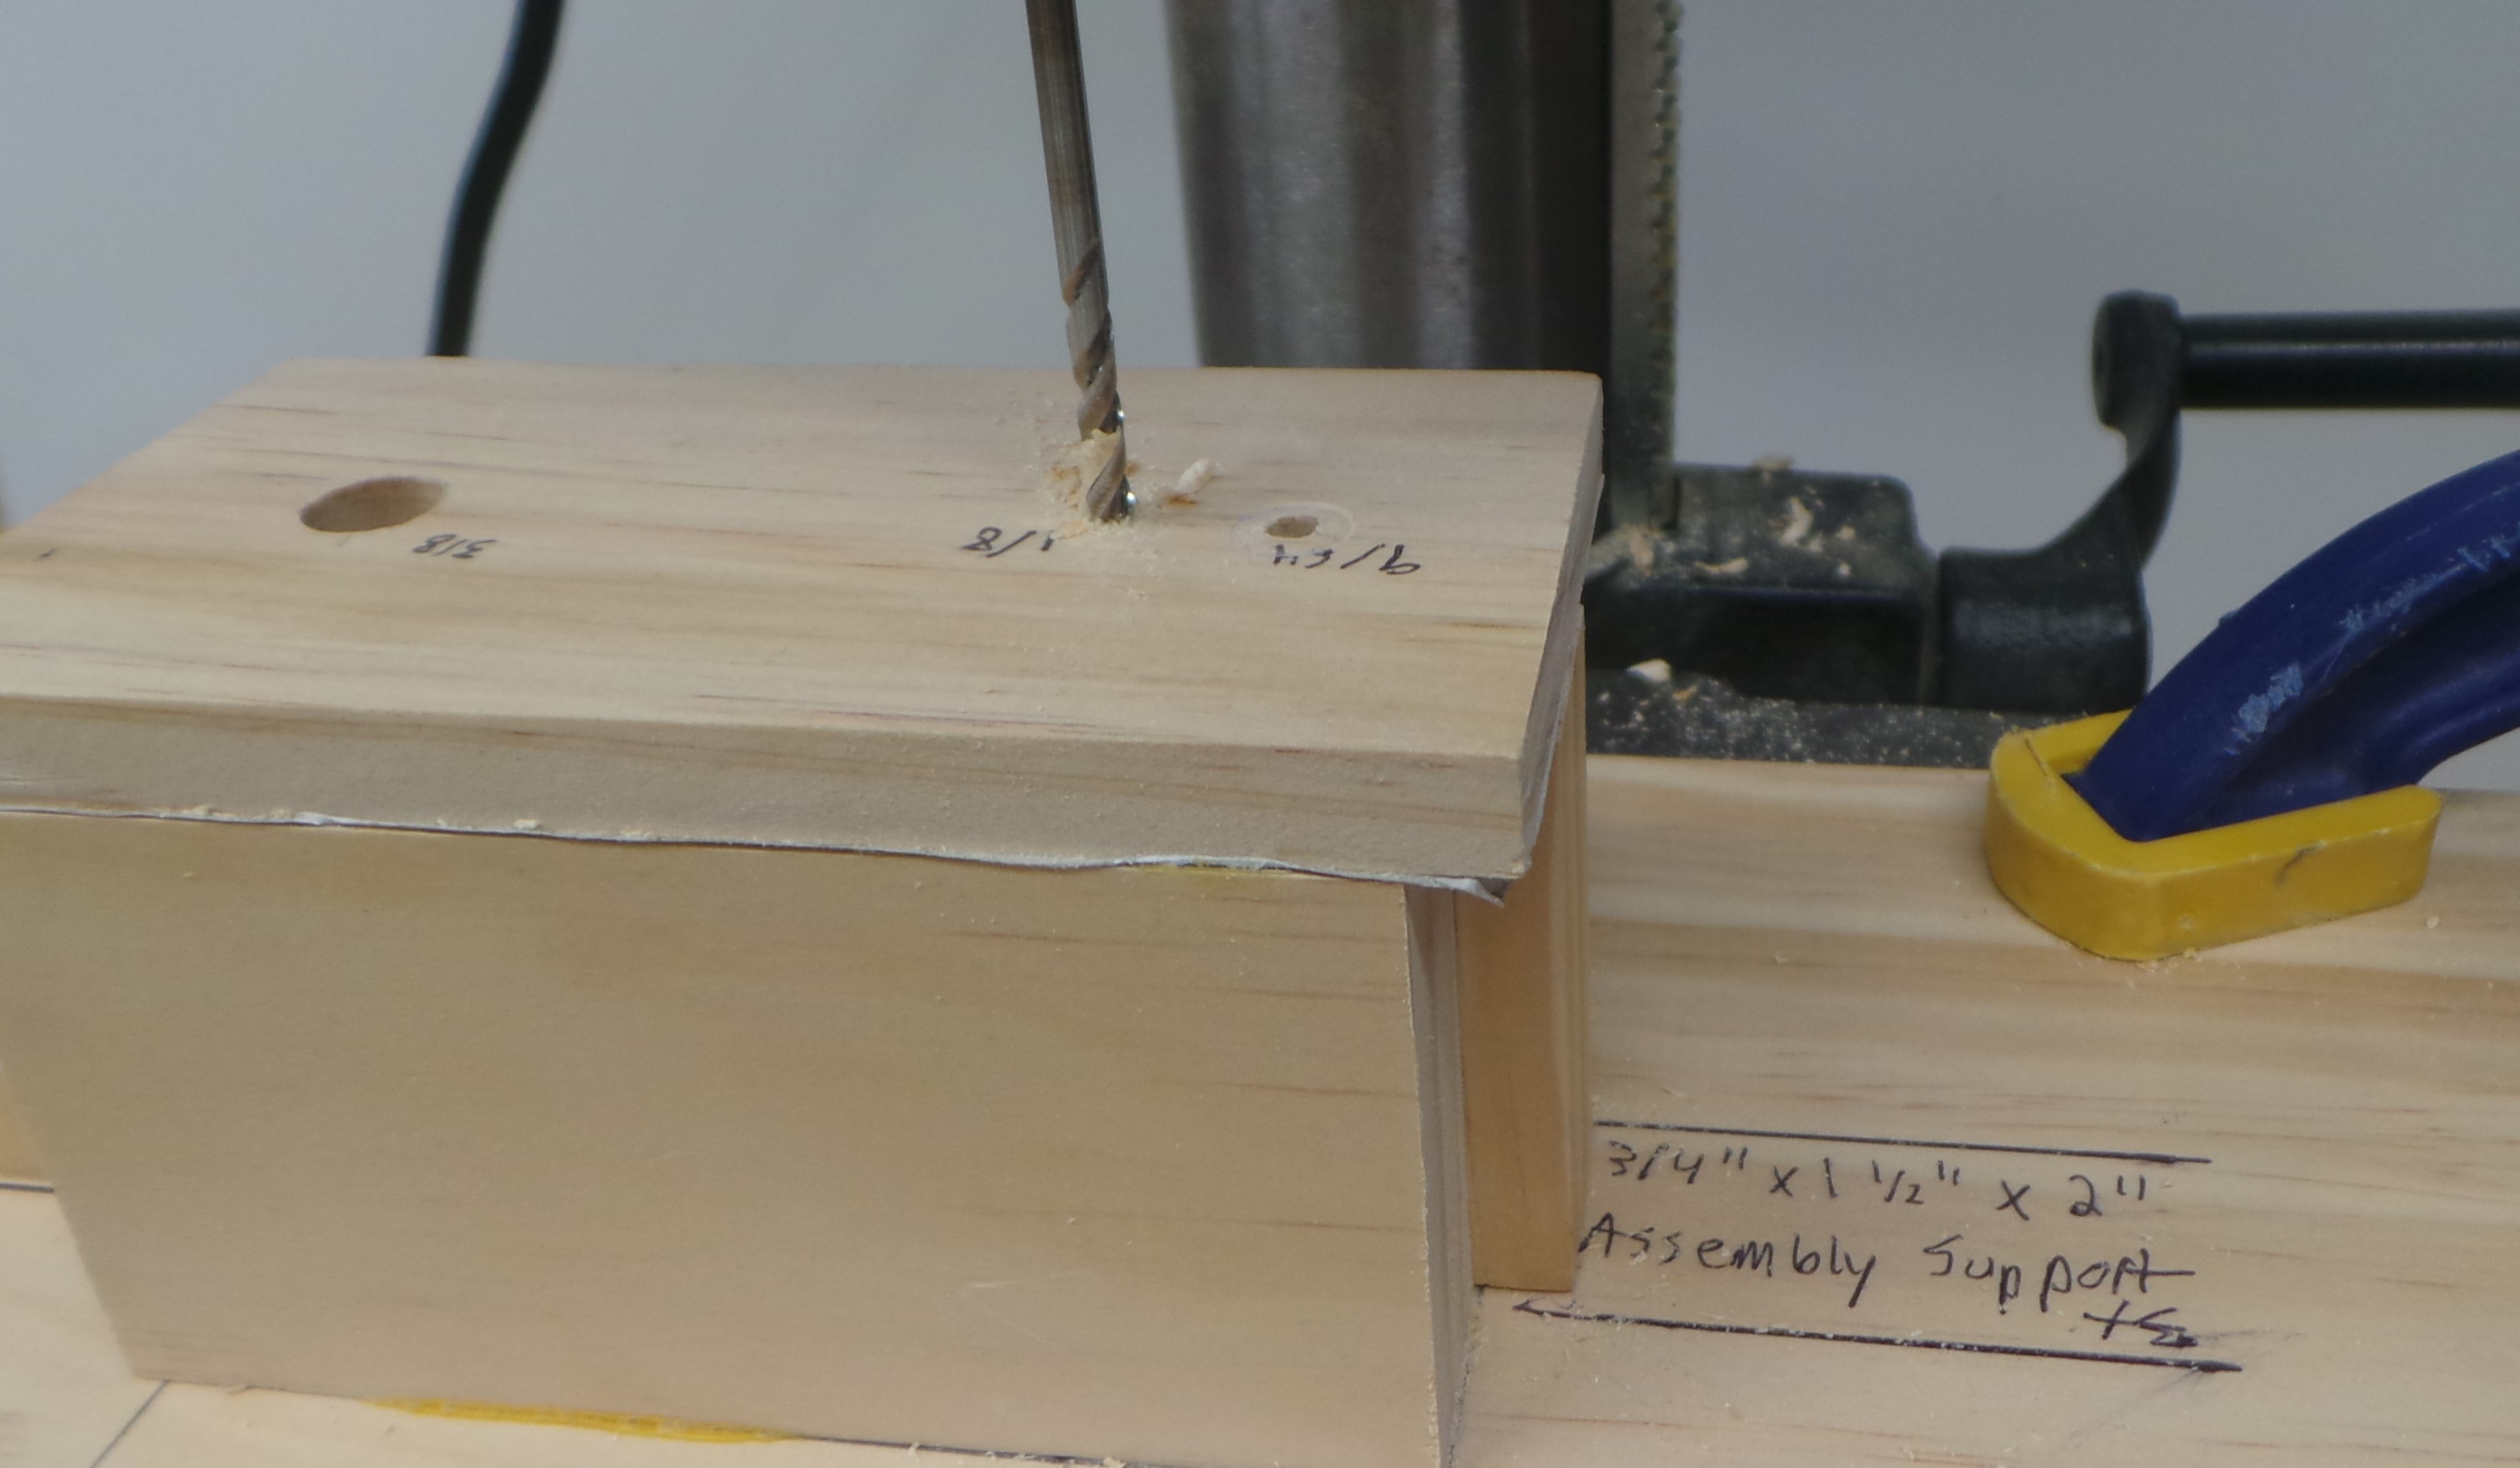
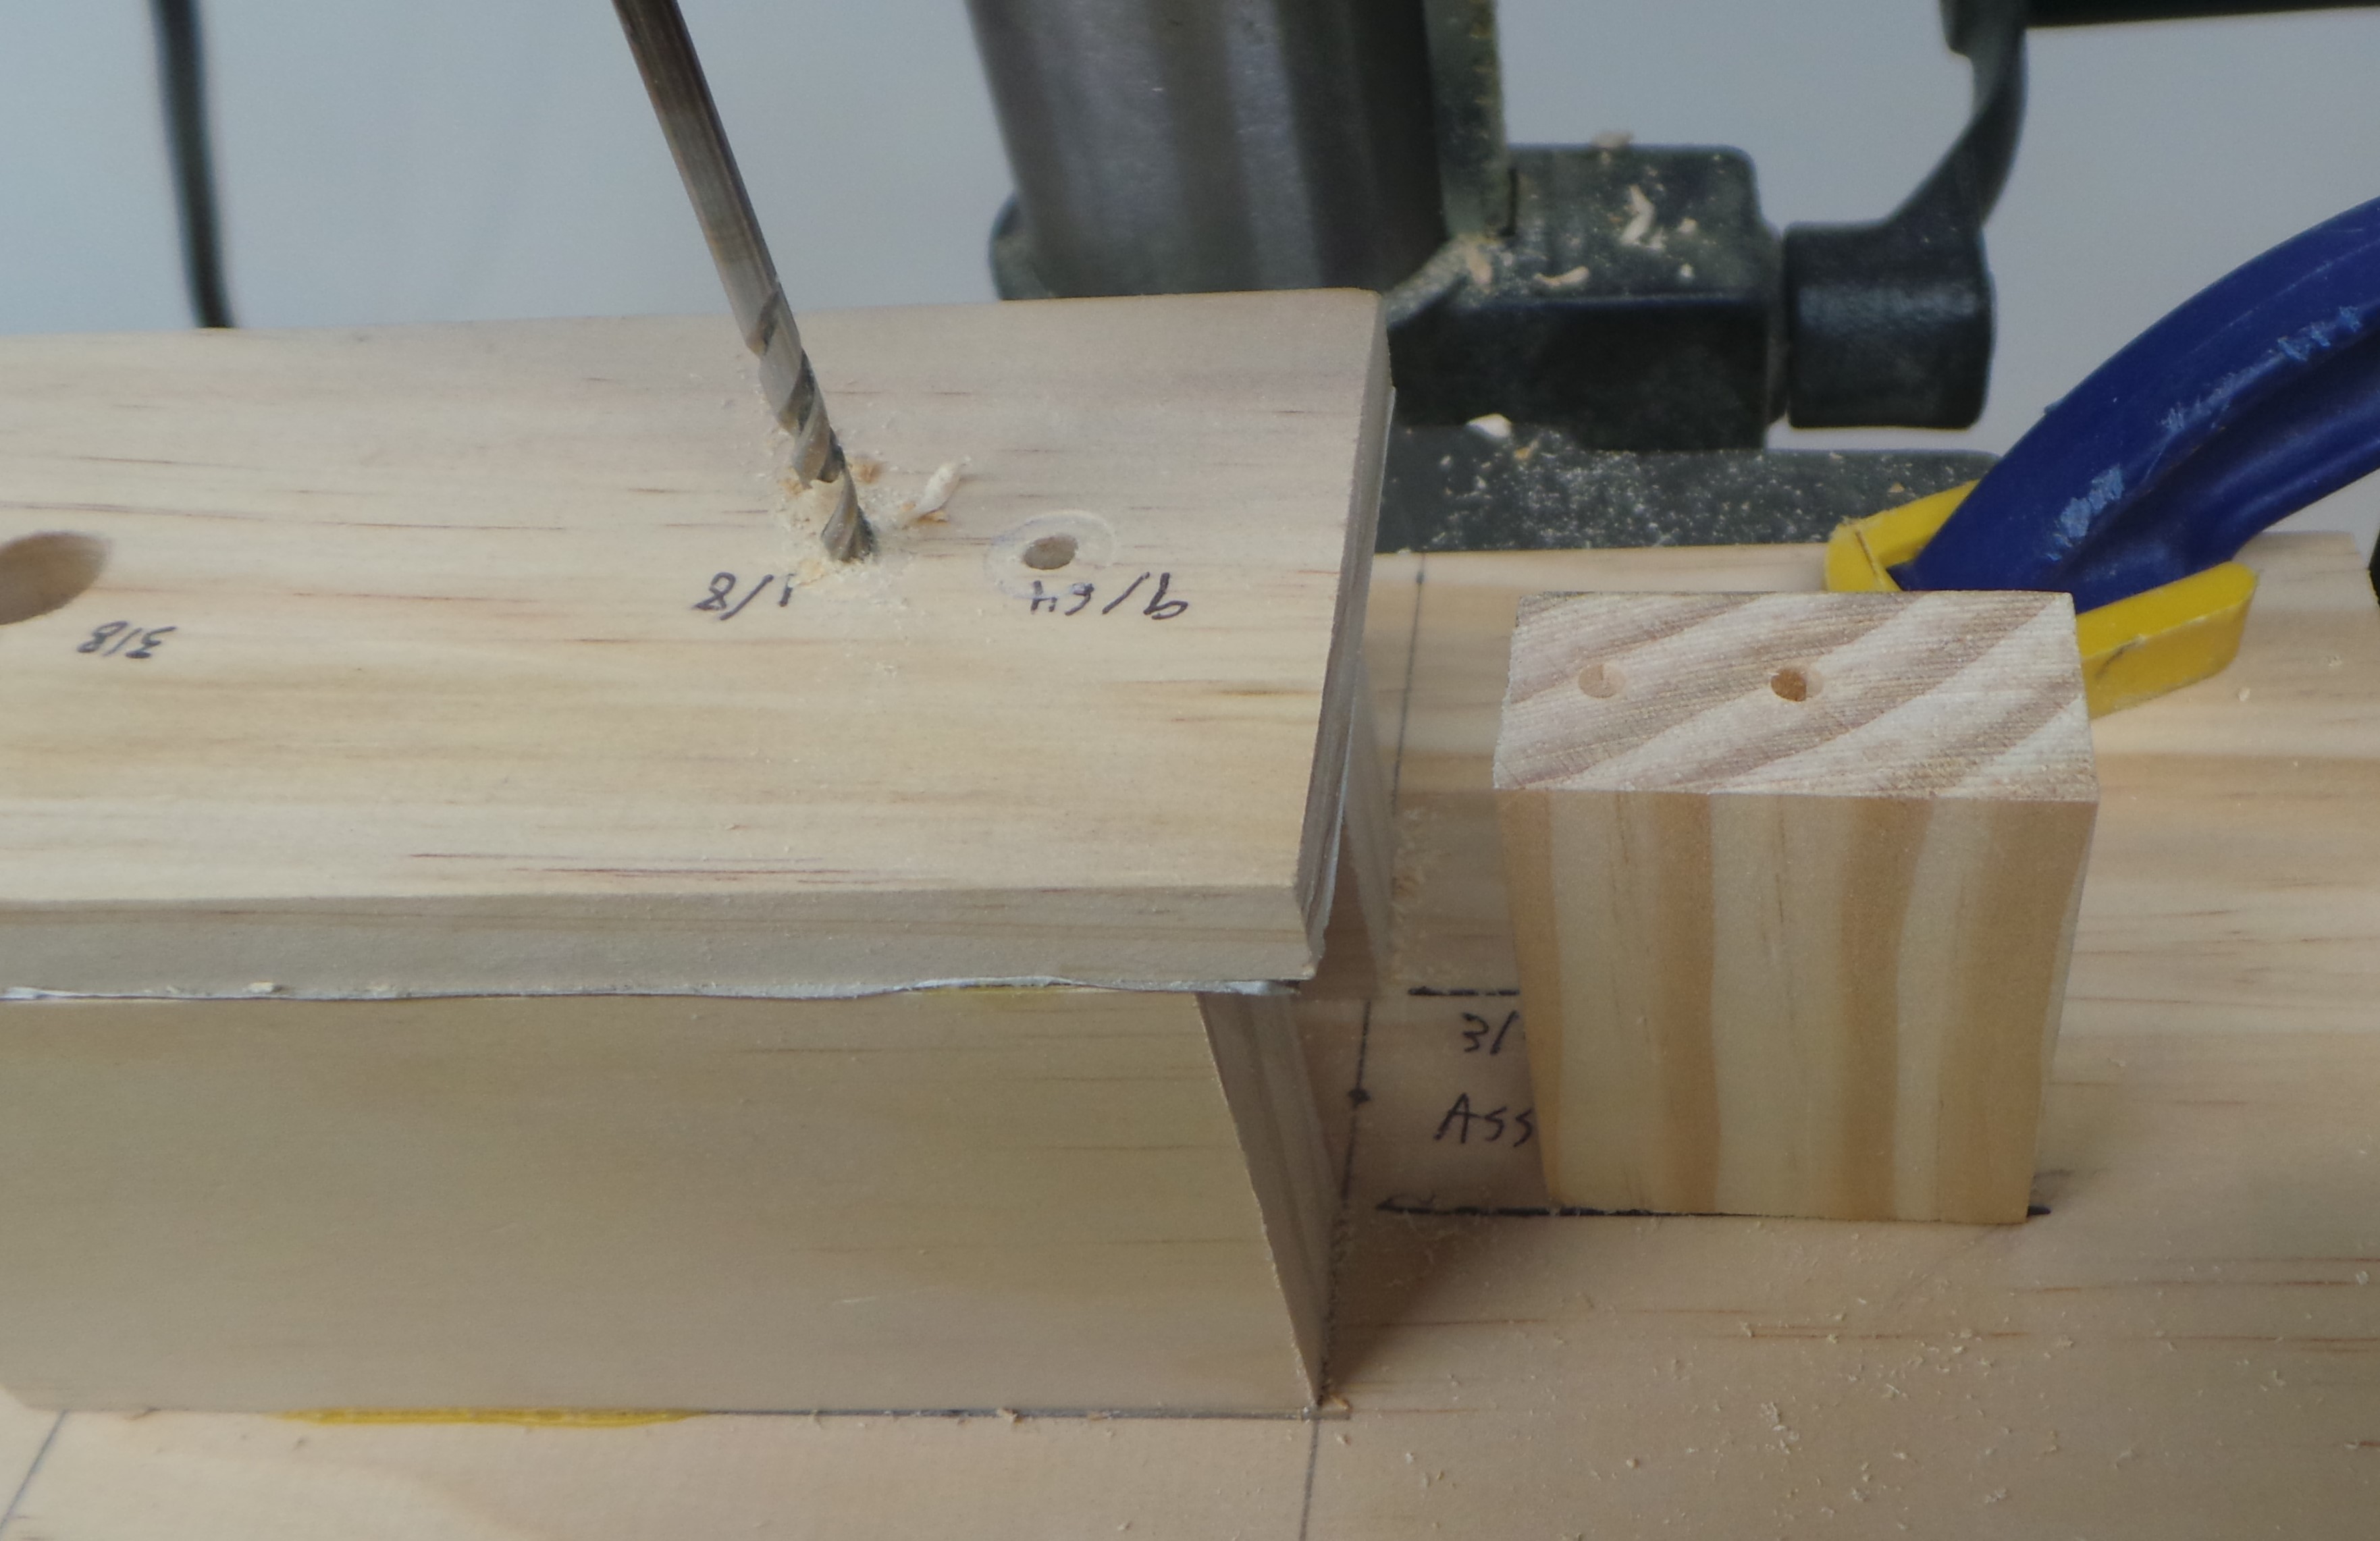
Jig “B” is used to drill holes in the 1-1/2″ x 1-1/2″ x 3/4″ pieces used as the Mallet Counterweight (see here), and the 2″ x 1-1/2″ x 3/4″ used as the End Support (see Solenoid Assembly page).
Download the Template for Jigs “A” and “B” and print on full-sheet adhesive label paper, such as the Avery 5265 Shpping Labels. Note that the template has each jig pattern twice.
For Jig “A”, the following pieces need to be cut:
- 3/8″ x 3-1/2″ x 2-3/4″ (Top)
- 3/8″ x 5-1/2″ x 12″ (Bottom)
- 3/8″ Square Dowels of lengths: 3-1/2″, 3-1/2″, 3″, 2-1/4″, 1″, and 1″ (Middle)
For Jig “B”, but the following pieces are needed:
- 3/8″ x 2-1/4″ x 4″ (Top)
- 3/8″ x 5-1/2″ x 12″ (Bottom)
- 3/4″ x 2″ x 4″ (Qty 2) (Middle)
- 3/4″ x 2″ x 1-1/2″ (Middle)
These pieces don’t all necessarily have to be the exact dimensions above. These are just some sizes that have worked for me.
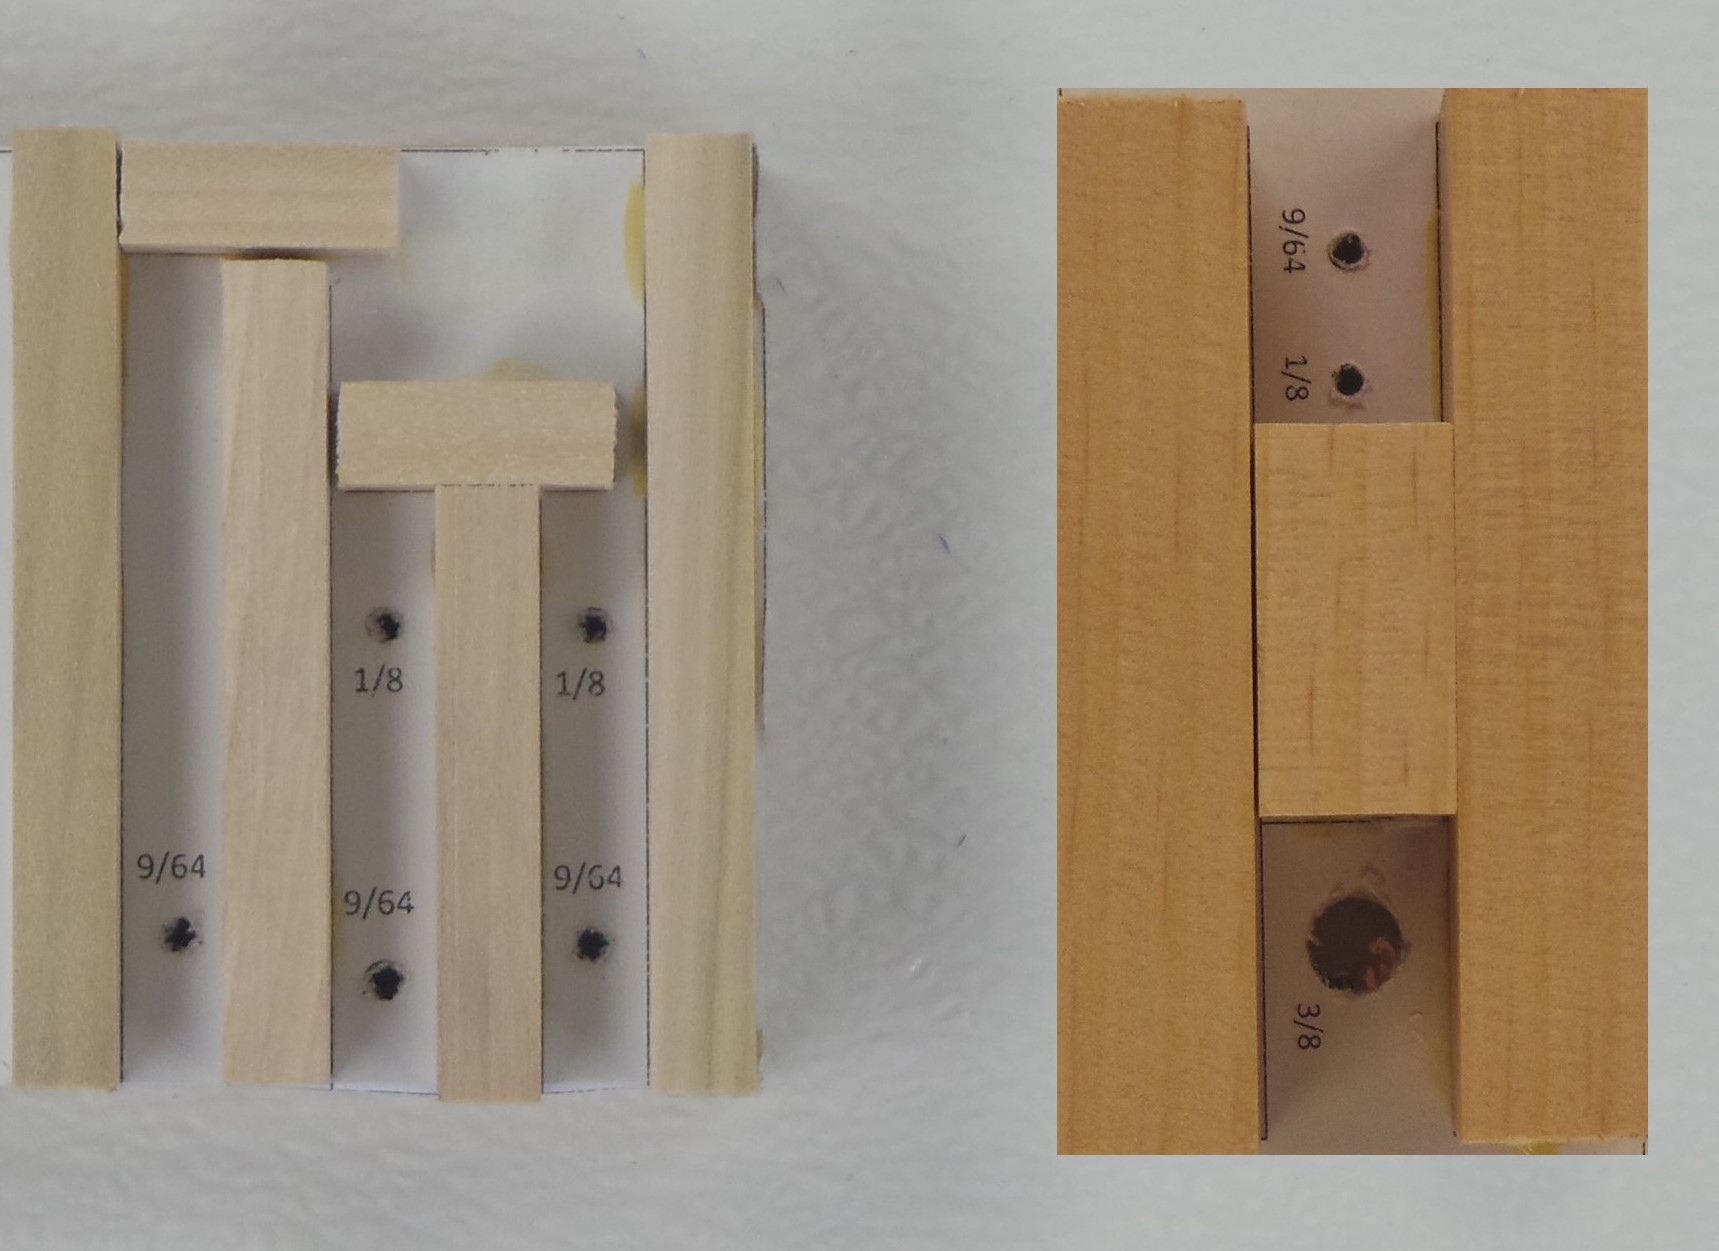
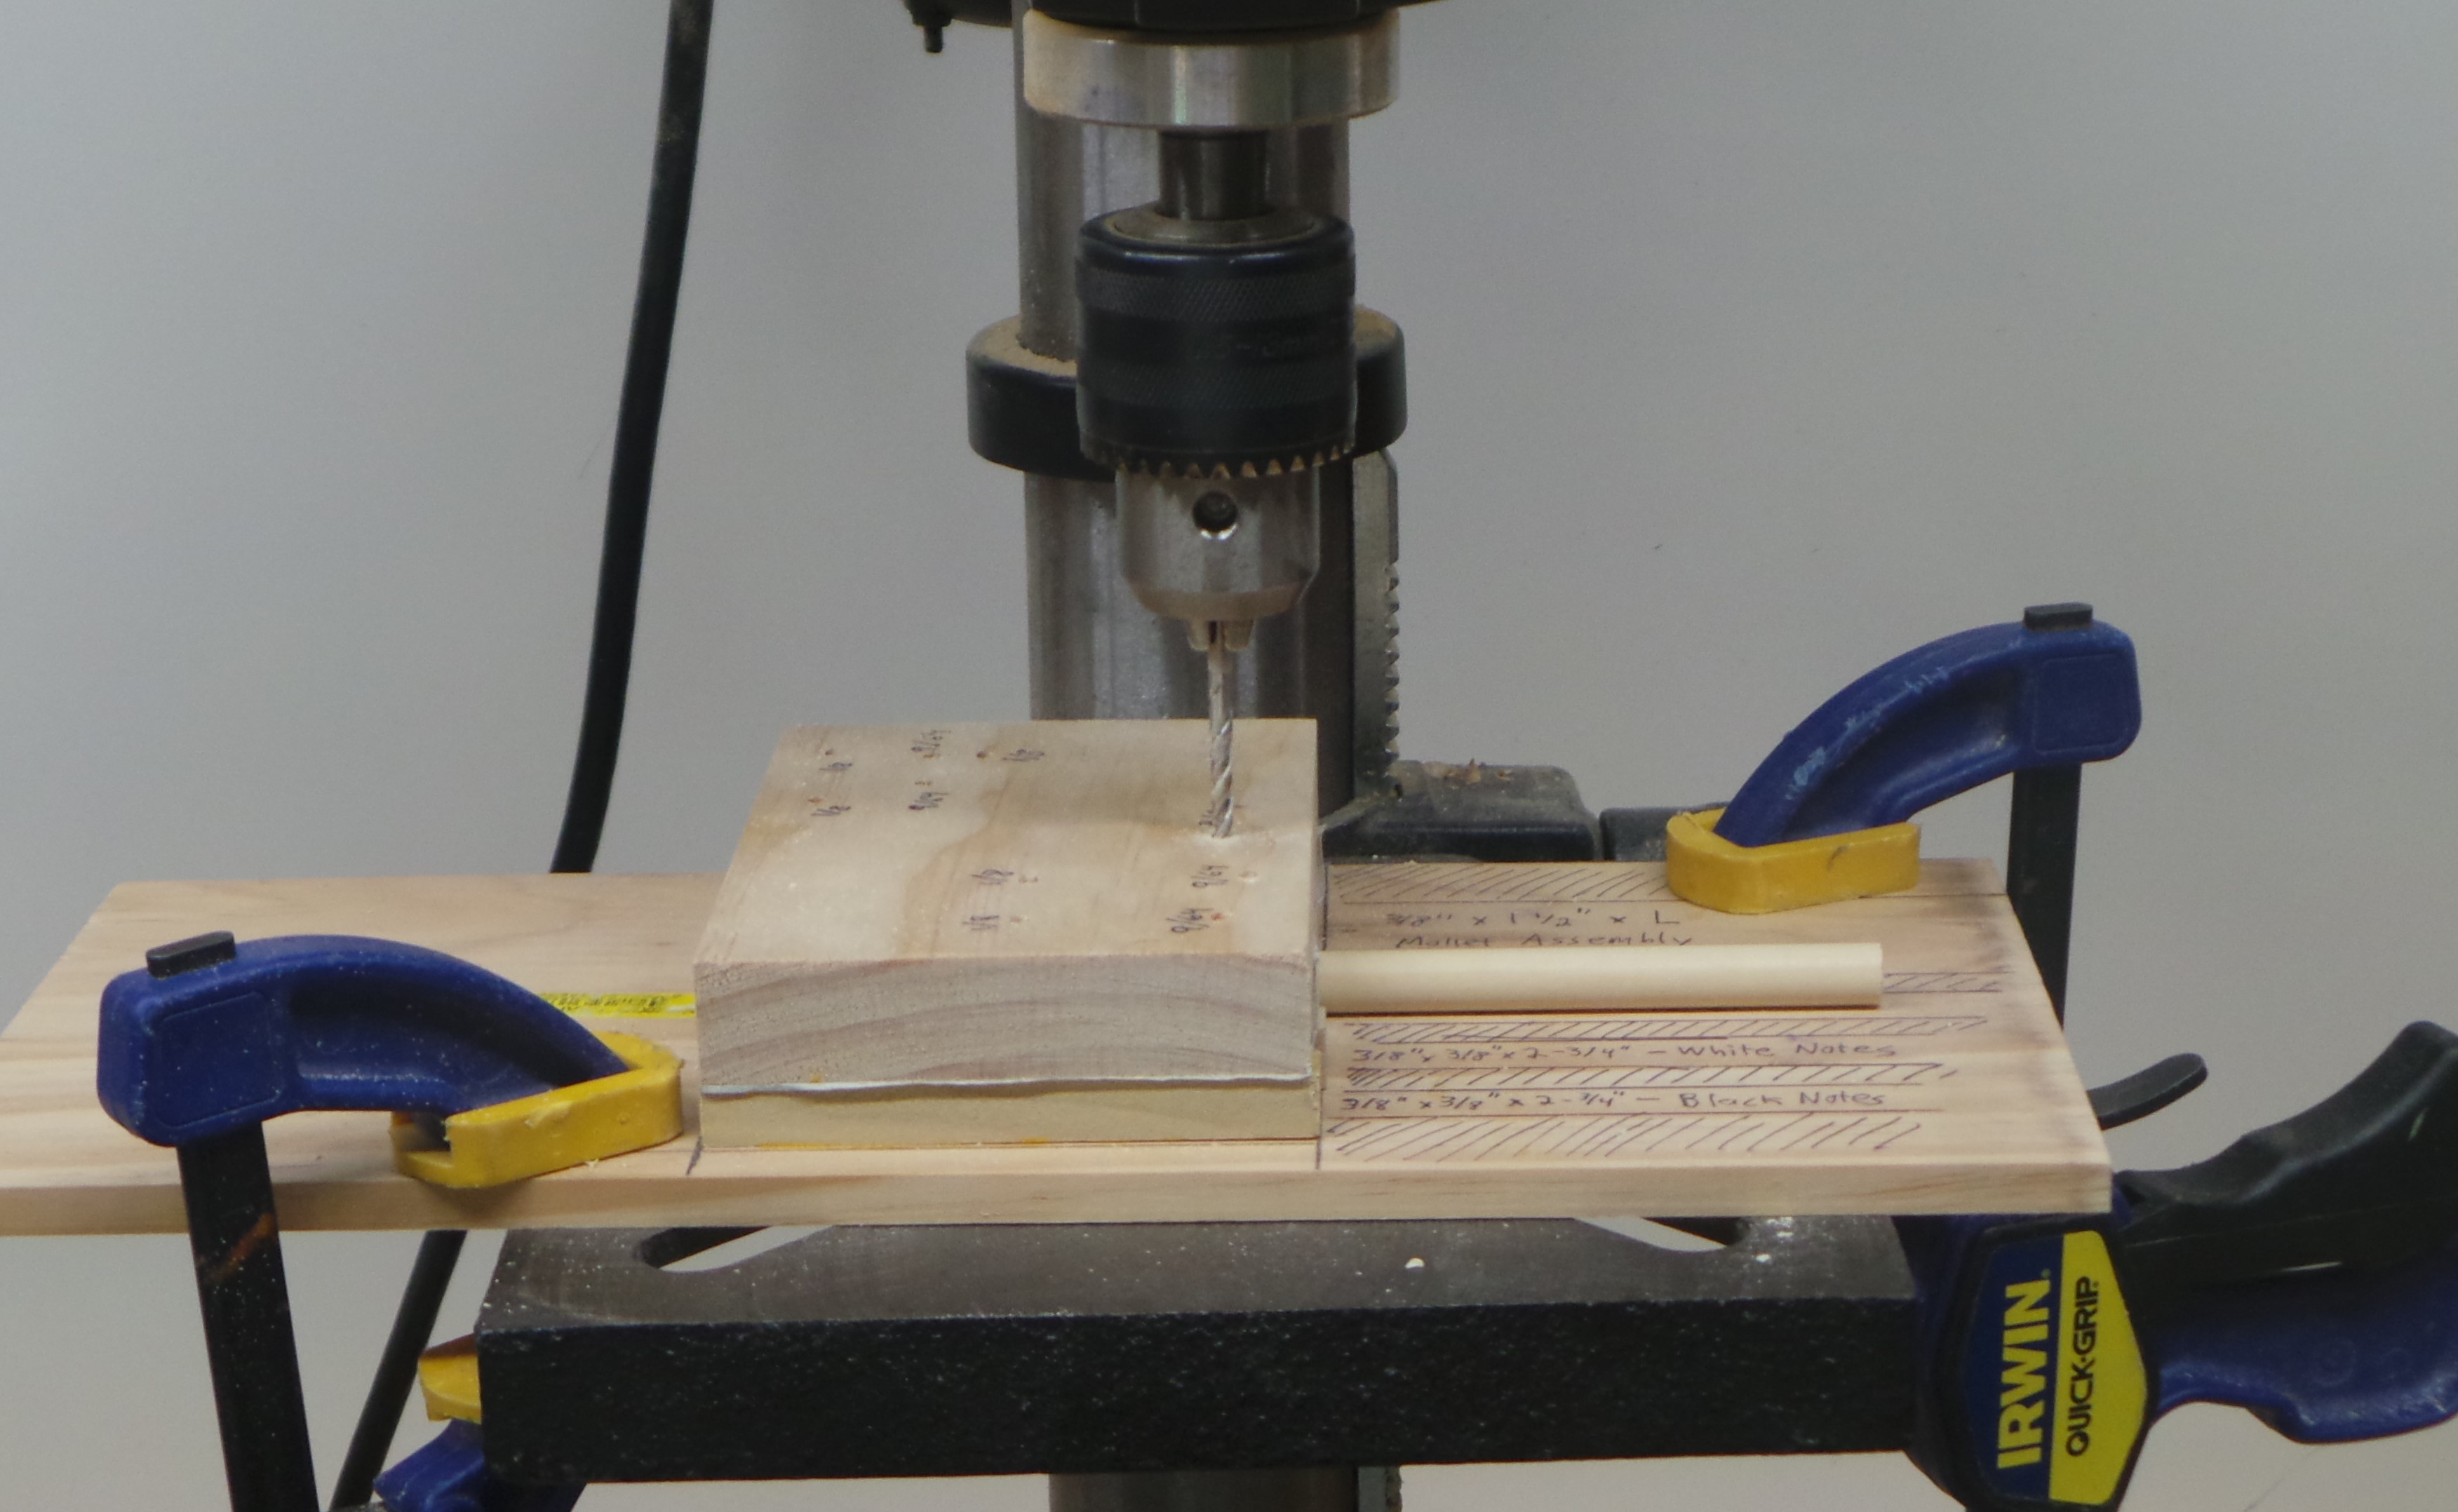
Affix one of the templates to Top board for each jig. The template should completely cover the board. Drill the holes in the diameter indicated by the template (e.g. 1/8″, 9/64″ or 3/8″). It is very important that the holes be drilled vertically, and at the position indicated by the template. Any errors in drilling the holes here will be amplified when using the jig to drill the holes for the mallet pieces.
After drilling the holes, glue all of the Middle pieces onto the area indicated by the gray shading on the template as shown below.
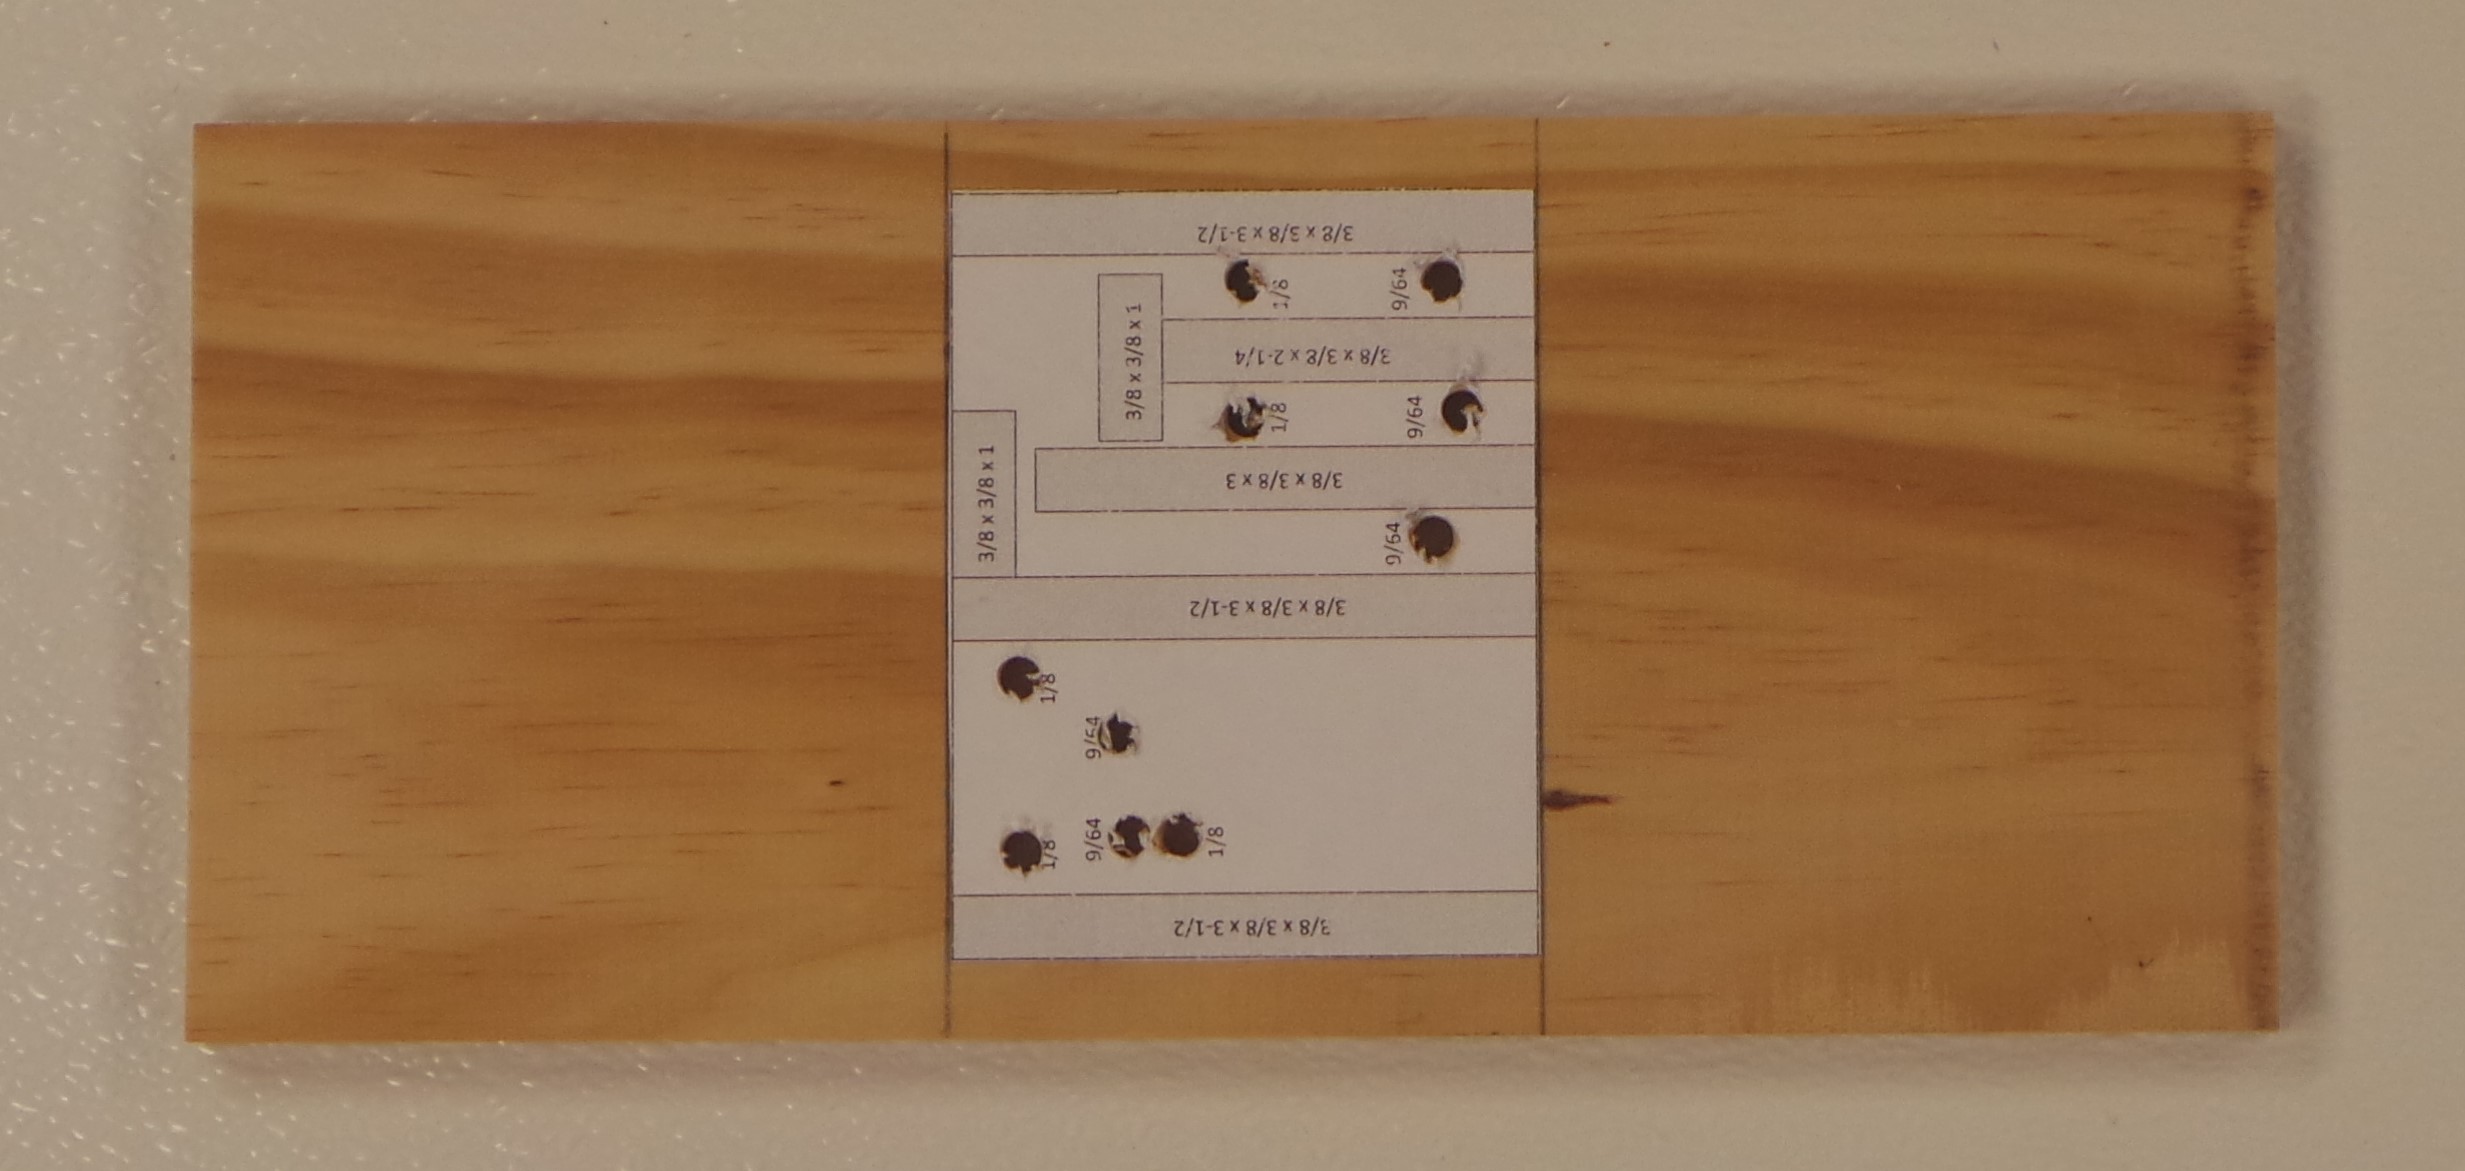
For each jig, affix the remaining template to the Bottom board, near the center. The Bottom board will be much larger than the template. The reason for having the Bottom board a larger size is to provide space for the jig to be clamped. Drill 1/4″ or 3/8″ holes through the template in every place marked. The exact diameter of these holes is not important. The purpose of drilling holes through the bottom board is so that the saw dust can fall out through the bottom, and not build up on the inside of the jig.
Glue the Top and Middle pieces onto the Bottom jig piece. Make sure that the holes on the Top board line up with the holes on the Bottom board. The fully assembled jigs will look similar to the following:
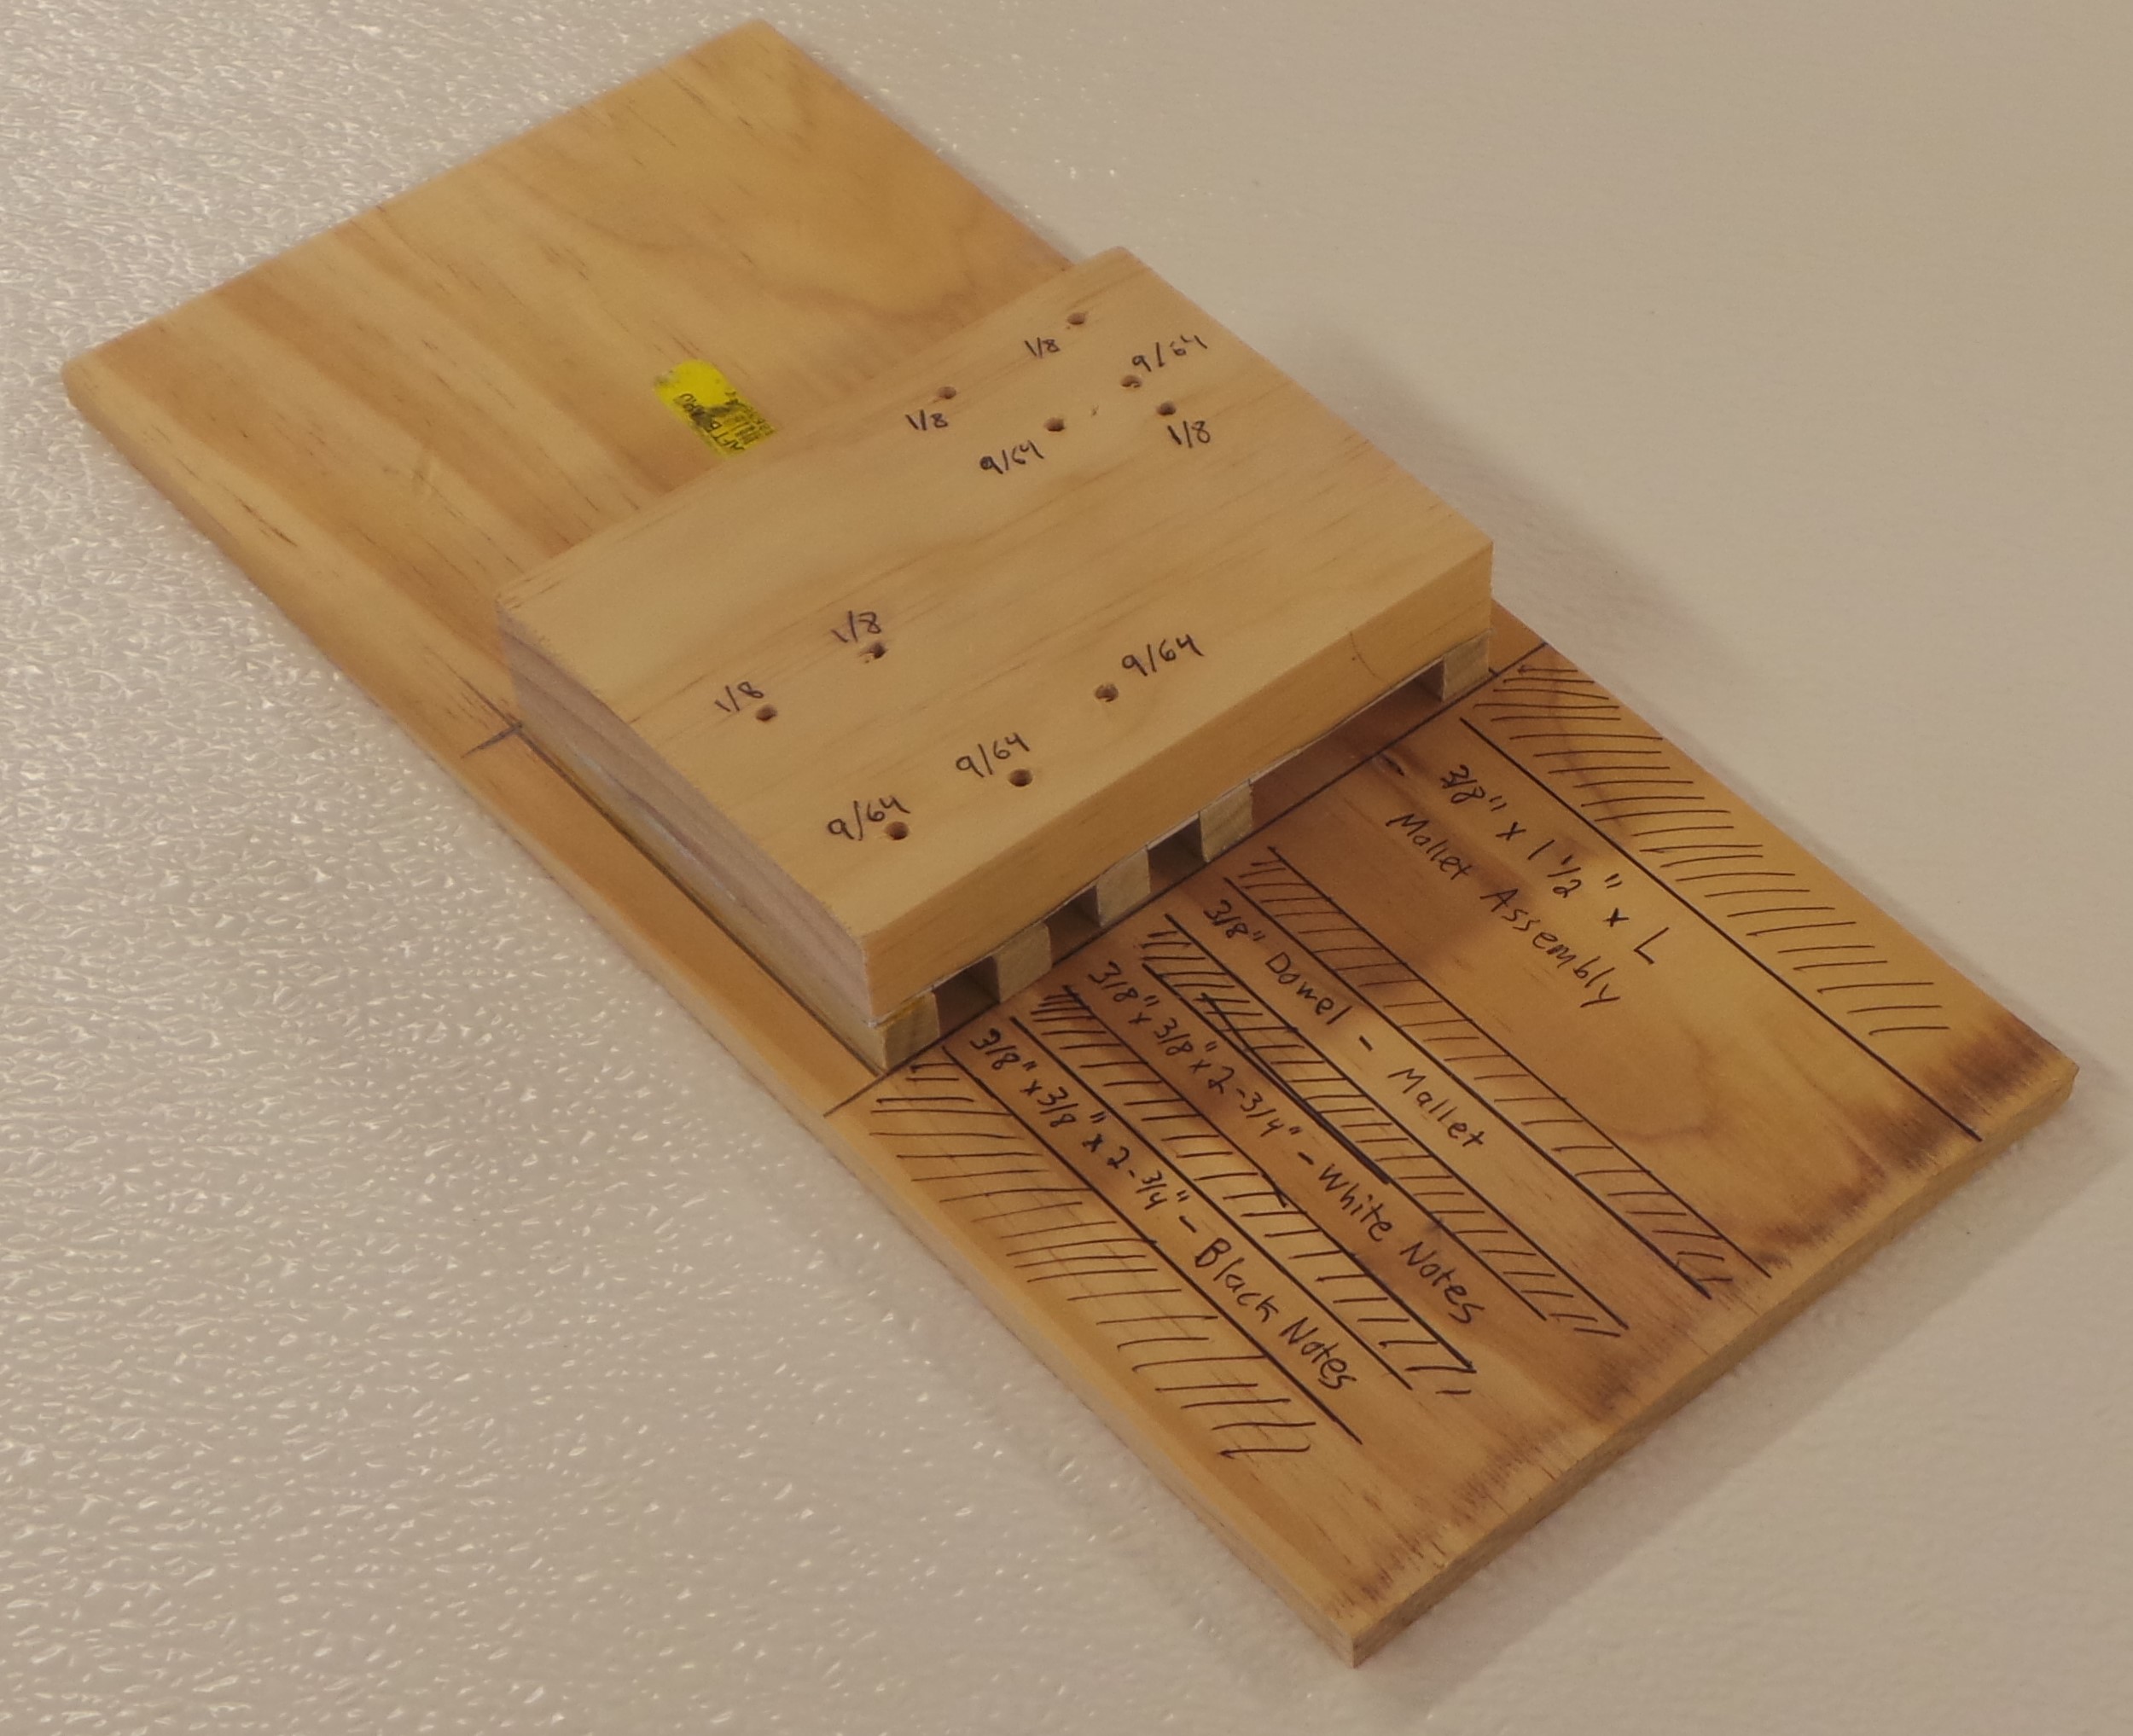

Below are some pictures of the jigs used for drilling the holes in the Mallet pieces:
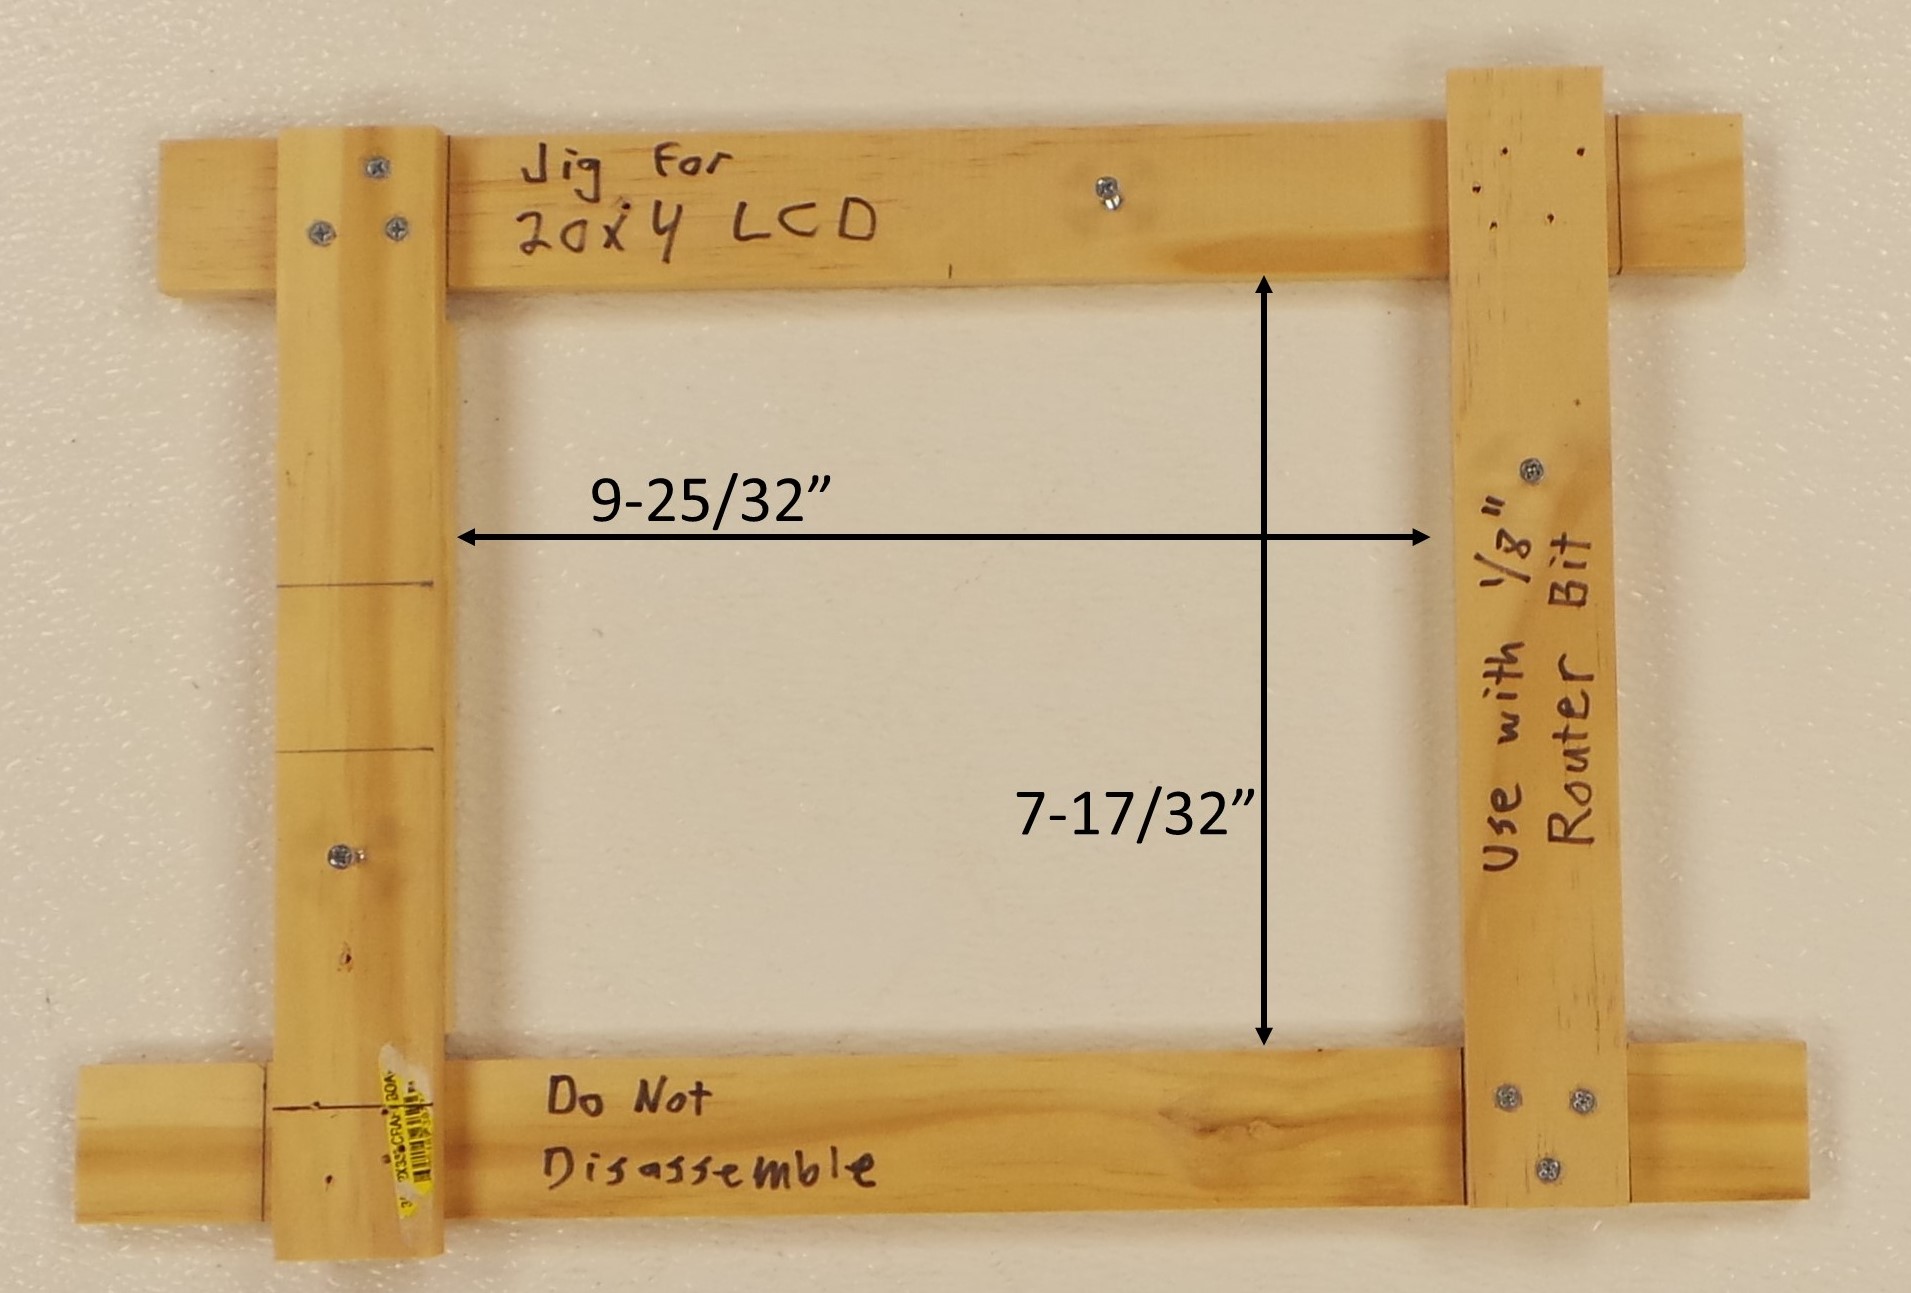
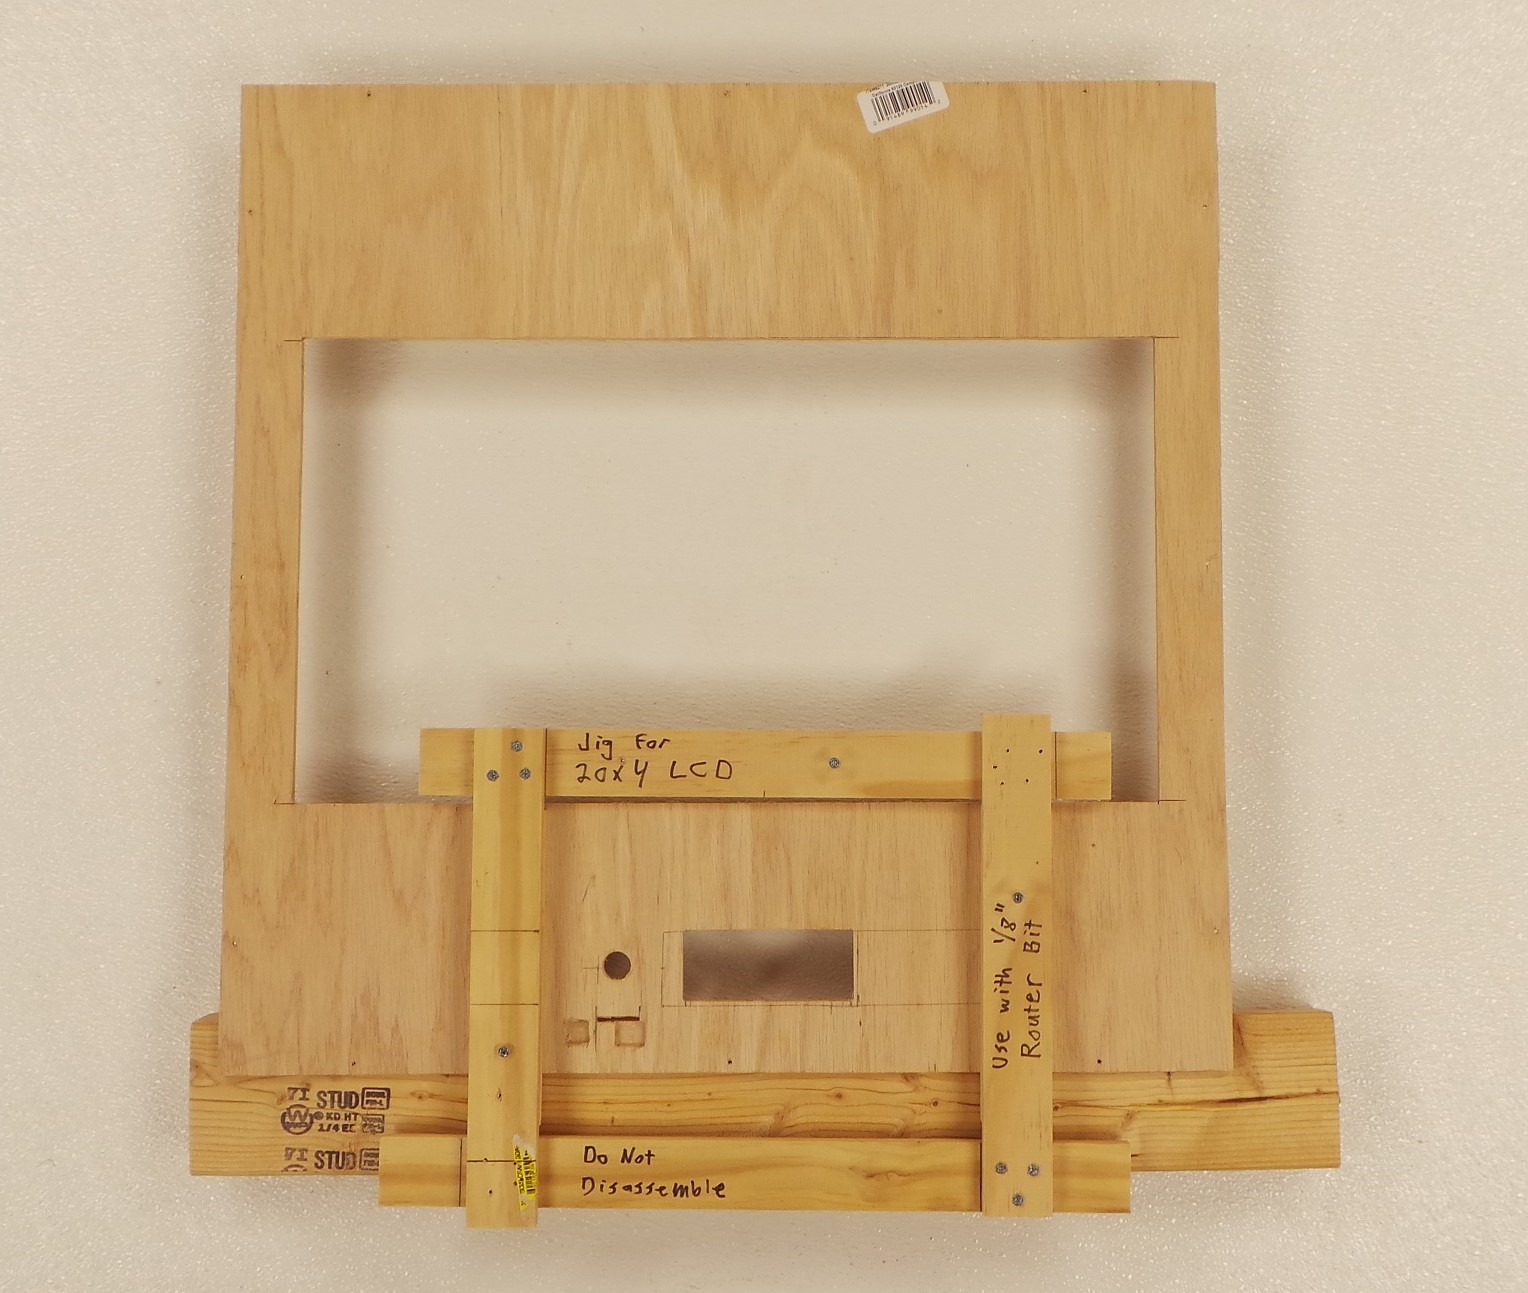
The final jig, Jig “C”, is used to cut the rectangular hole for the 20×4 LCD. The jig is used in combination with a 6″ Router with 1/8″ router bit. The exact dimensions of the jig may vary based upon the diameter of the router and bit. But for my Ryobi router, I found that a rectangular jig with inside dimensions of 9-25/32″ x 7-17/32″ cuts a hole that is just right for the LCD. This jig is pictured below:
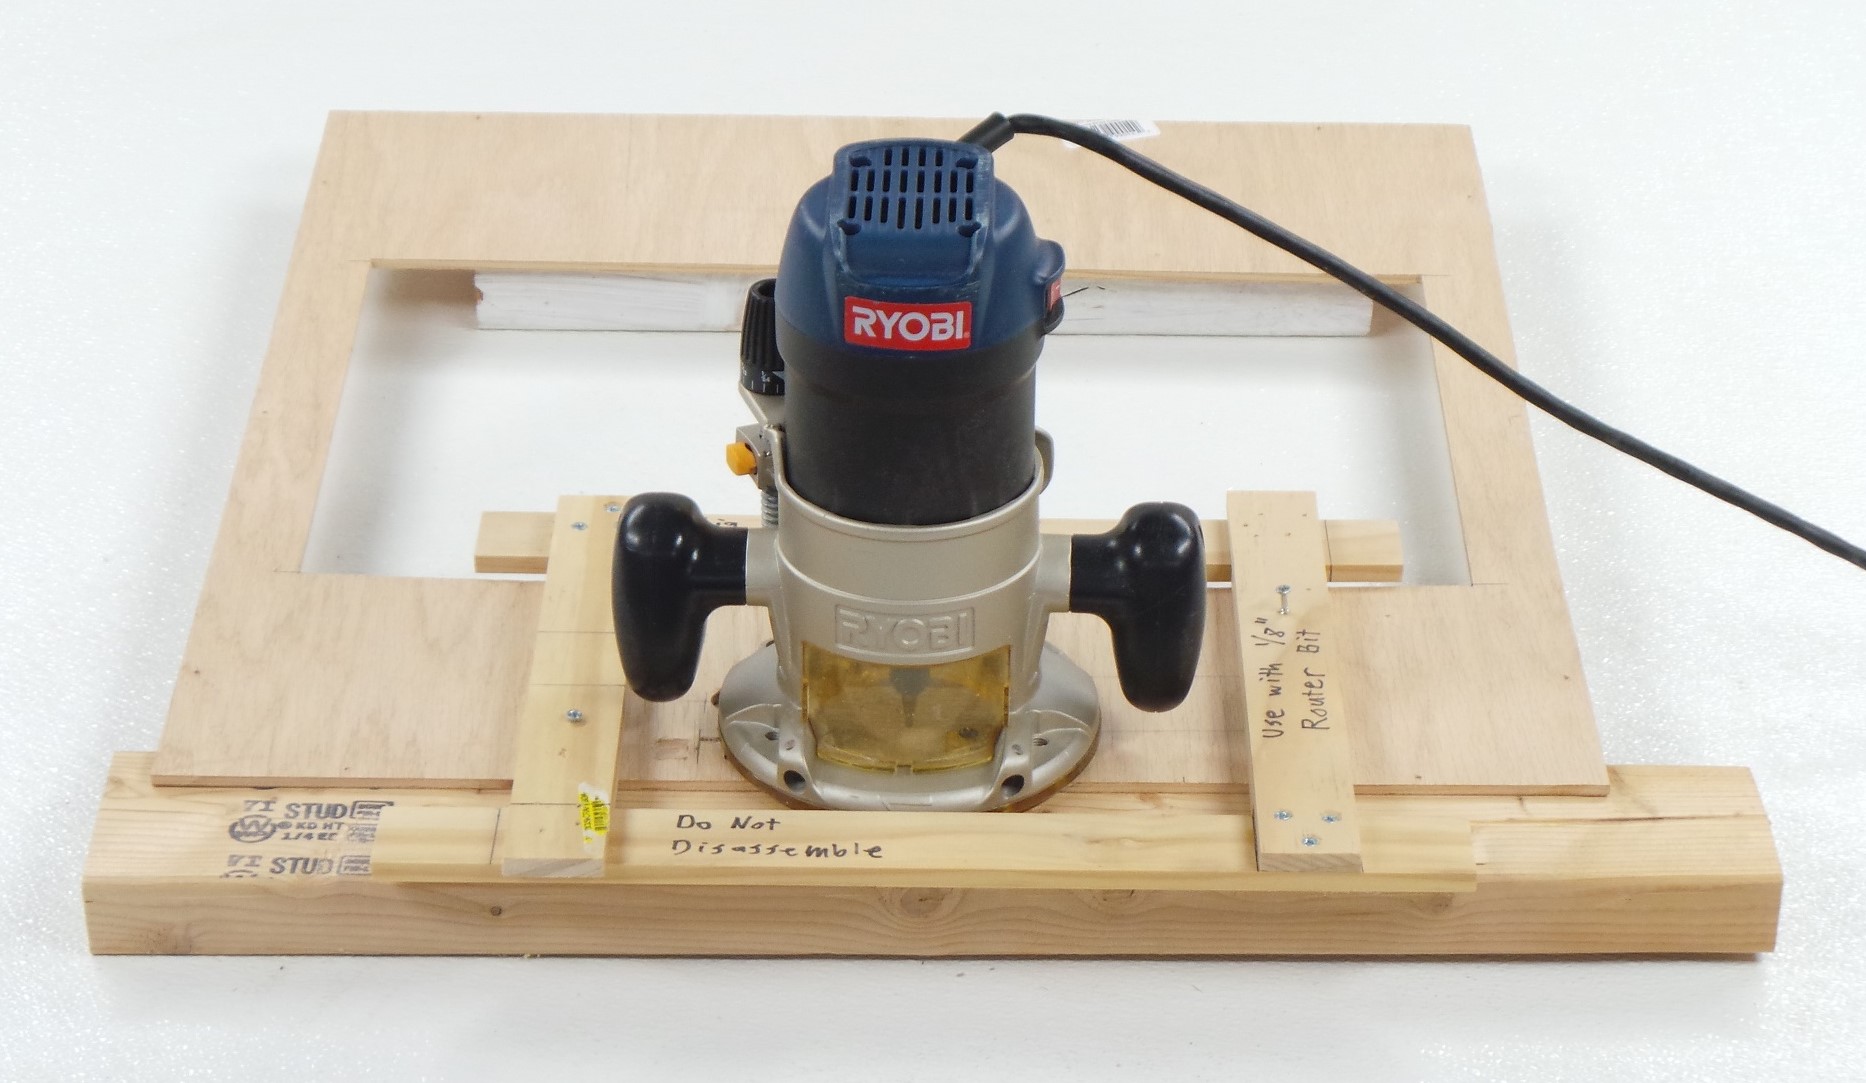
To cut the hole, the jig is fastened to the inside of the Enclosure Top. Make sure that the jig is positioned correctly (e.g. parallel to the edge, and centered with where the hole is to be cut). By keeping the router flush with the edge of the jig, a perfectly rectangular hole can be cut as shown below.
The Enclosure Top after the rectangular hole has been cut looks like this:
By using different sizes for the inside of the jig, it is possible to cut rectangular holes of any diameter. The math is fairly simple:
[Jig Size] = [Hole Size] + [Router Diameter] – [Bit Diameter]
In my particular case:
[Router Diameter] = 6-1/16″ and [Bit Diameter] = 1/8″
Thus,
Jig Width = 3-27/32″ + 6-1/16″ – 1/8″ = 9-25/32″
and
Jig Height = 1-19/32″ + 6-1/16″ – 1/8″ = 7-17/32″
Using similar math, you can calculate the size of the jig that you need for any size rectangular hole.
Rememer to Like Us on Facebook and Follow us for updates.
