
After all parts are glued together, the enclosure can be given a finished, professional look by routing, sanding, and staining.
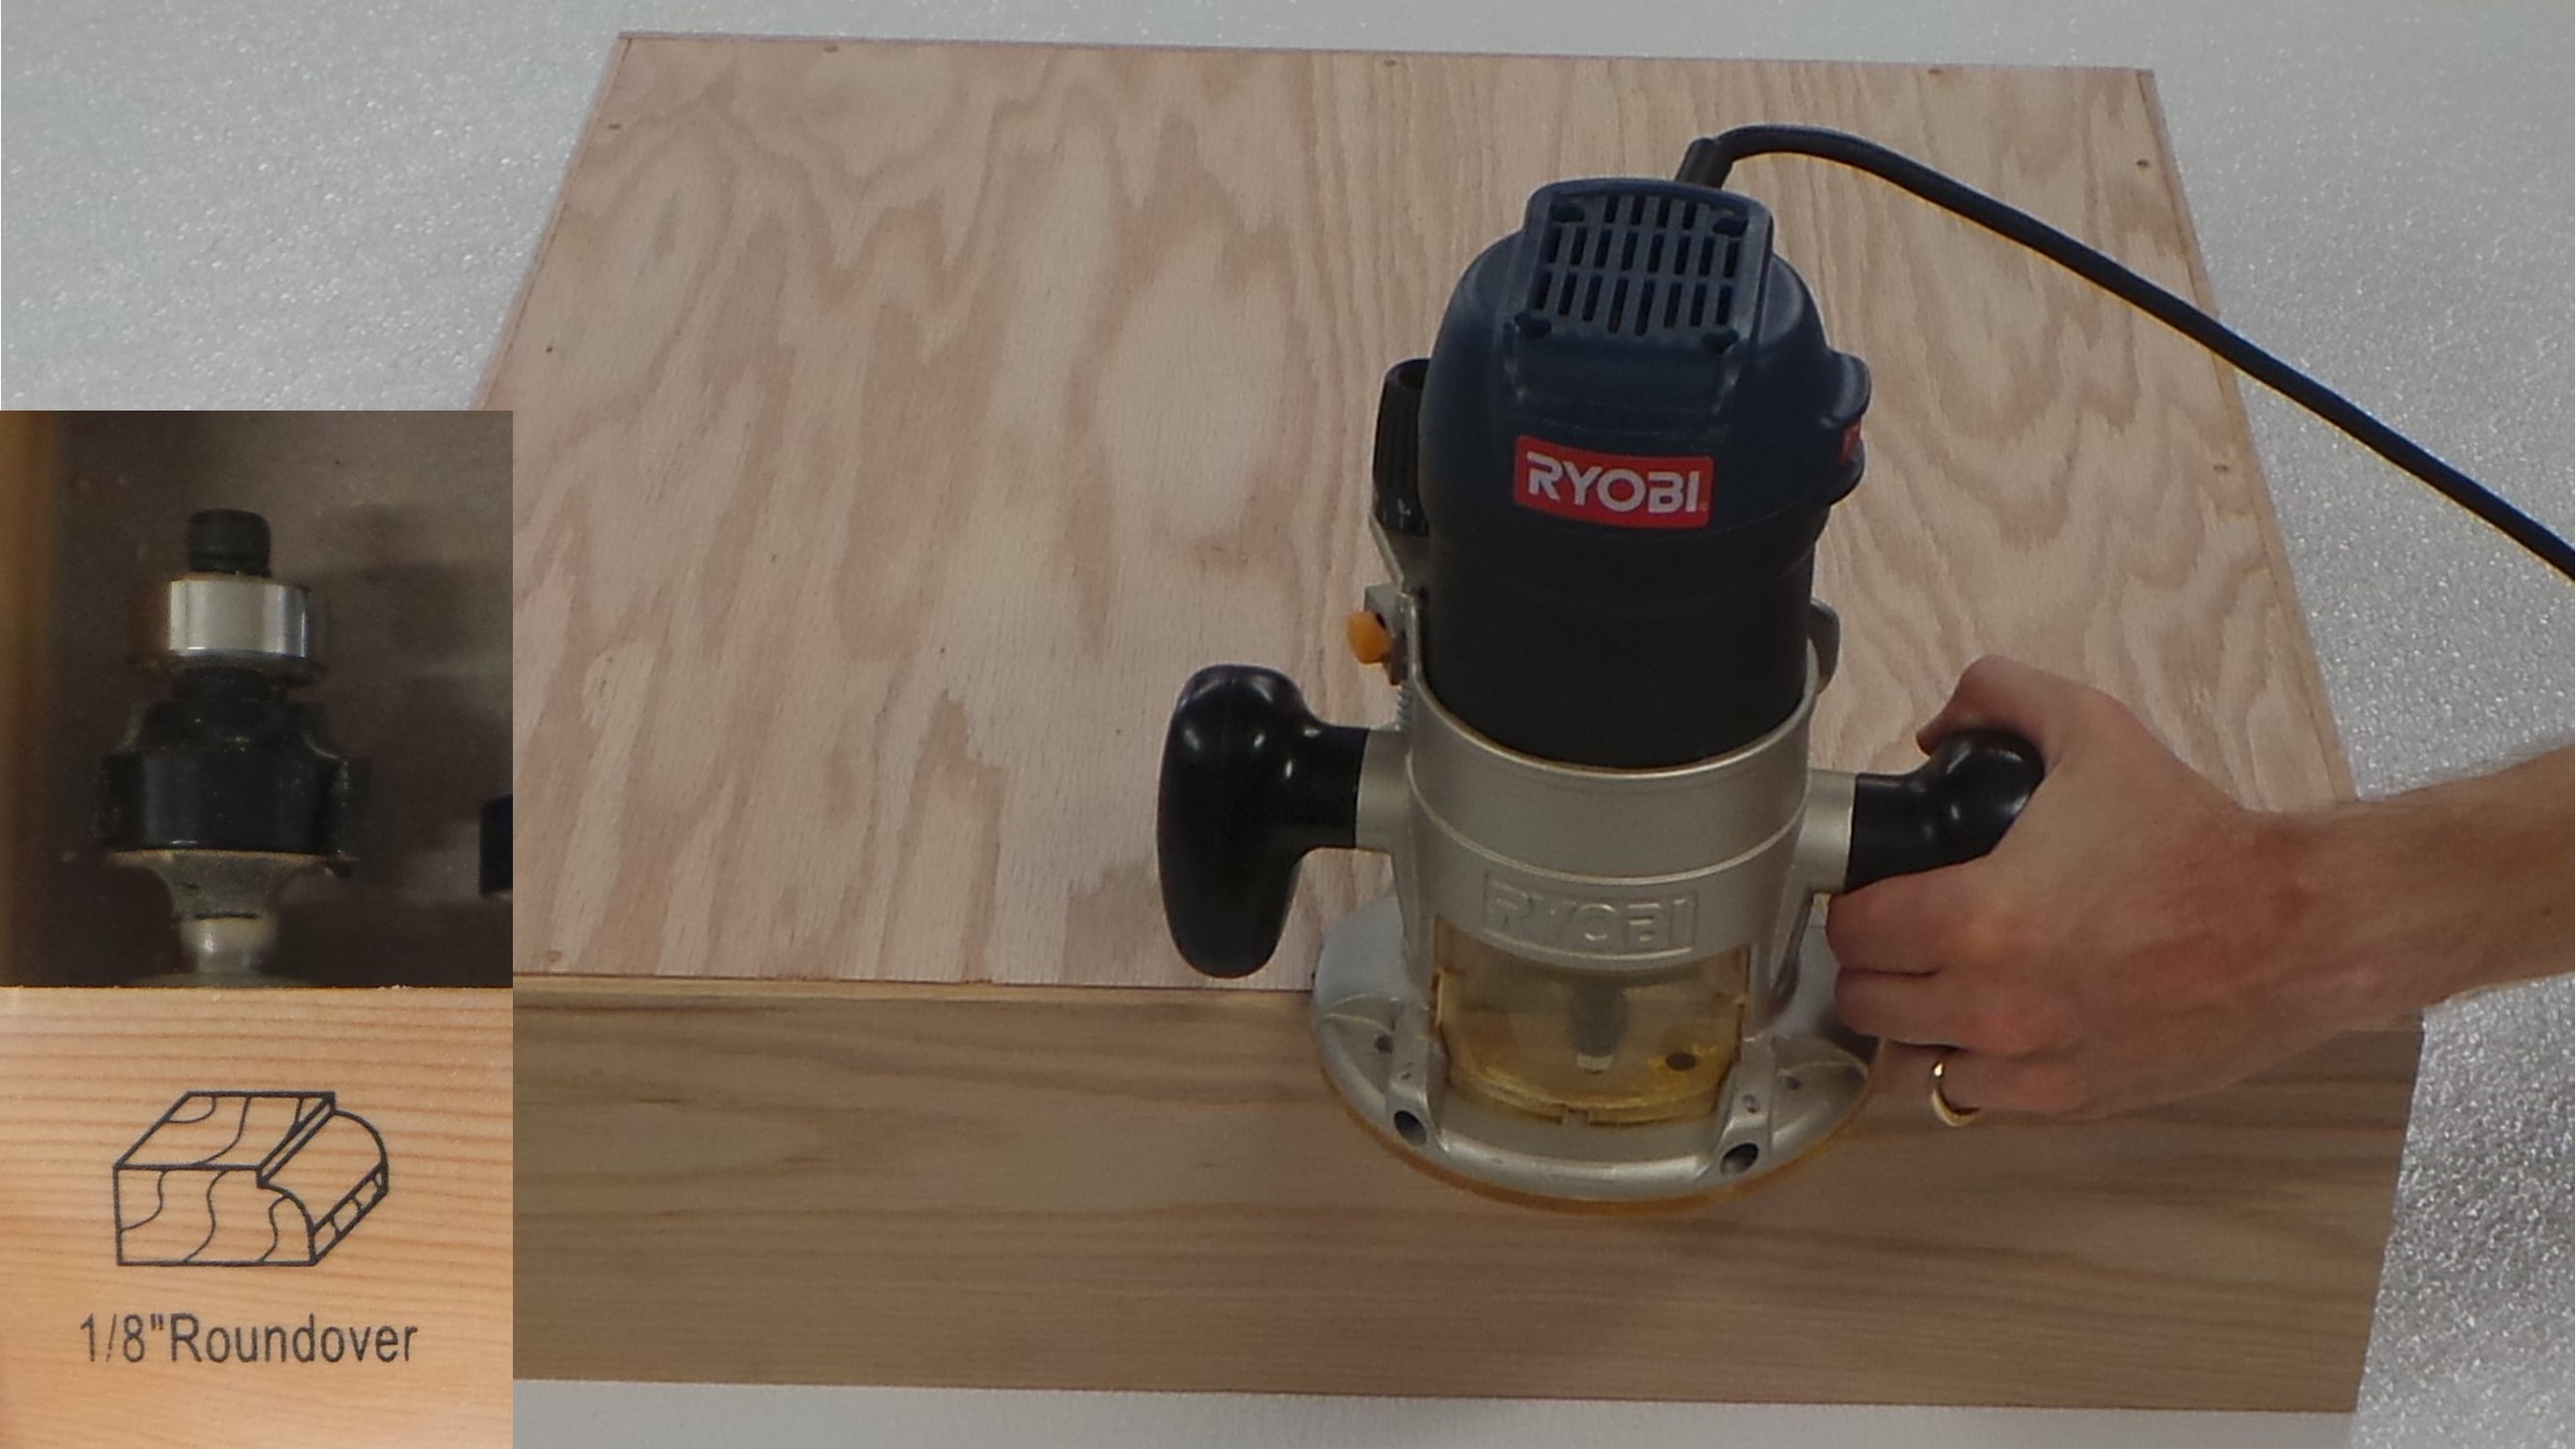
Place the bottom of the enclosure on top of the four sides. Use a router with a 1/8″ Roundover bit (or whatever other router bit you choose) and route all edges of the enclosure.
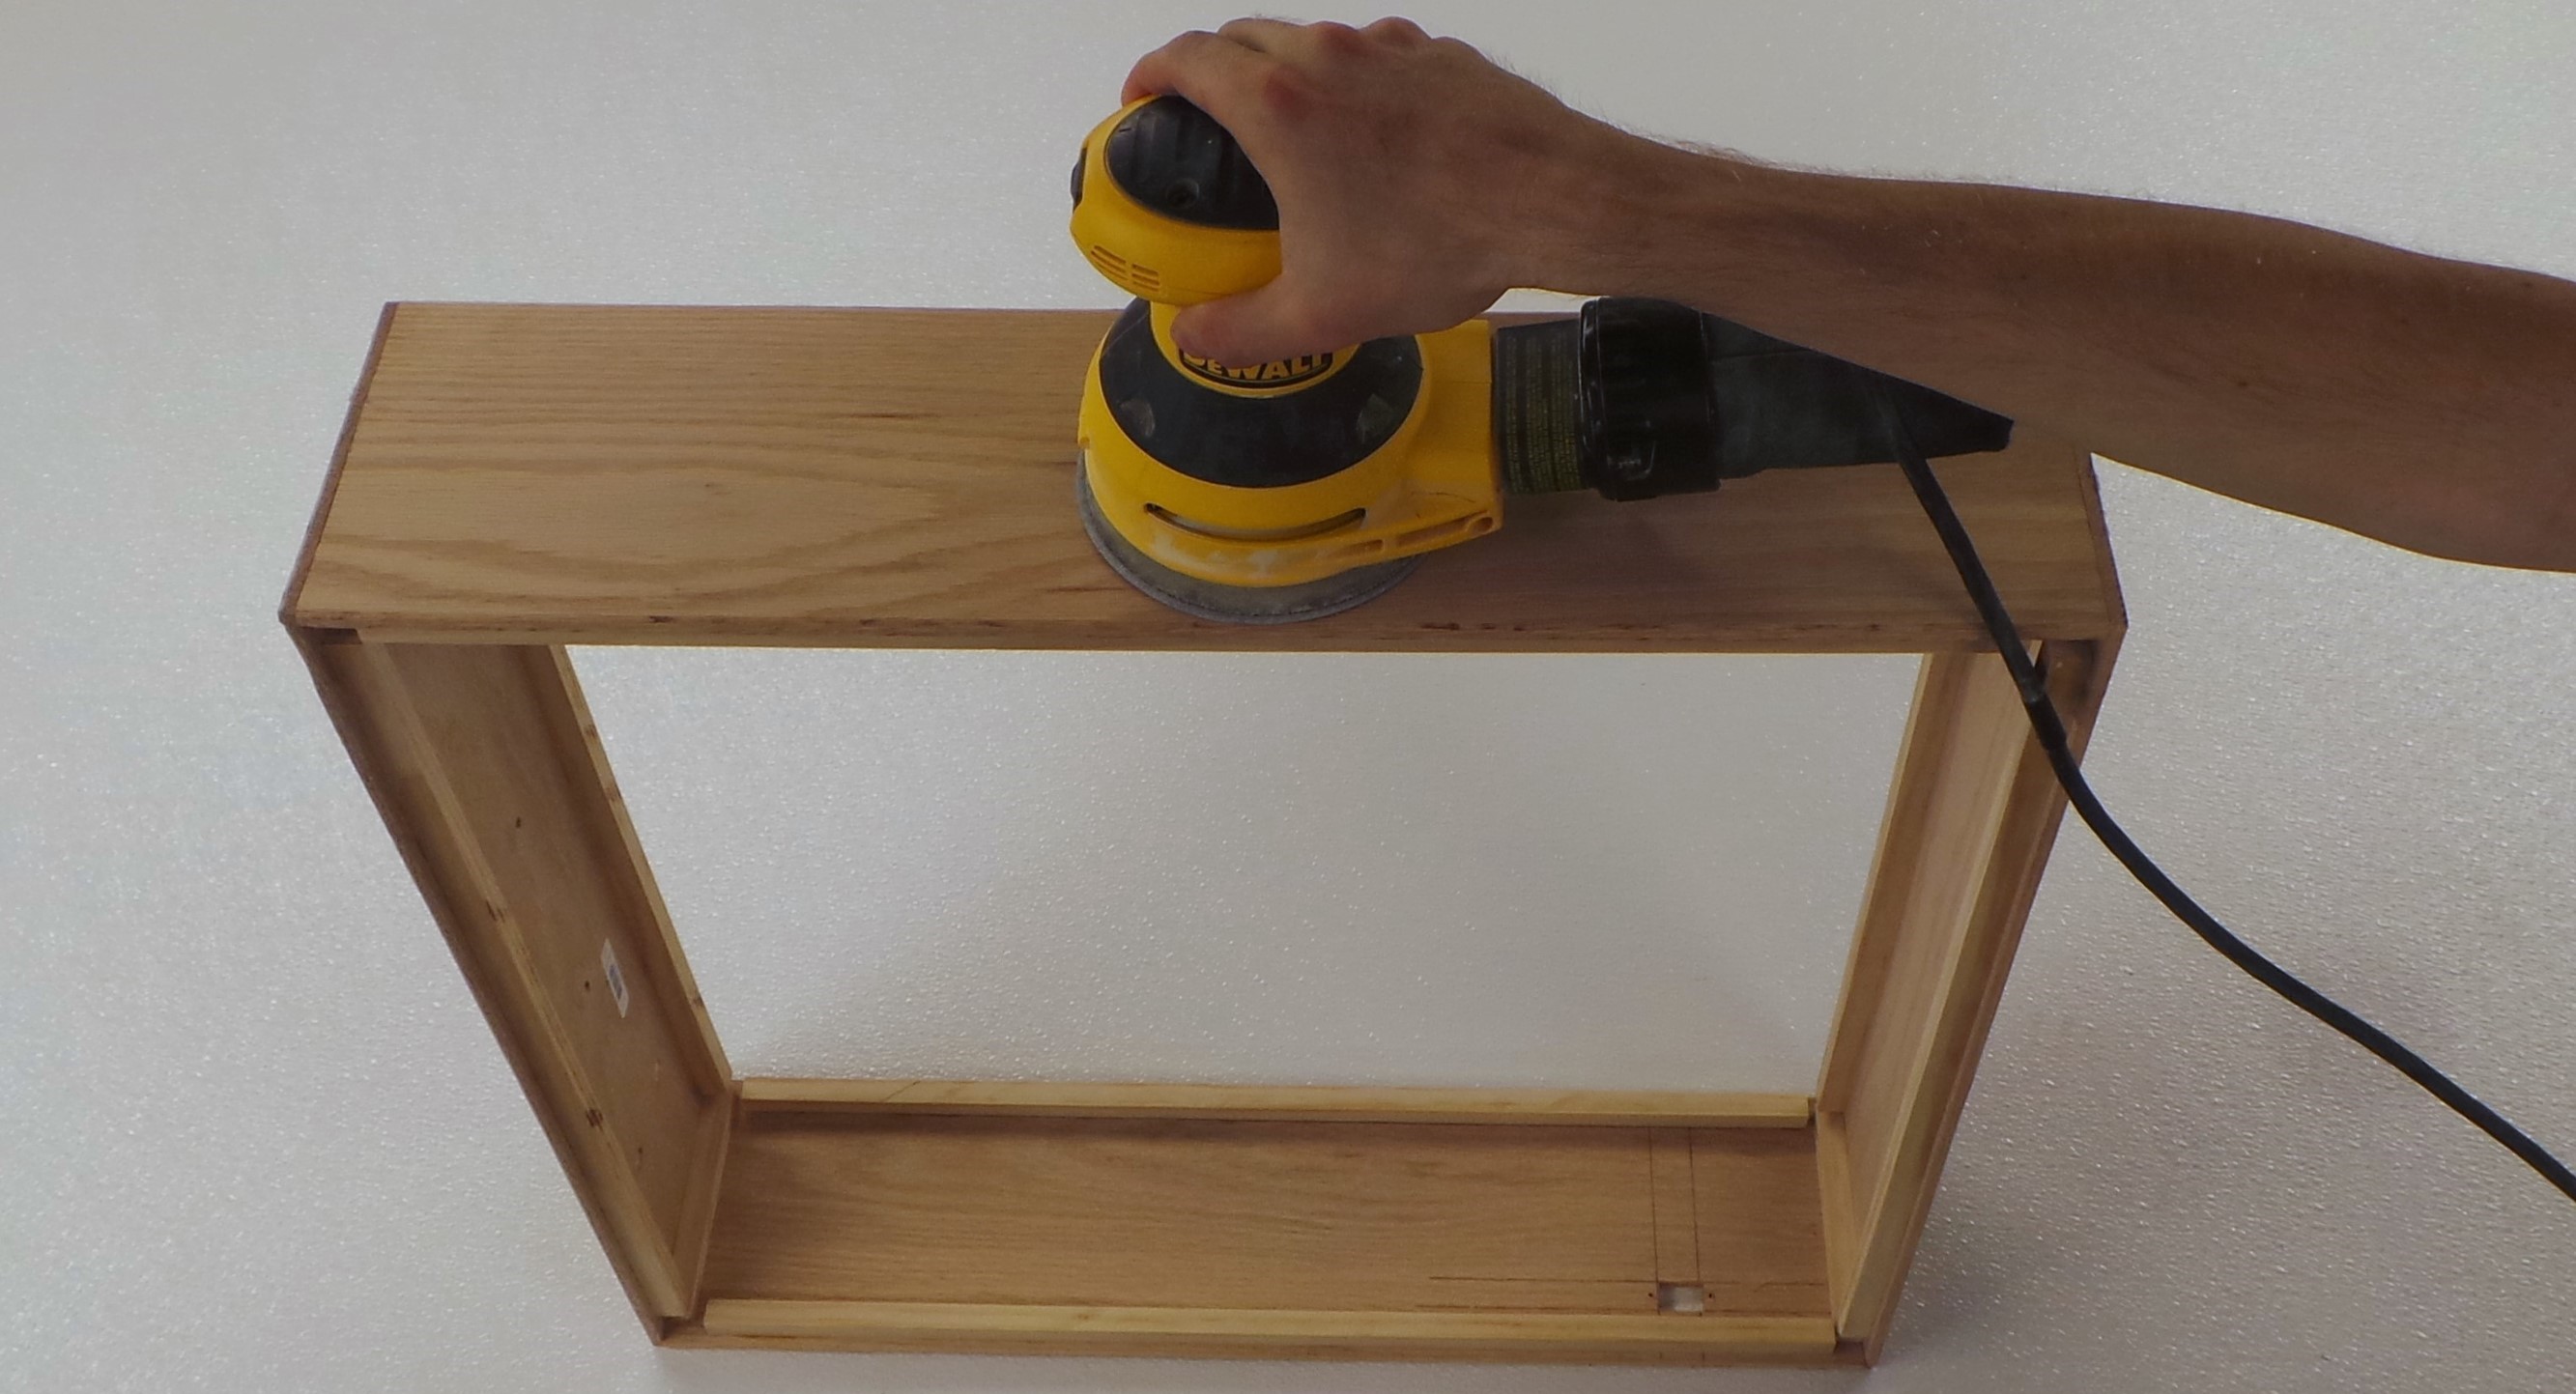
Use a random orbital sander to sand all sides, edges, and corners. It is especially important to sand off any wood glue that may have seeped out of the joints and onto the surface.
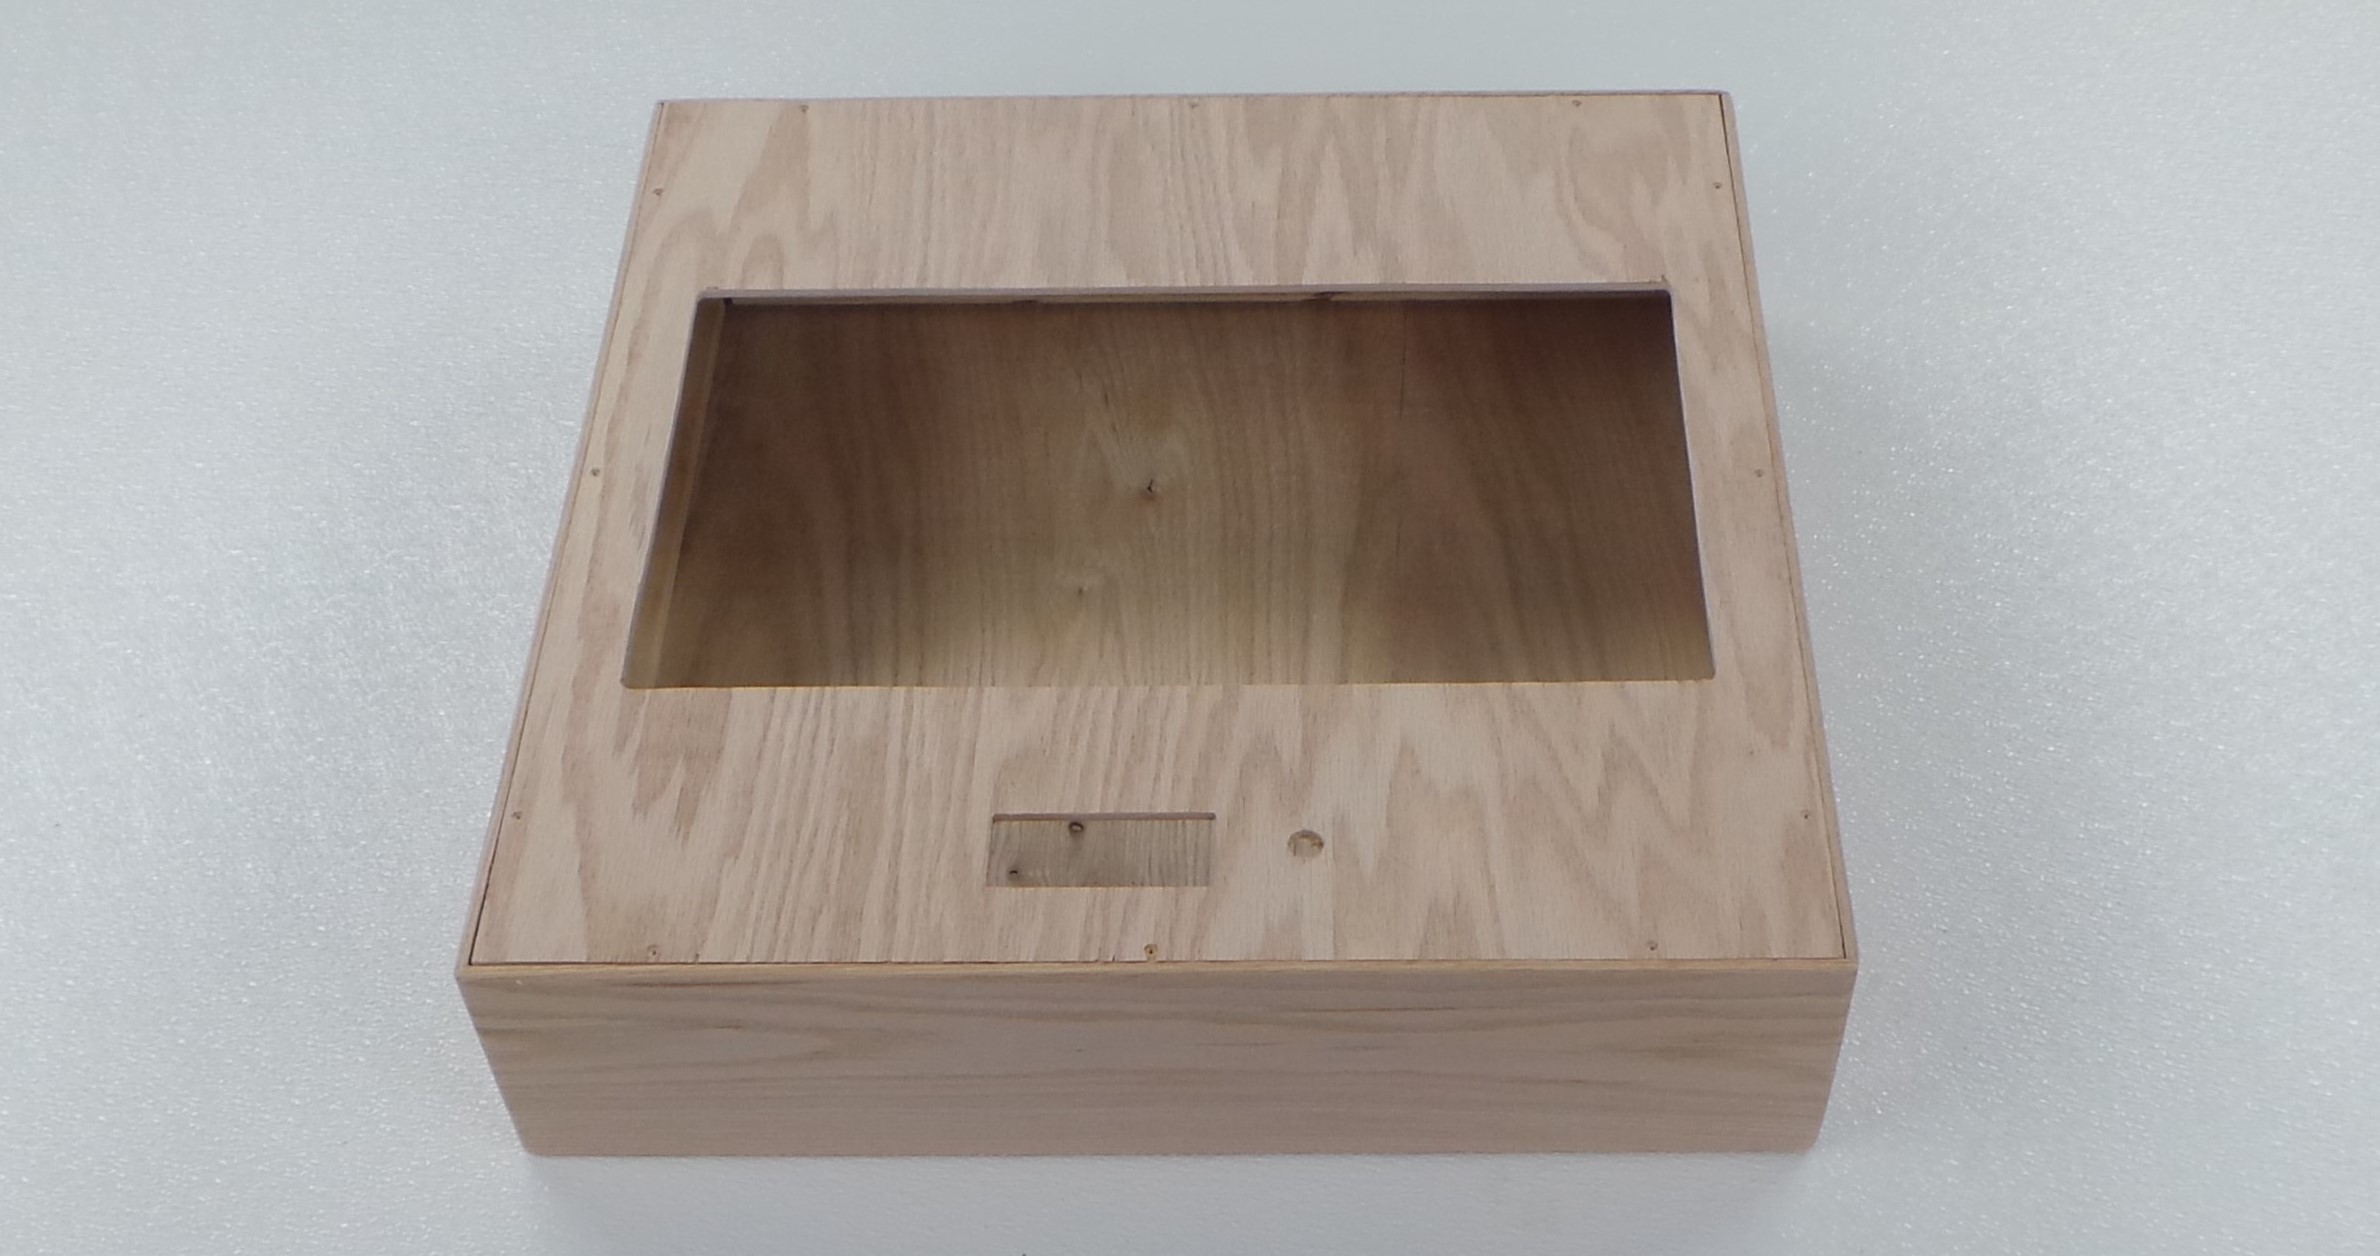
The routed and sanded enclosure will look something like below.
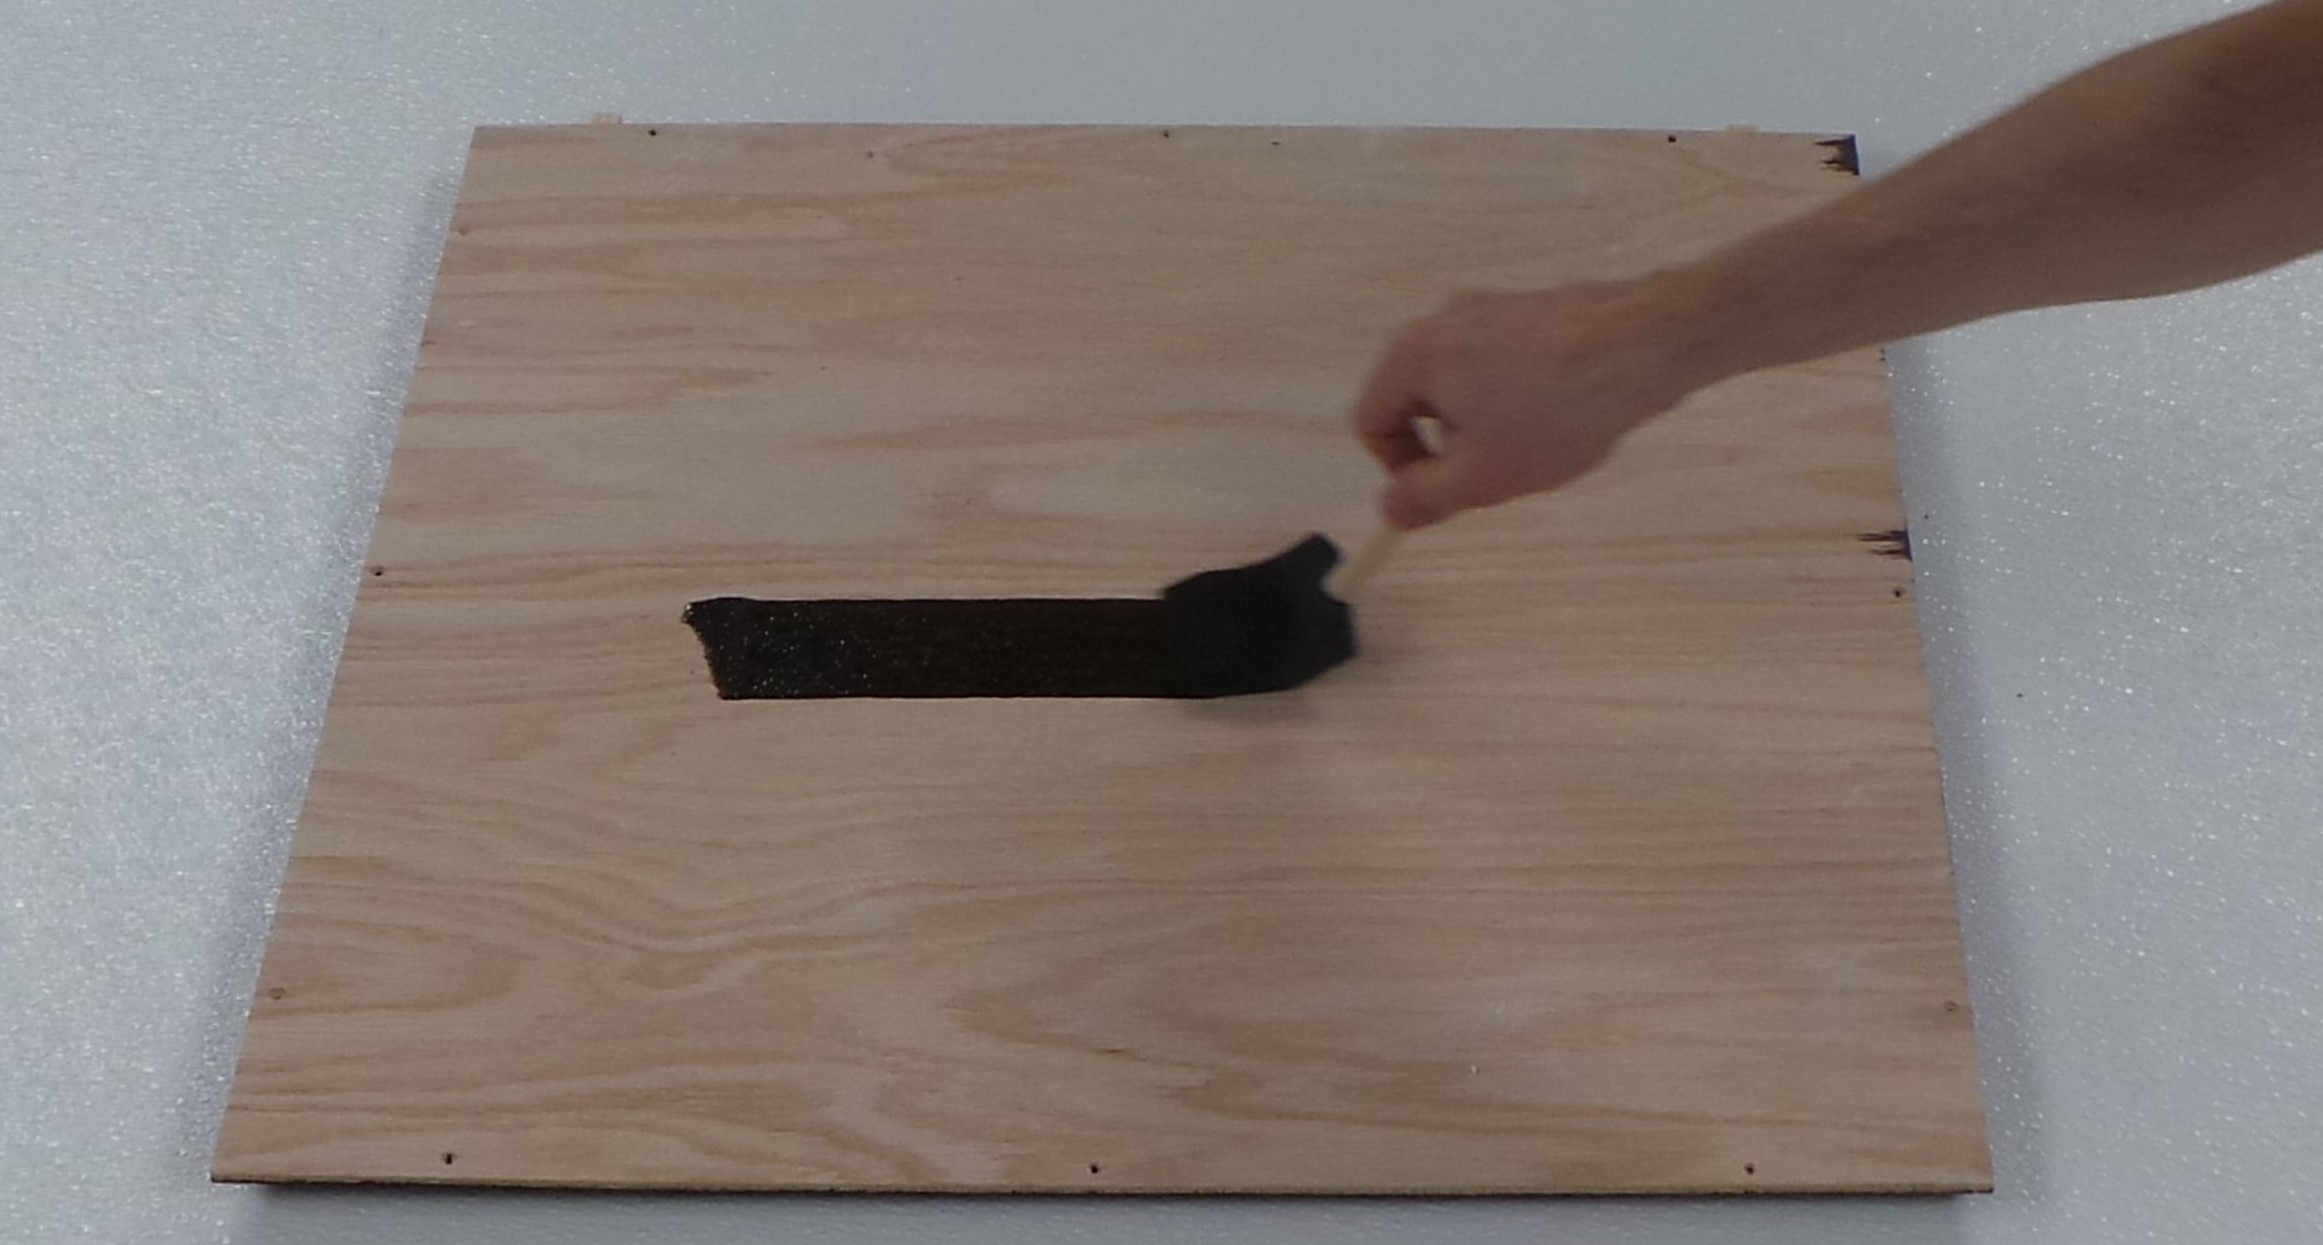
Stain all surfaces of the enclosure with your choice of stain. In this example, I use the Minwax Red Oak stain.
After the stain dries apply serveral coats of polyurethane. Allow the polyurethane to dry beetween coats. Use a the random orbital sander with a 320-grain sanding disc to sand off any rough spots on the polyurethane, prior to applying the final coat.
The sides of the enclosure will look like this:

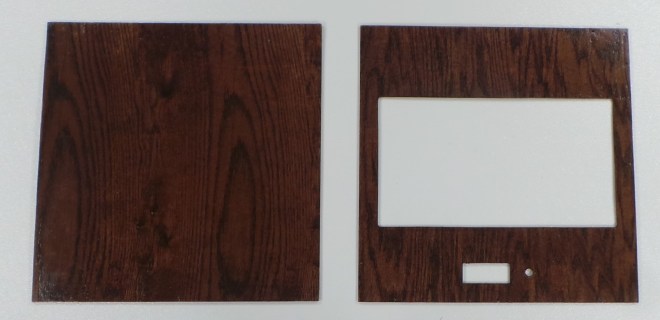
The top and bottom of the enclosure will look similar to this:
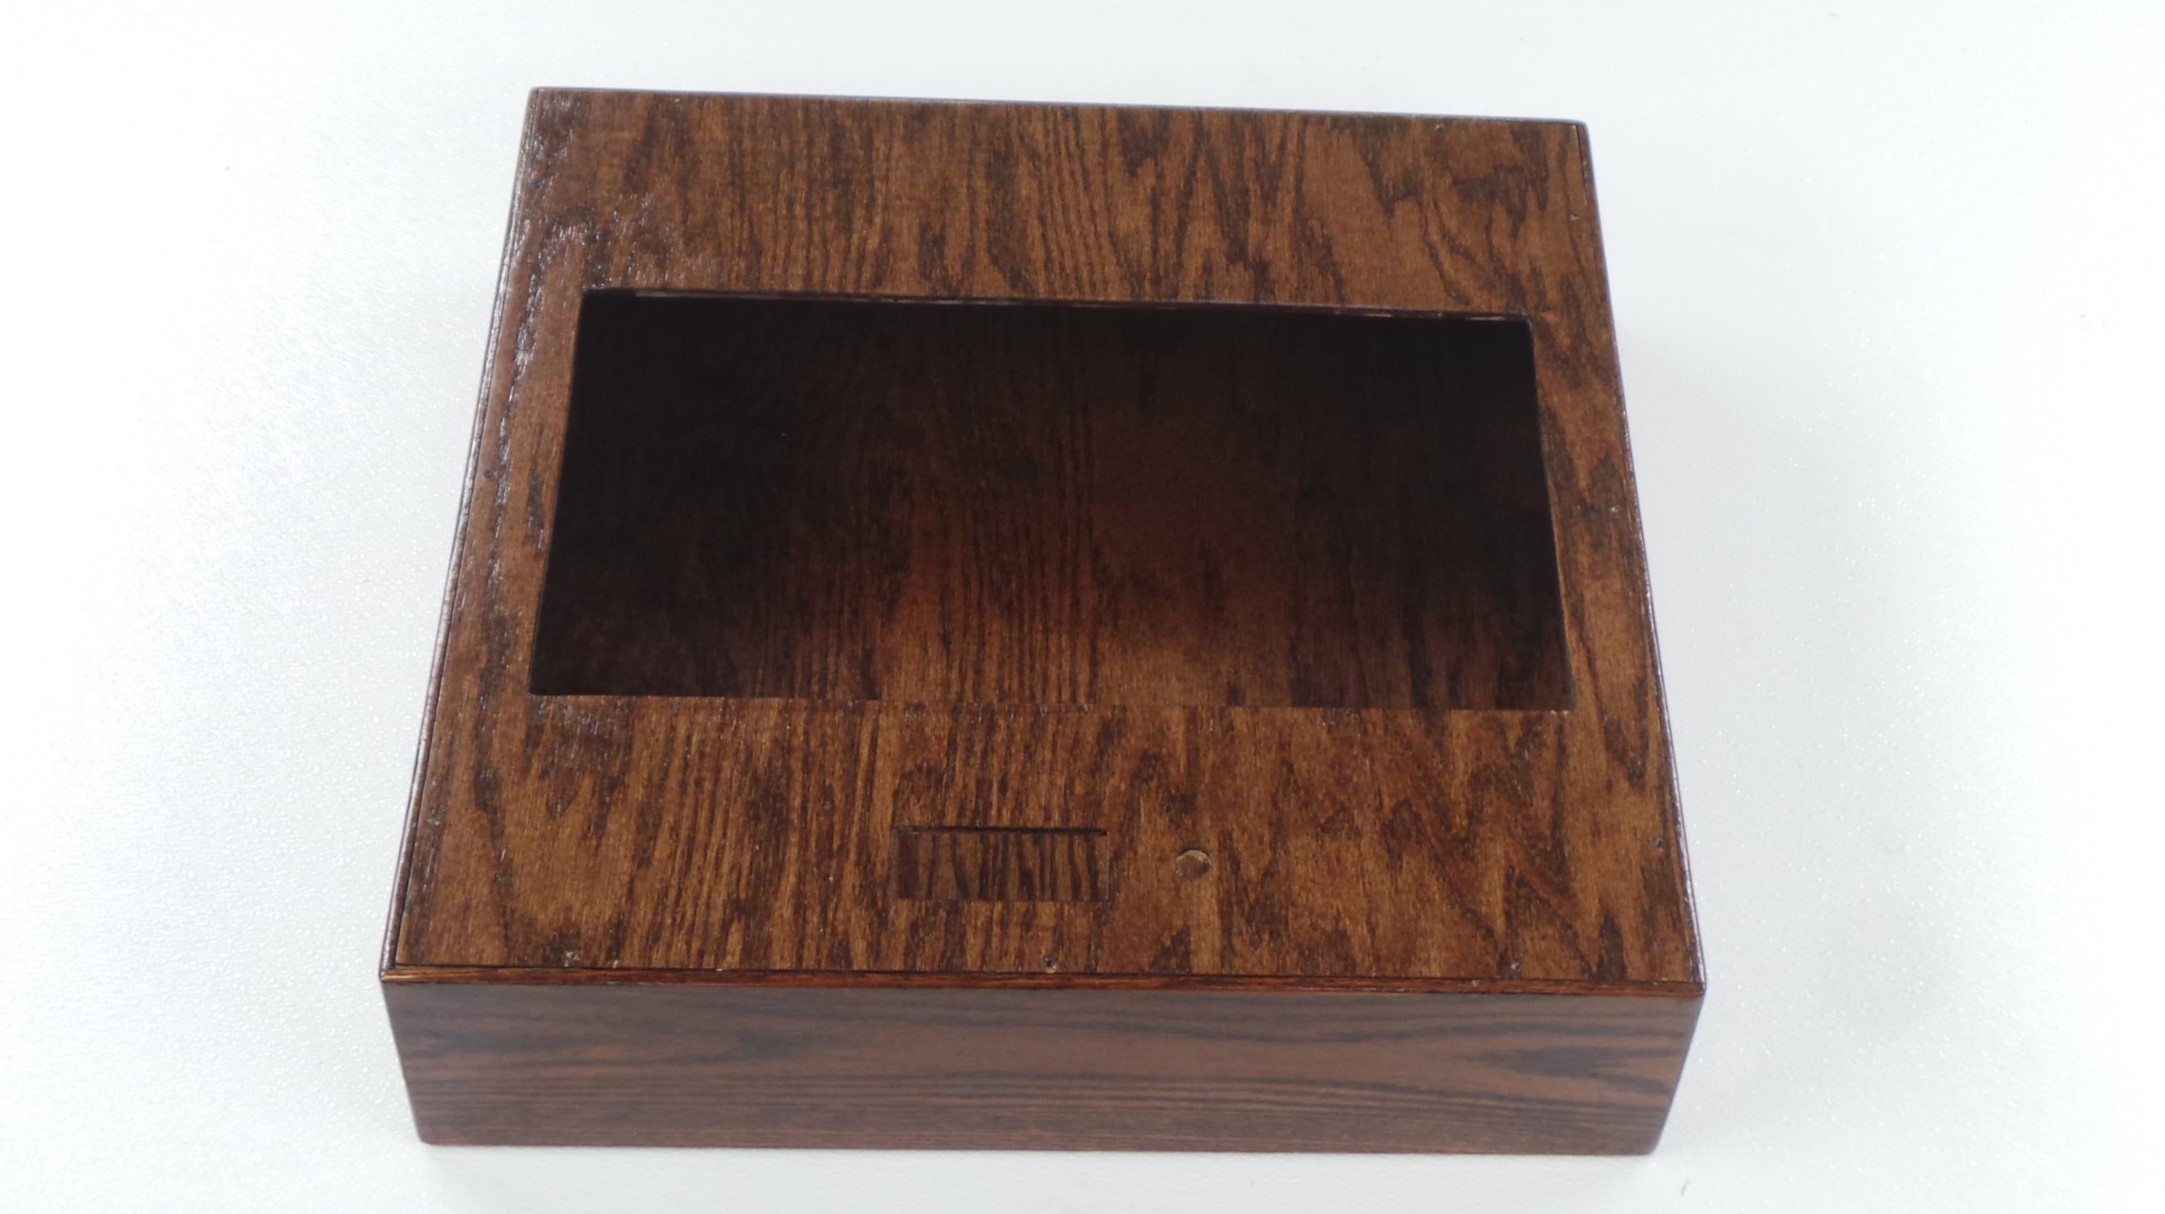
When the top, bottom, and sides are put together, the whole enclosure looks like this:
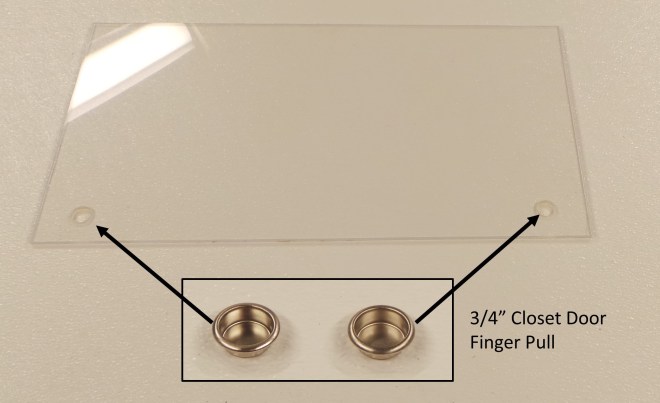
Place the two 3/4″ Closet Door Finger Pulls into the two holes in the Window. Use glue to secure them if they are too loose.
Next: Mallets
