
OK, now that the software has been loaded into the Arduino, and MIDI files have been copied onto the SD Card, it’s time to try it out and see if it works.
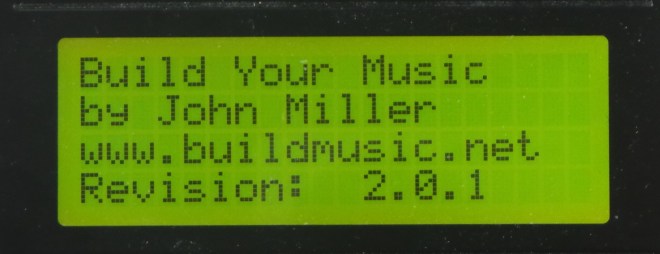
When the Arduino is first powered up, you will see a Splash Screen for 5 seconds, that shows basic information about the program. If you don’t like seeing my name on the Splash Screen you can edit the PROGMEM strings in the program.
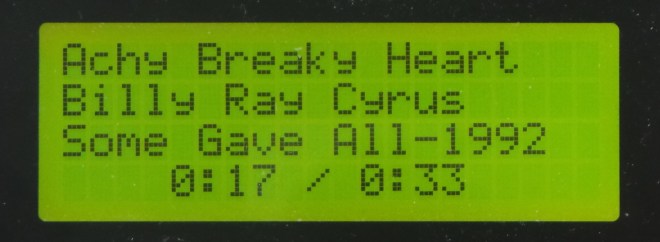
Next, the list of MIDI files in the current directory and/or from the current playlist is shown. See the SD Card Config page for instructions on setting up directories and playlists.

At this point, you may turn the rotary encoder to select a song from the list. Click the rotary encoder button to play the selected song.
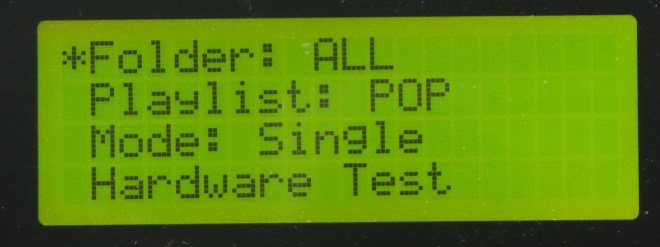
To access the Configuration menu, from the Song Select menu, hold down the rotary encoder button for 3 seconds. The configuration menu has the following options:
- Folder – Set the current directory. User can select either the Root directory or another top-level directory.
- Playlist – Select the Playlist from a list of Playlist files (*.TXT) in the current directory.
- Play Mode – Change Play Mode to Single, Sequential, or Shuffle
- Hardware Test – Allows testing individual solenoids/notes or playing a chromatic scale to test all notes.
- About – Shows information about the program.
- Restart – Restarts the Arduino program.
- Back – Return to the Song Selection menu.
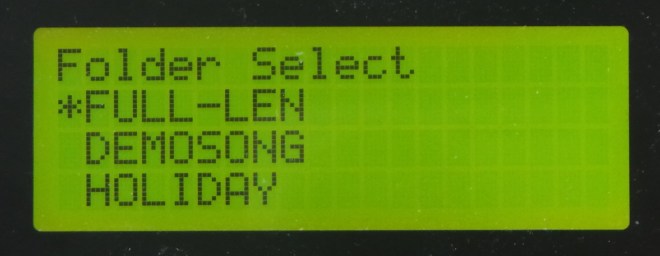
Select the “Folder” option to see a list of all folders at the root-level of the SD Card. Click the button to select a folder.
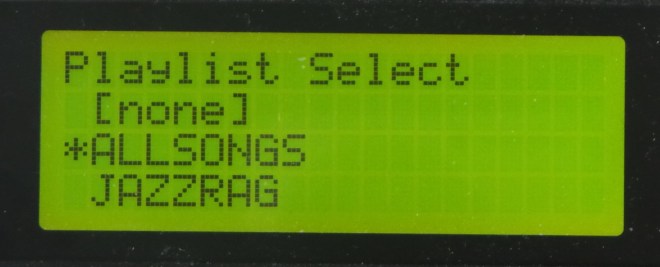
The “Playlist” option gives a list of all playlist files in the current folder. There is also an option to select [none], which will list all MIDI files in the current folder.
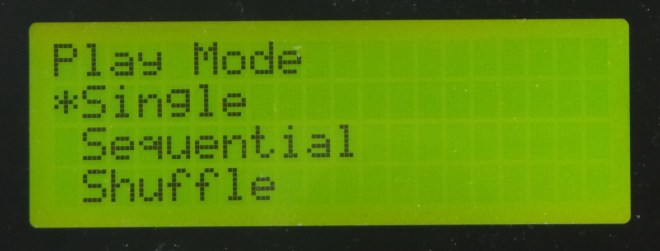
Select the “Play Mode” option to choose one of three different play modes:
- Single – Plays the currently selected song once
- Sequential – Plays the songs in the order of the playlist, starting with the currently selected song, and ending with the last song in the playlist.
- Shuffle – Plays all songs from the playlist in random order, starting with the currently selected song.
The Hardware Test menu allows you to test that the solenoids are all wired correctly, and that the note mapping is defined correctly in the program. Selecting the “Chromatic Scale” option will play a chromatic scale from the lowest to the highest note. This is the quickest way to verify that all notes are working correctly. See the Final Assembly instruction page, and/or the videos here and here, for examples of the xylophone playing the chromatic scale.
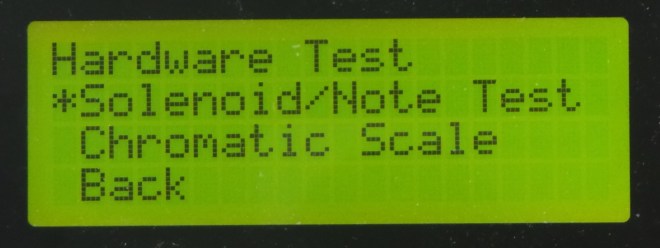
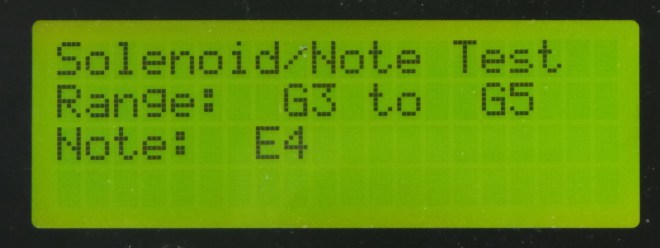
The “Solenoid/Note Test” option allows you to test one solenoid / note at a time. Turn the rotary encoder to select the note, and press the button to play the note 3 times. This function is useful to troubleshoot if you notice that not all notes are playing correctly on the chromatic scale. See the Electronics instruction page or this video for an example of the Solenoid/Note Test.
Does everything work? Were you able to build a robotic xylophone playing your favorite songs? Then, Congratulations! You have completed Build Your Music! It’s time to Celebrate!
I would love to hear from you, and see a picture and/or video of your own robotic xylophone. Please let me know via the Contact page or Facebook.
