
The Xylophone and Solenoid Support are attached to the base of the enclosure as follows:
Step 1: Place the xylophone on the base of the enclosure, centered left-to-right, and approximately 1″ closer to the back than the front. Drill 9/64″ holes through the frame of the xylophone and the base. Secure the xylophone to the base using three (3) #6-32 x 1 inch machine screws and nuts. Use two machine screws on the left side, and one on the right, as shown below.

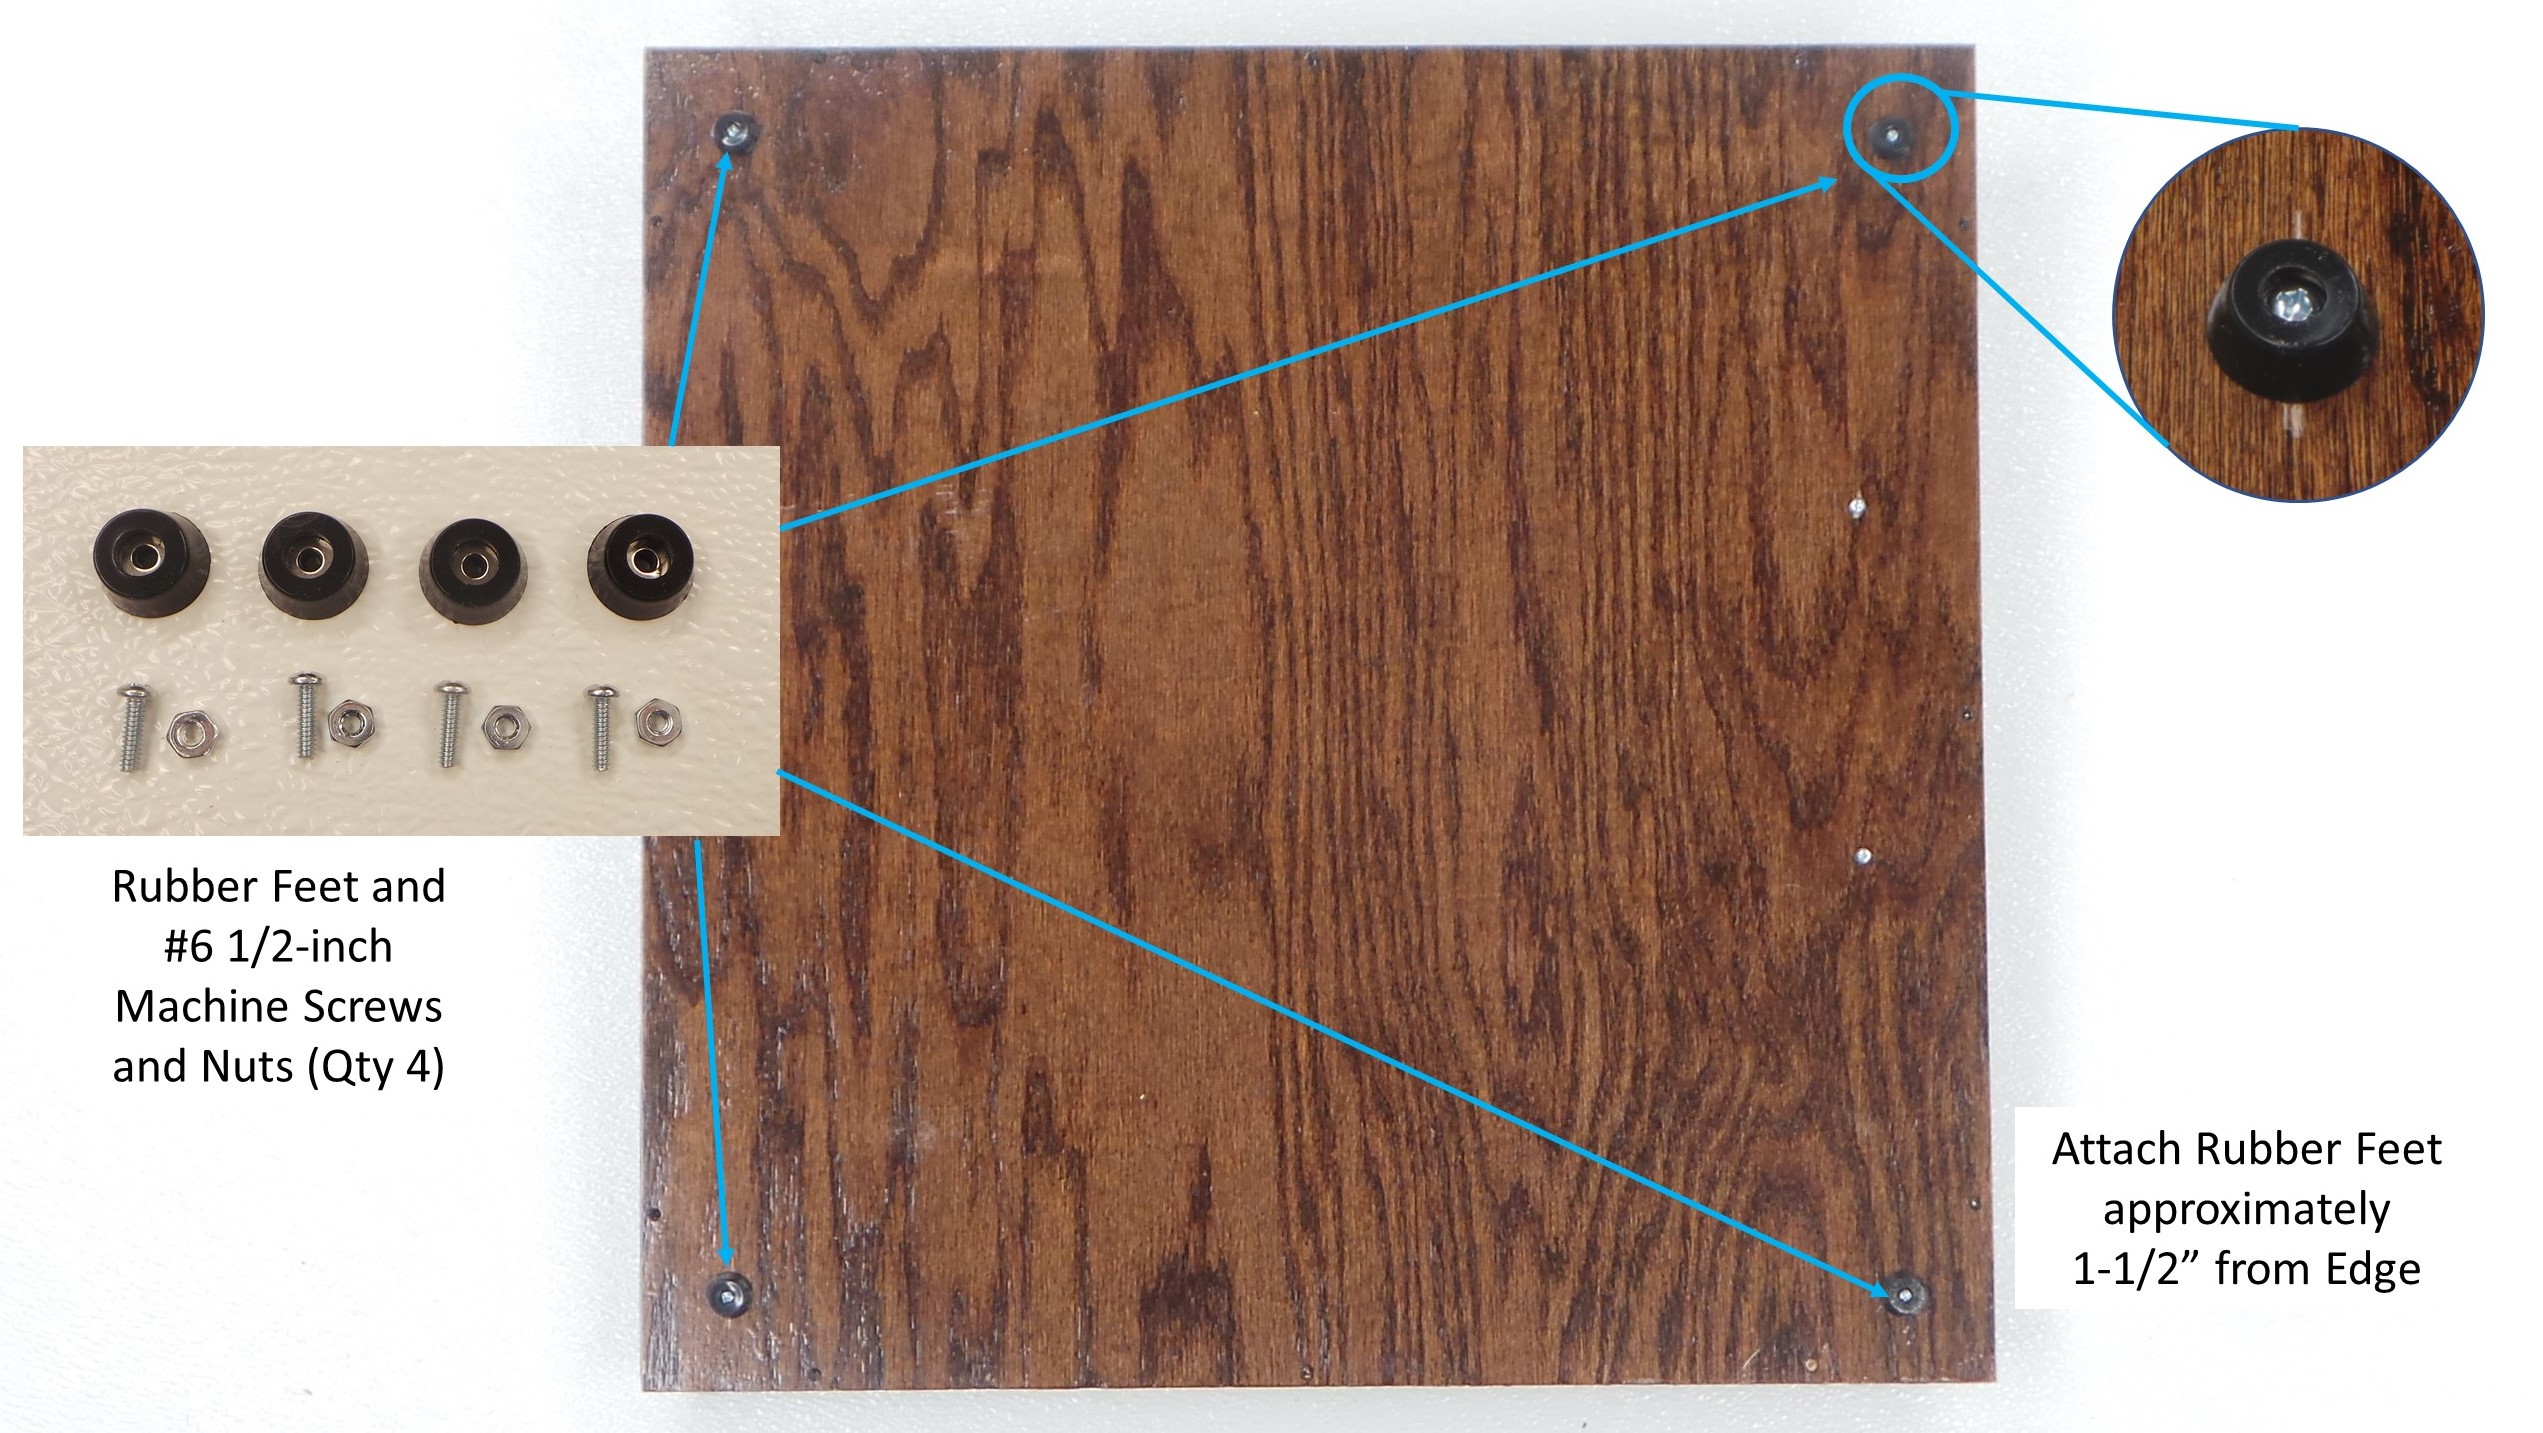
Step 2: Attach the four (4) rubber feet to the bottom of the base, using #6-32 x 1/2 inch machine screws and nuts. The feet should be near the four corners, approximately 1-1/2 inch from each edge. Do not over-tighten, as it is possible to make the screw head cut all the way through the rubber feet.
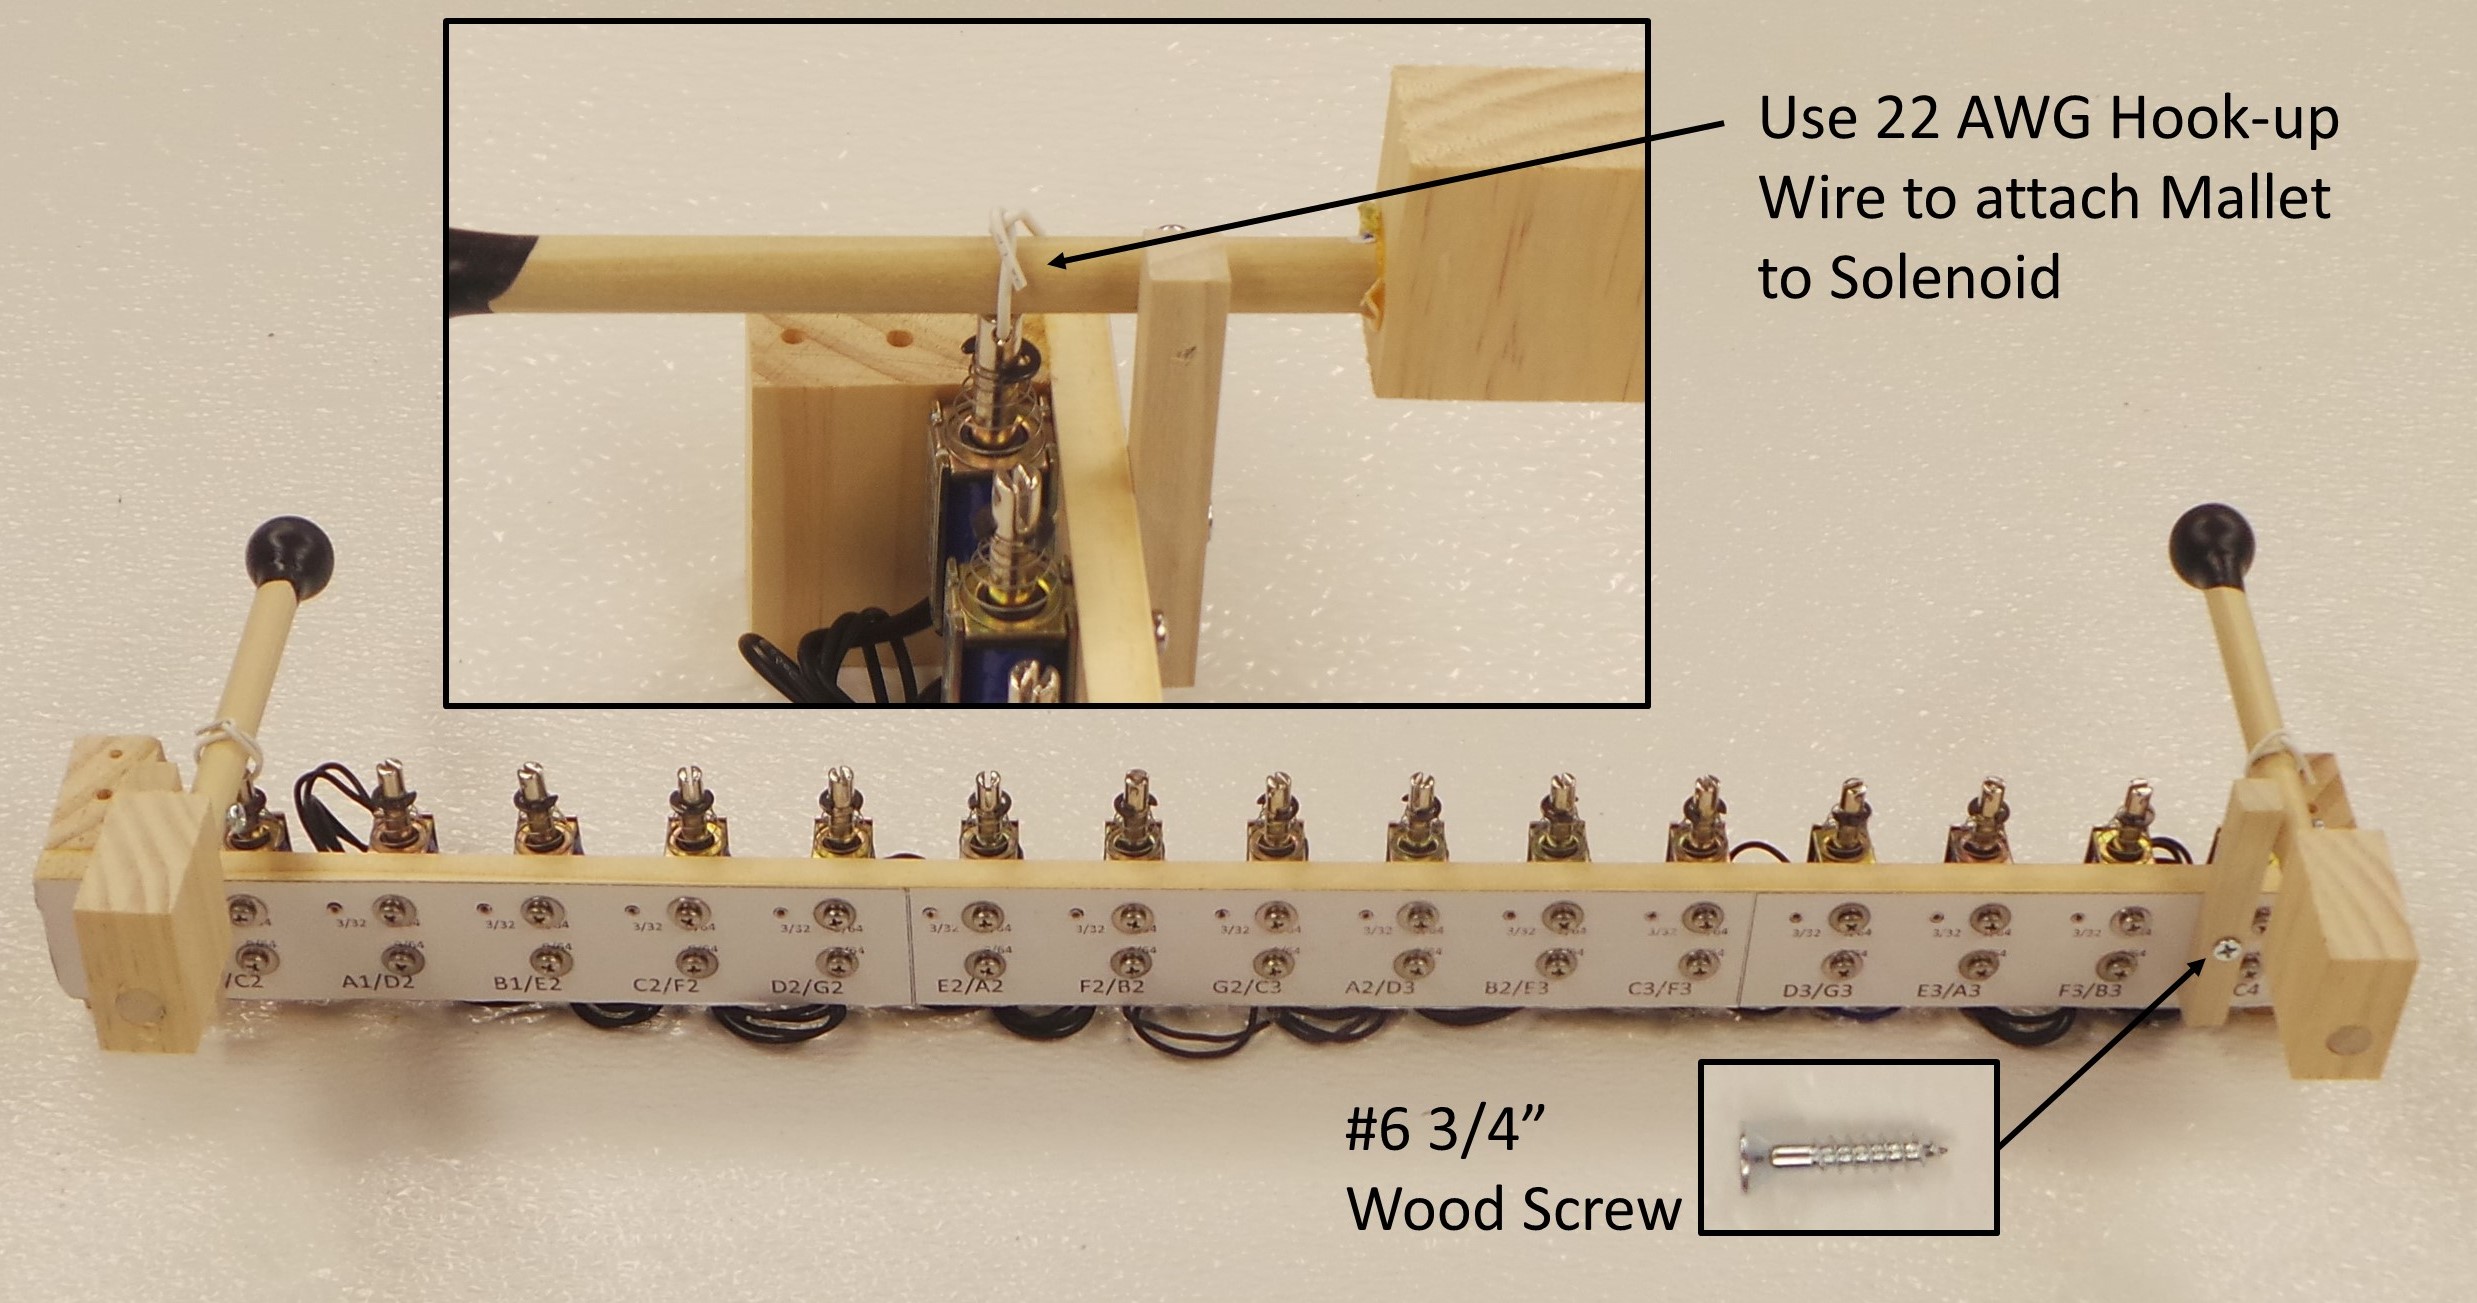
Step 3: Use #6 x 3/4″ wood screws to attach mallets to the ends of each Solenoid Board. At this point, attach the mallets only on the ends. The rest of the mallets will be attached later. Thread 22 AWG Hook-up wire through the shaft of the solenoid, and tie it to each mallet. The mallet should rotate freely when pulled by the solenoid.
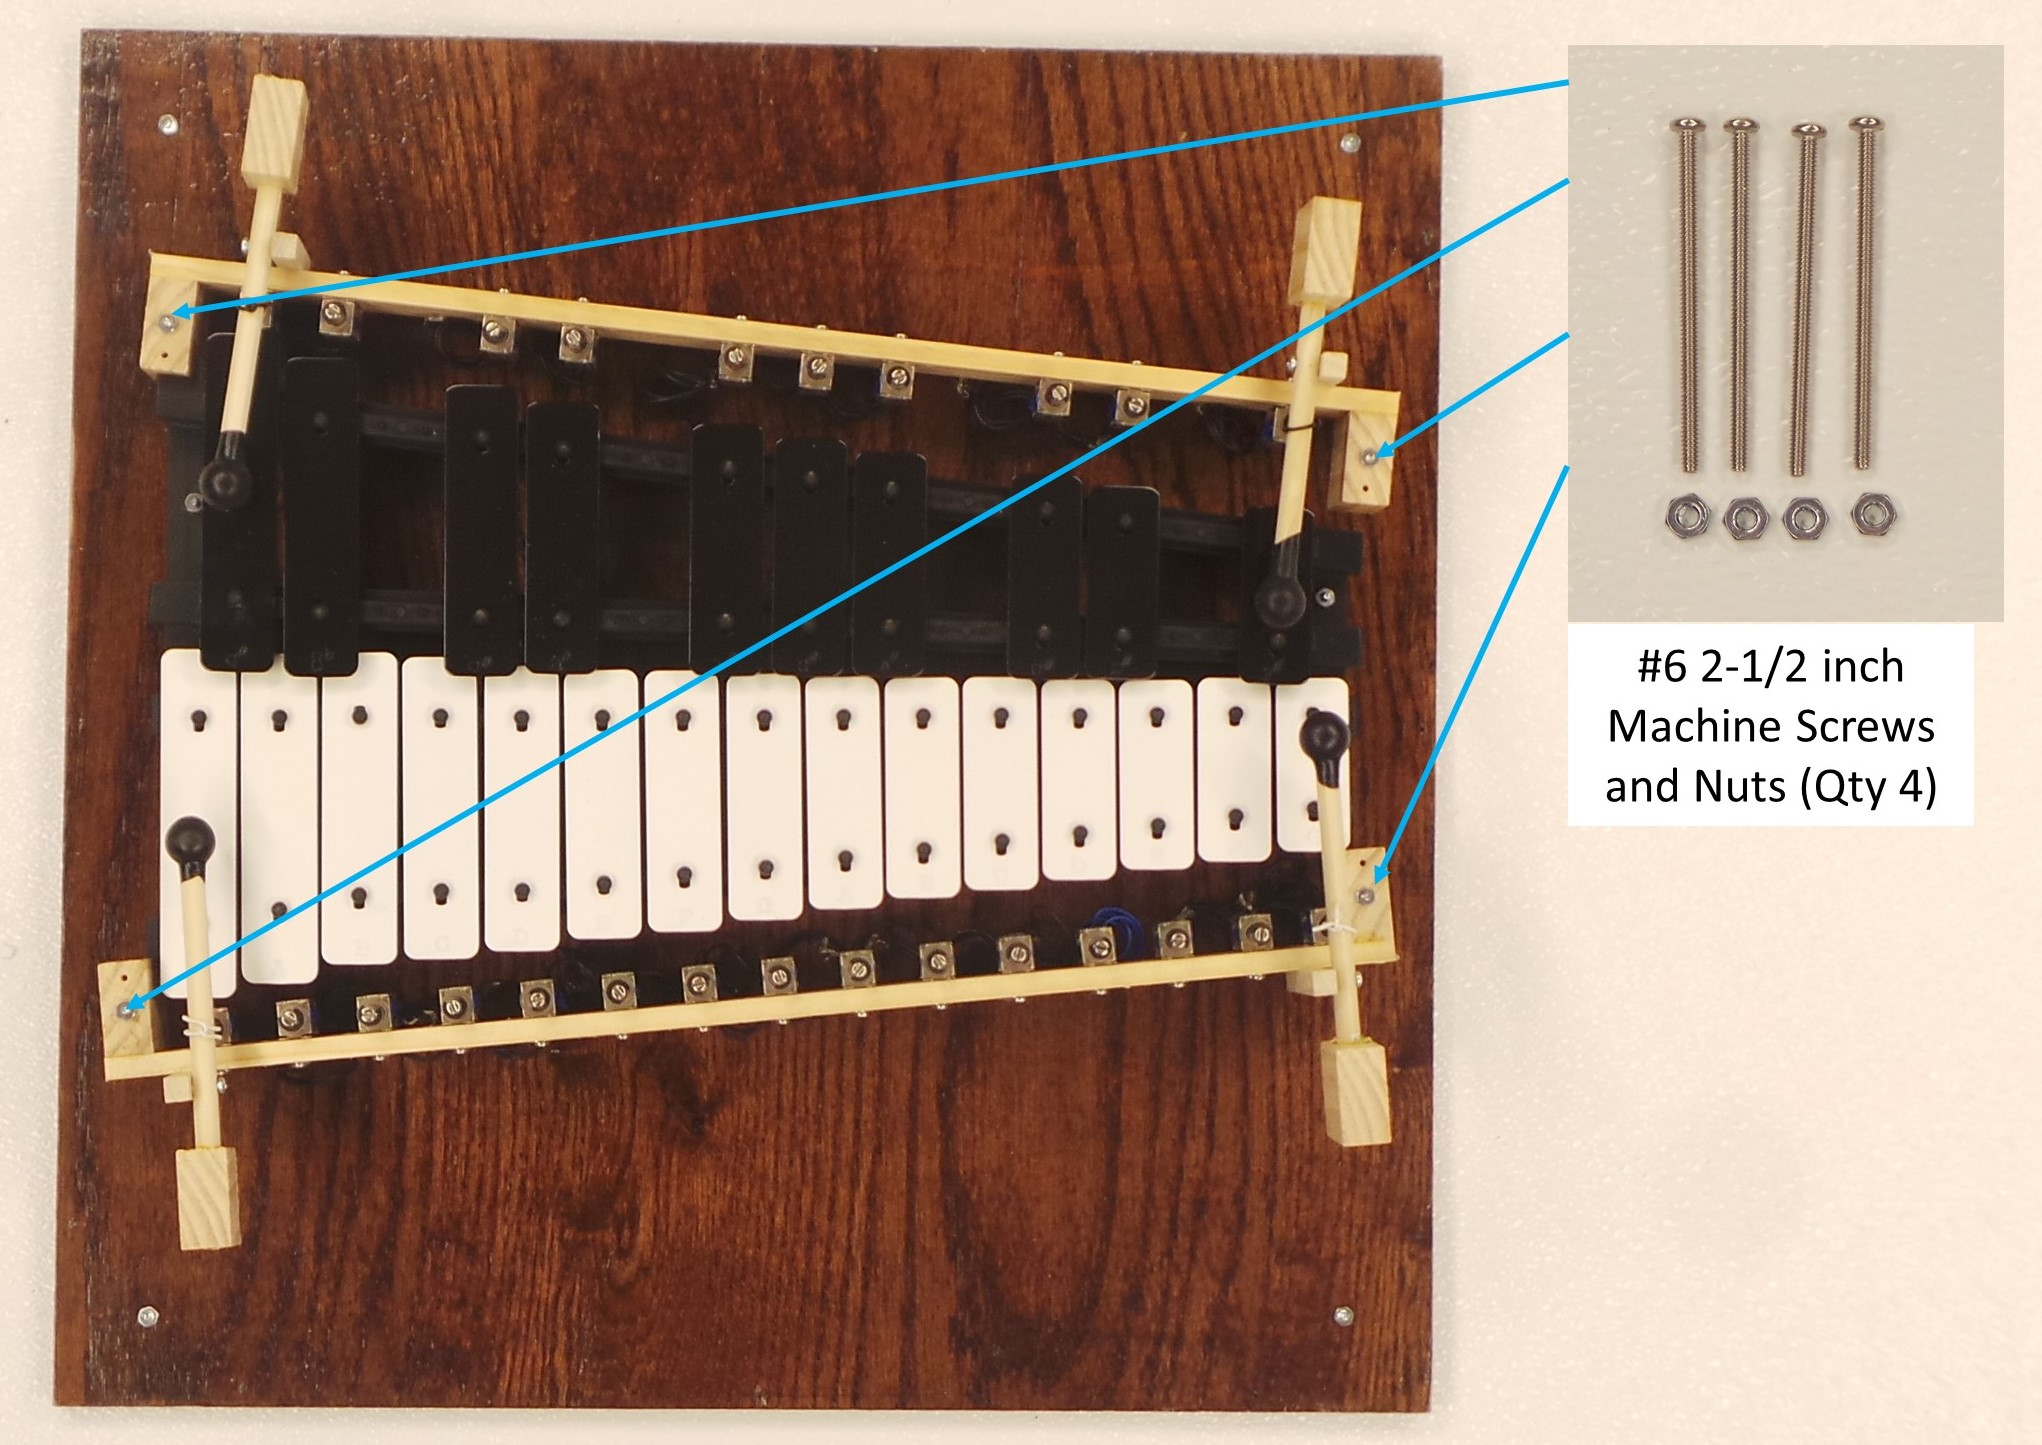
Step 4: Position the Solenoid Assembly such that the heads of the mallets on each end are centered with the highest and lowest notes. Make sure that none of the solenoids are touching any of the keys. Use a 9/64″ drill bit to drill though the center hole of each End Support and into the base of the enclosure. Secure each End Support to the base using #6-32 x 2-1/2″ machine screws and nuts.
Next: Electronics
