
The assembly that support the solenoids and mallets is constructed as follows:
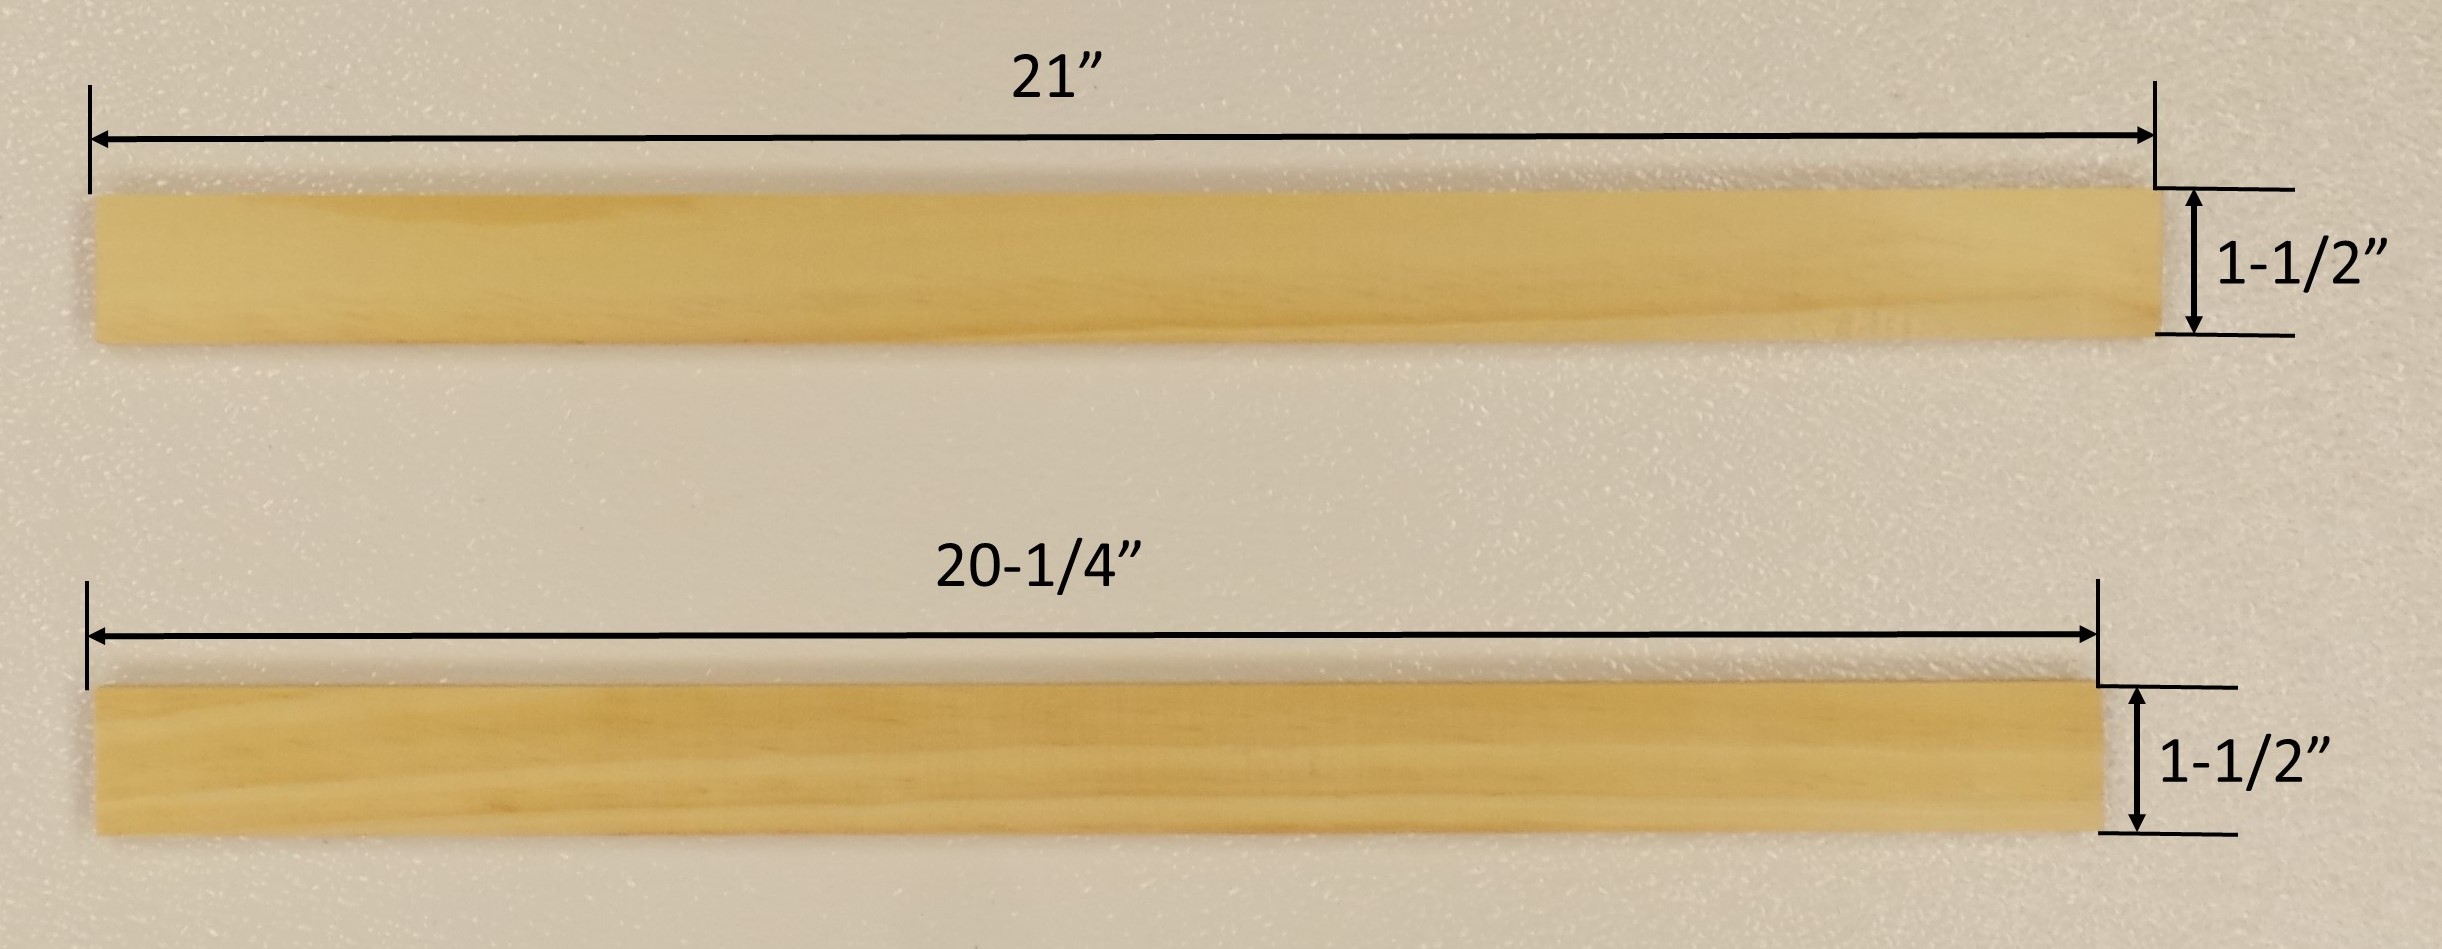
Step 1: Cut the 3/8″ x 1-1/2″ boards to lengths of 20-1/4″ and 21″. These pieces are the “Solenoid Boards”
Step 2: Download the pattern template corresponding to the model of xylophone that you are using:
Print the pattern template on full-sheet adhesive label paper, such as the Avery 5265 Shpping Labels.
After you print, use a ruler to make sure that the template prints to the actual size. (In other words, when a rectangle on the template is labeled as 7-1/2 inches, make sure that is actually measures 7-1/2 inches on the paper.) If the measurement does not come out right, you will need to adjust your print settings.
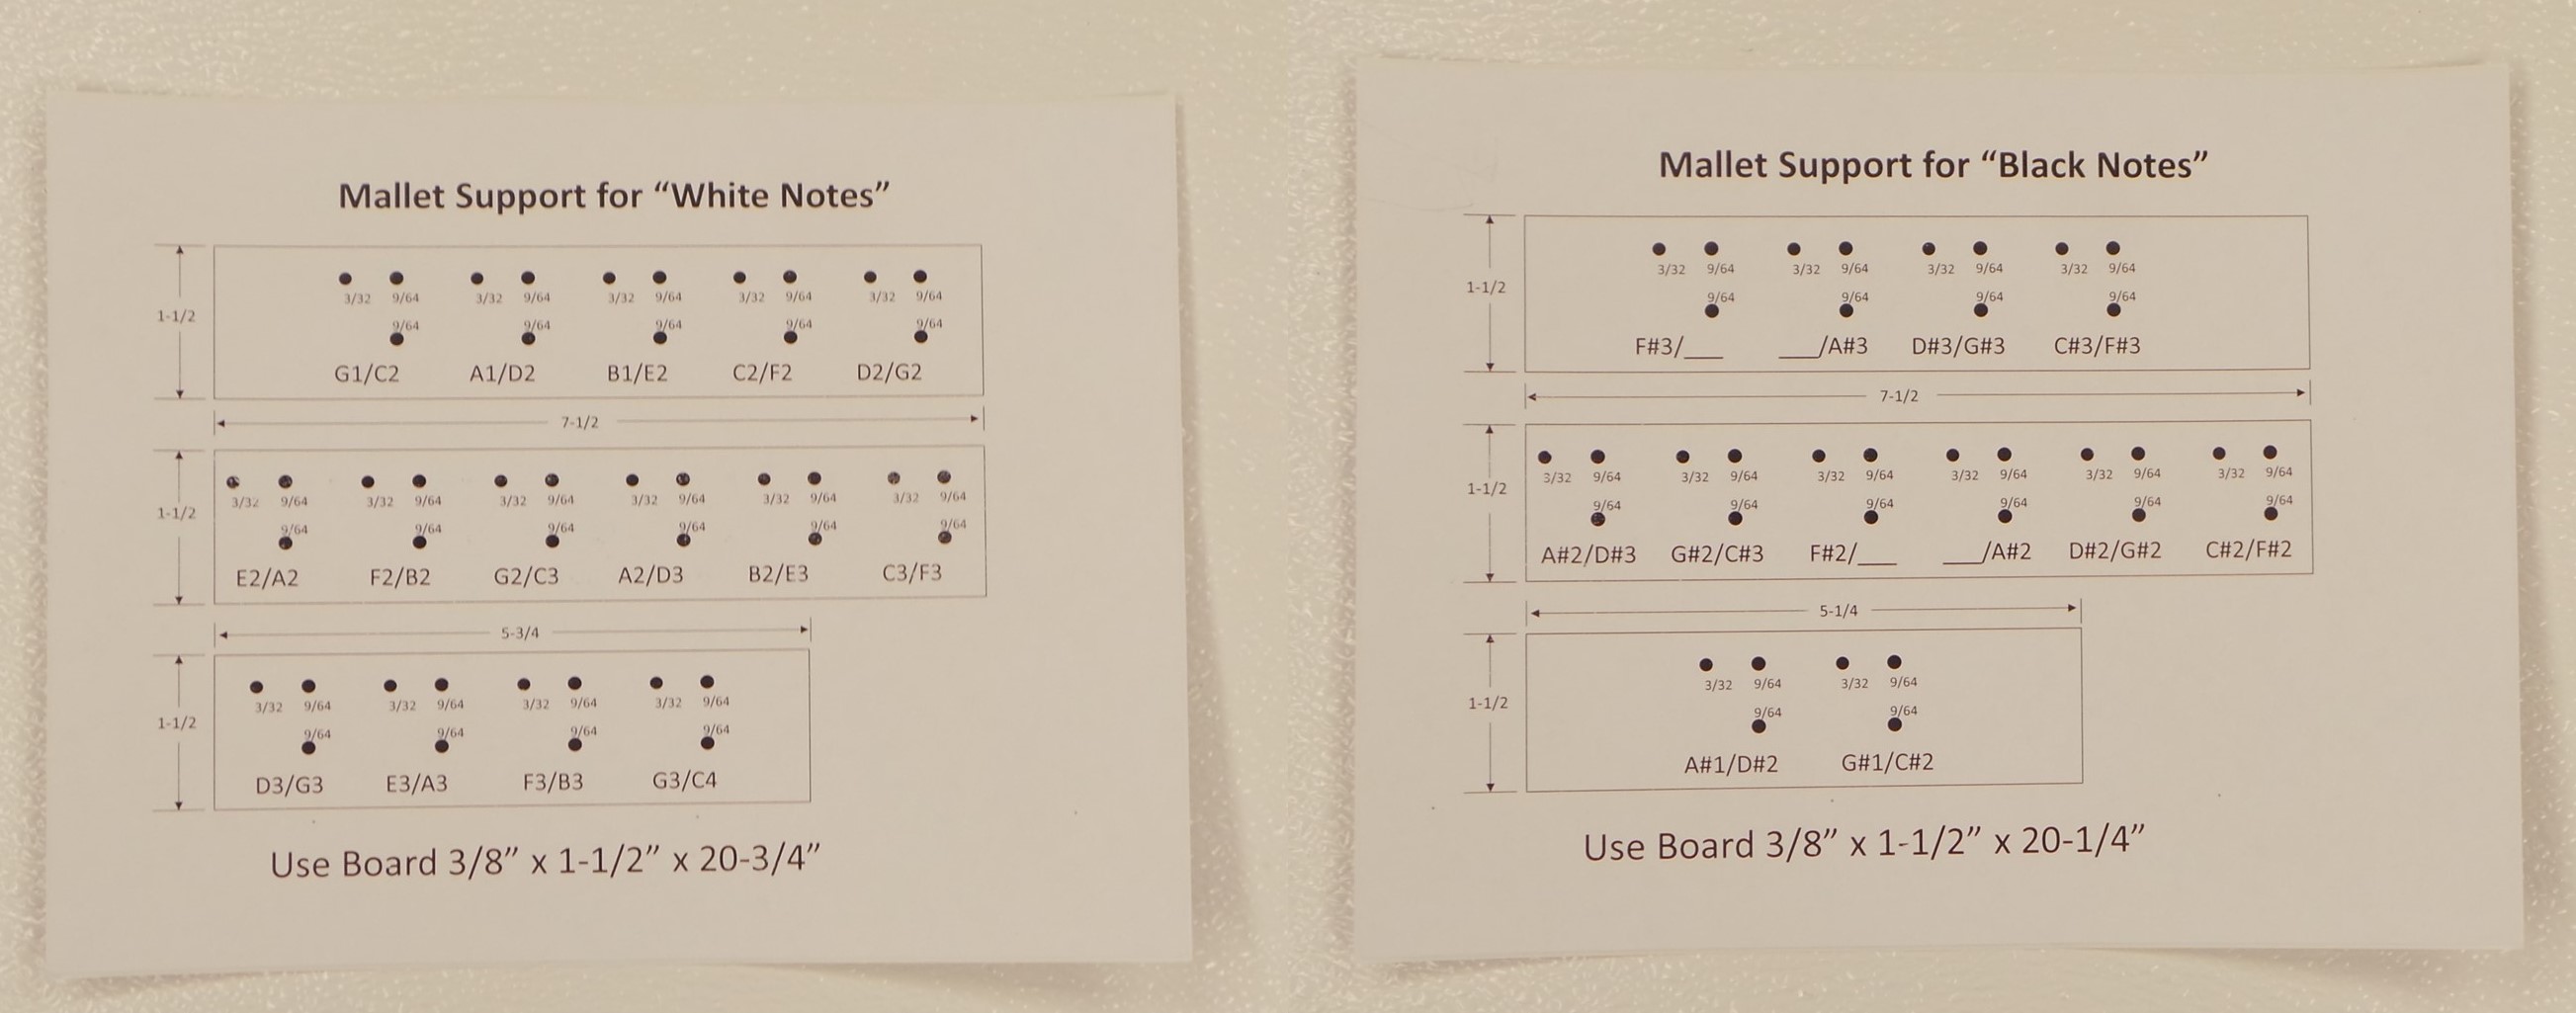
Cut out the pattern, and affix to the Solenoid Boards.
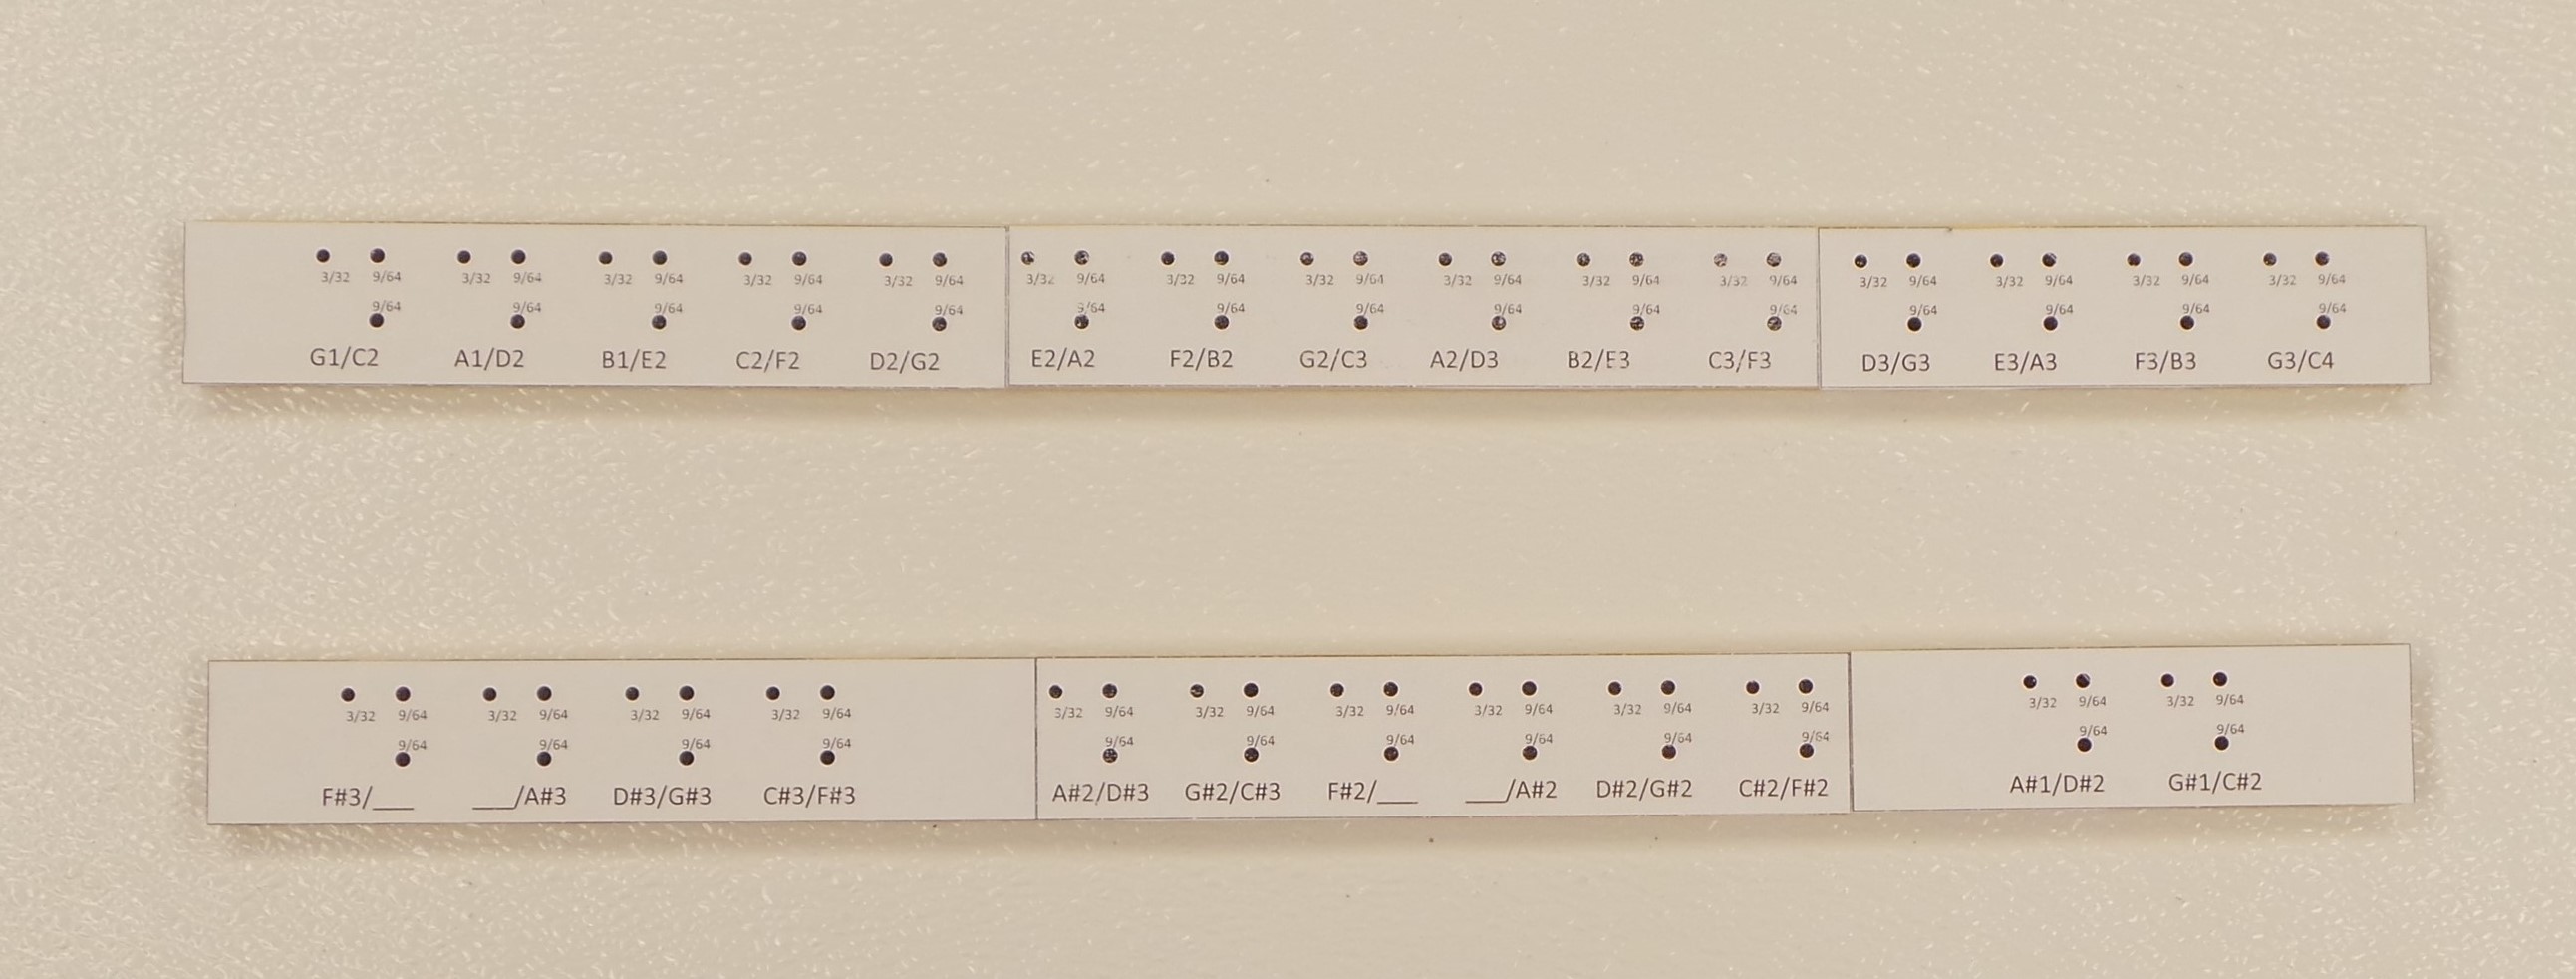
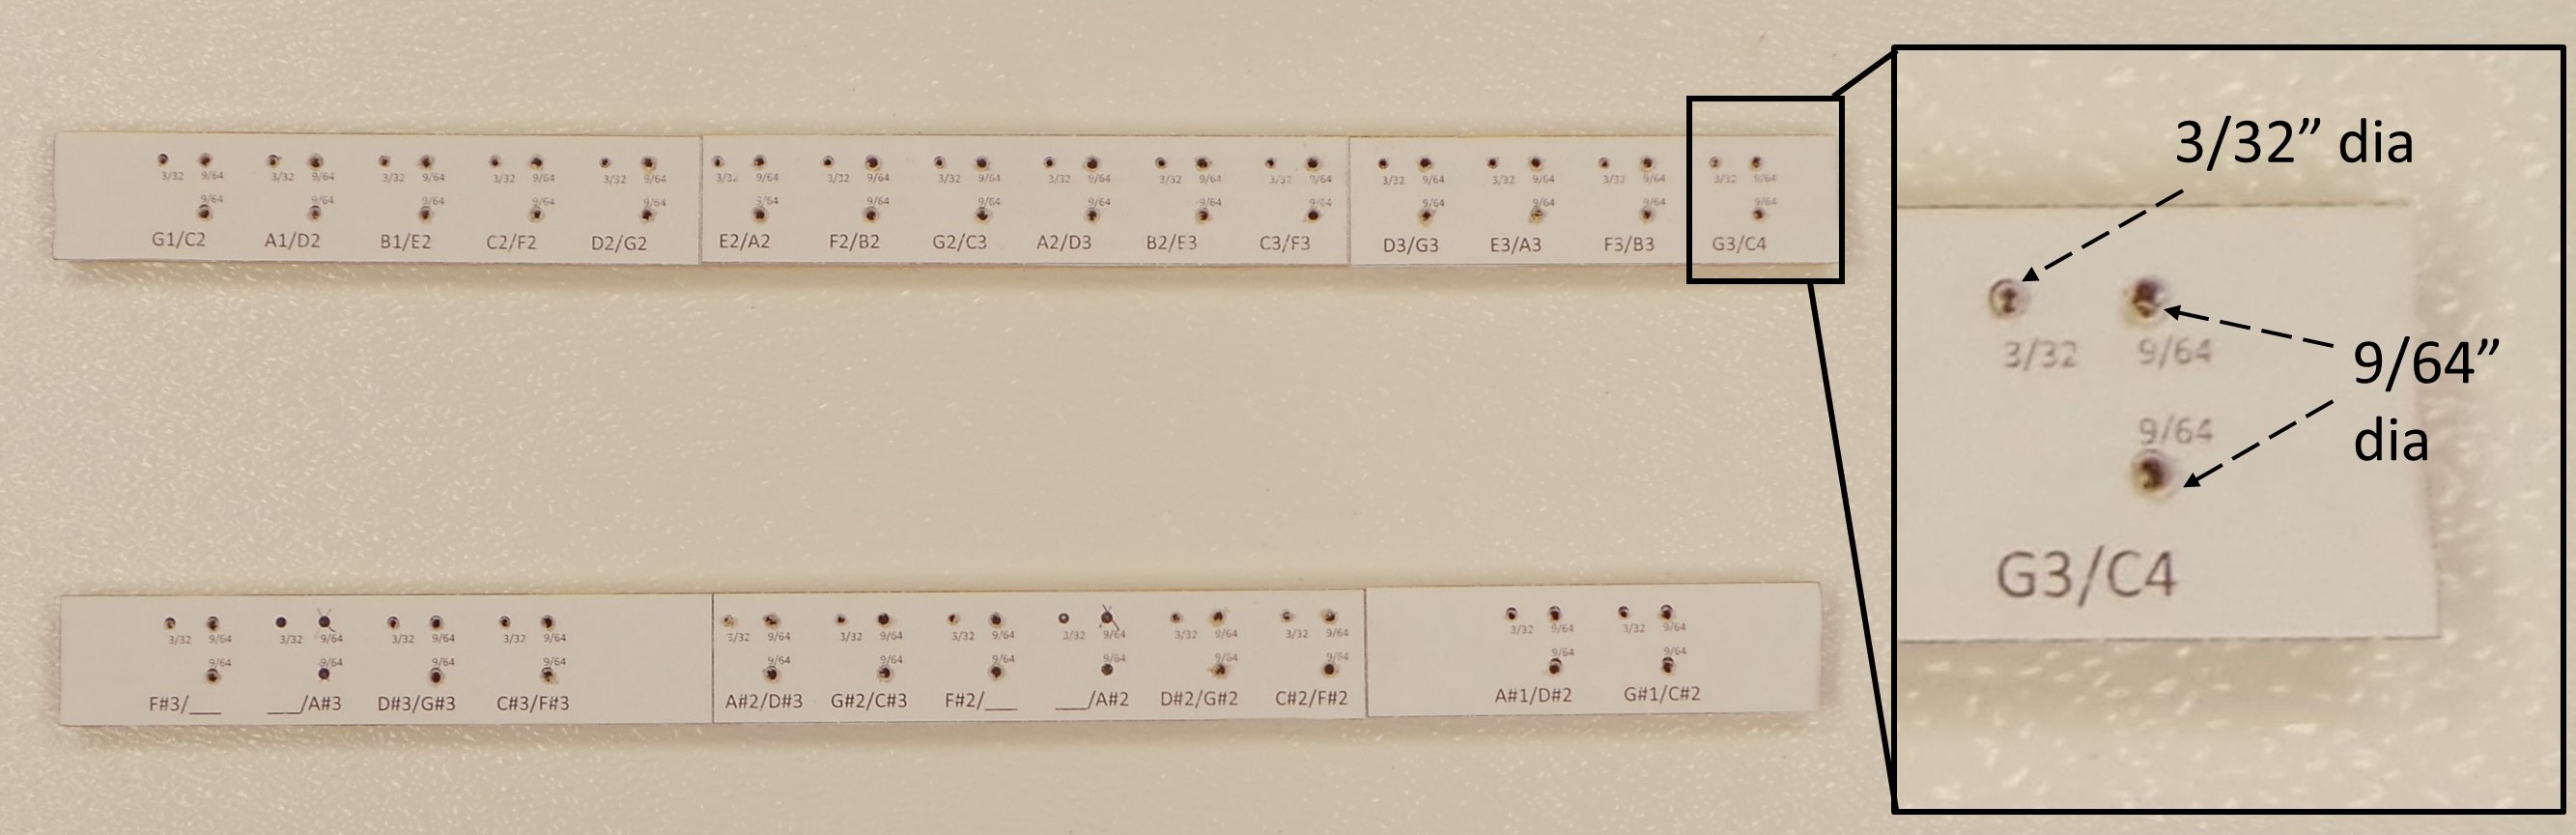
Step 3: Drill 9/64″ and 3/32″ diameter holes as indicated on the pattern. It is recommended that you use a drill press or drill guide to ensure that the holes are perpendicular to the surface of the board.
Step 4: Cut four (4) pieces of the 3/4″ x 1-1/2″ board, with each piece 2″ long. Drill 9/64″ and 1/8″ diameter holes as indicated below. Use the jig to secure the piece while drilling. These pieces are the “End Supports.”
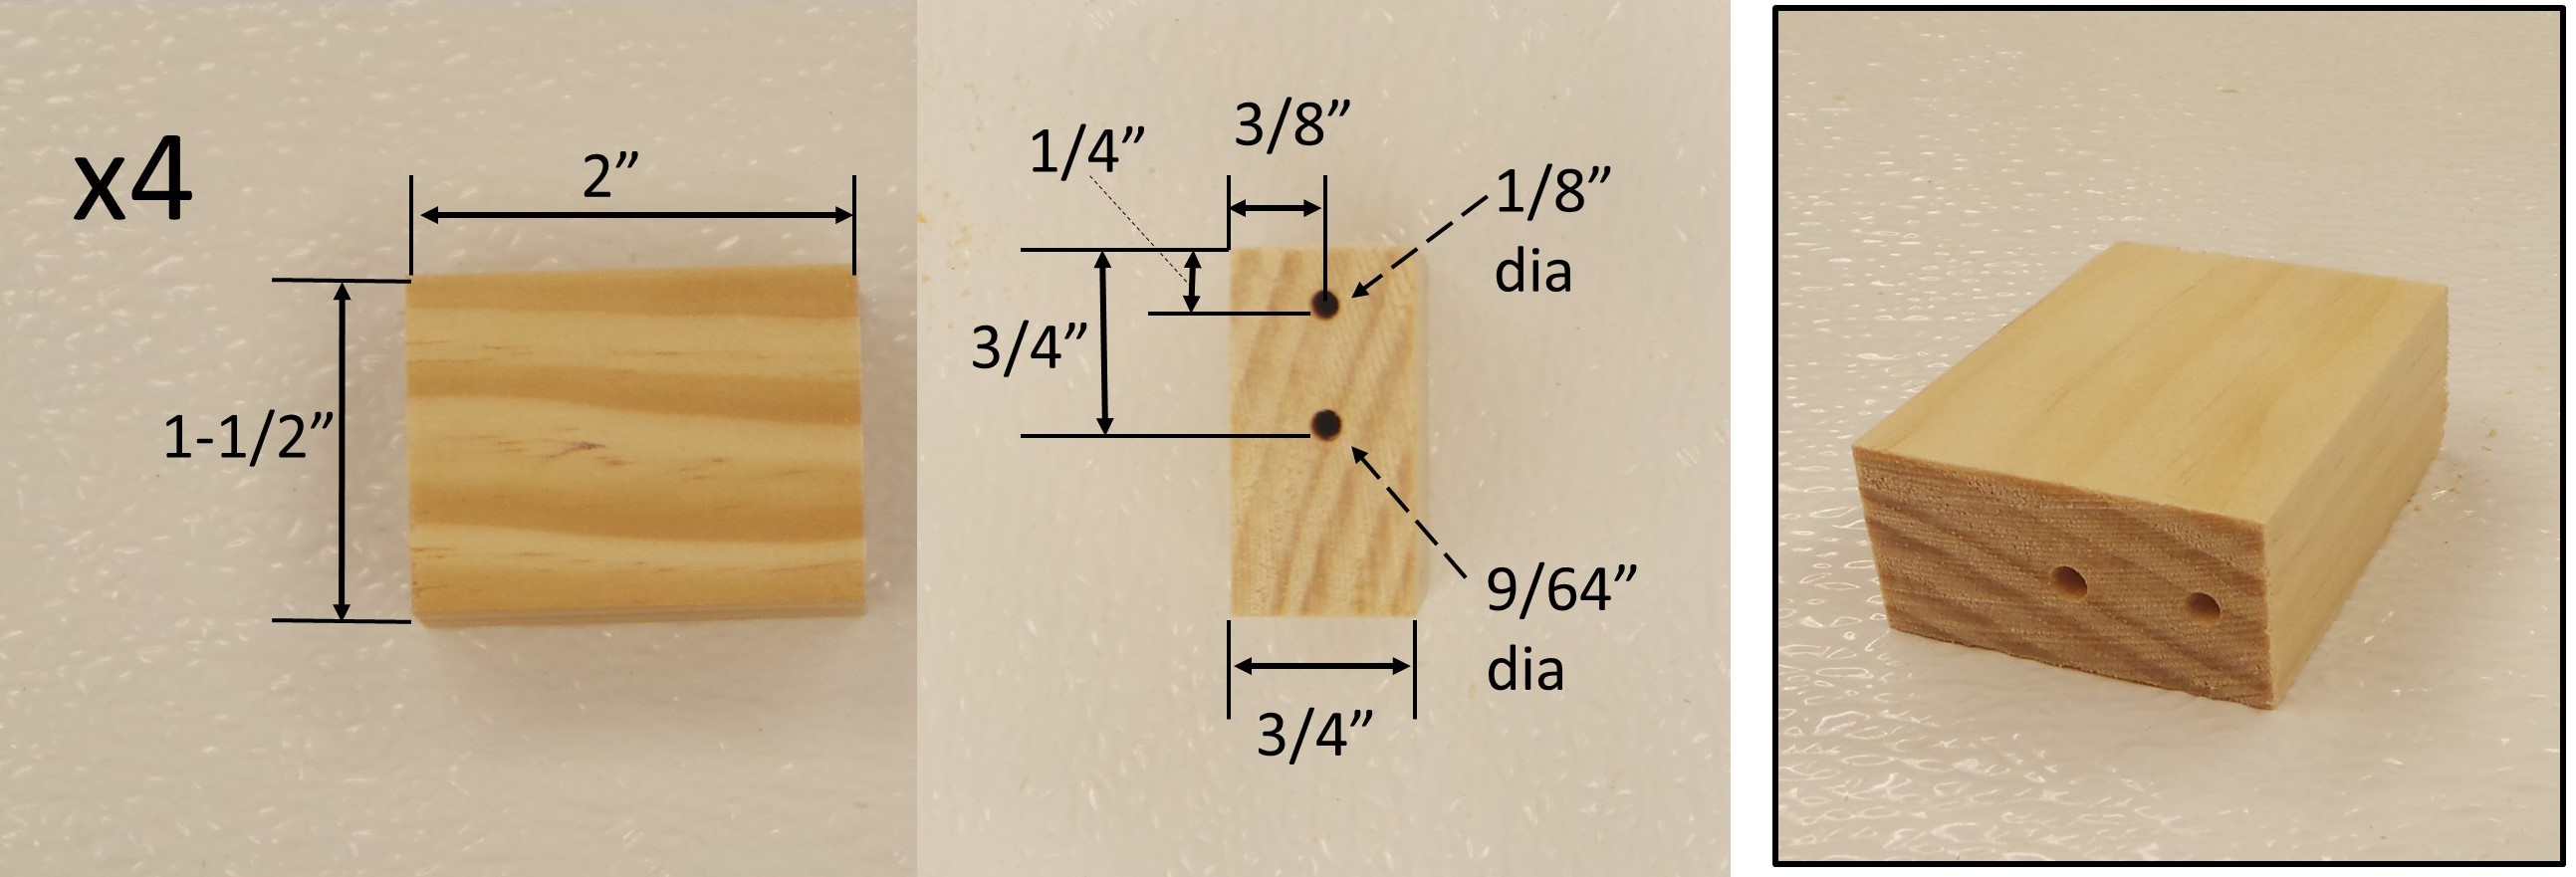
Step 5: Glue the End Supports to the ends of each Solenoid Board. The Solenoid Board should be flush with the top and edge of the End Supports. Make sure that the holes in the End Supports are up, and that the 1/8″ hole is away from the Solenoid Board.

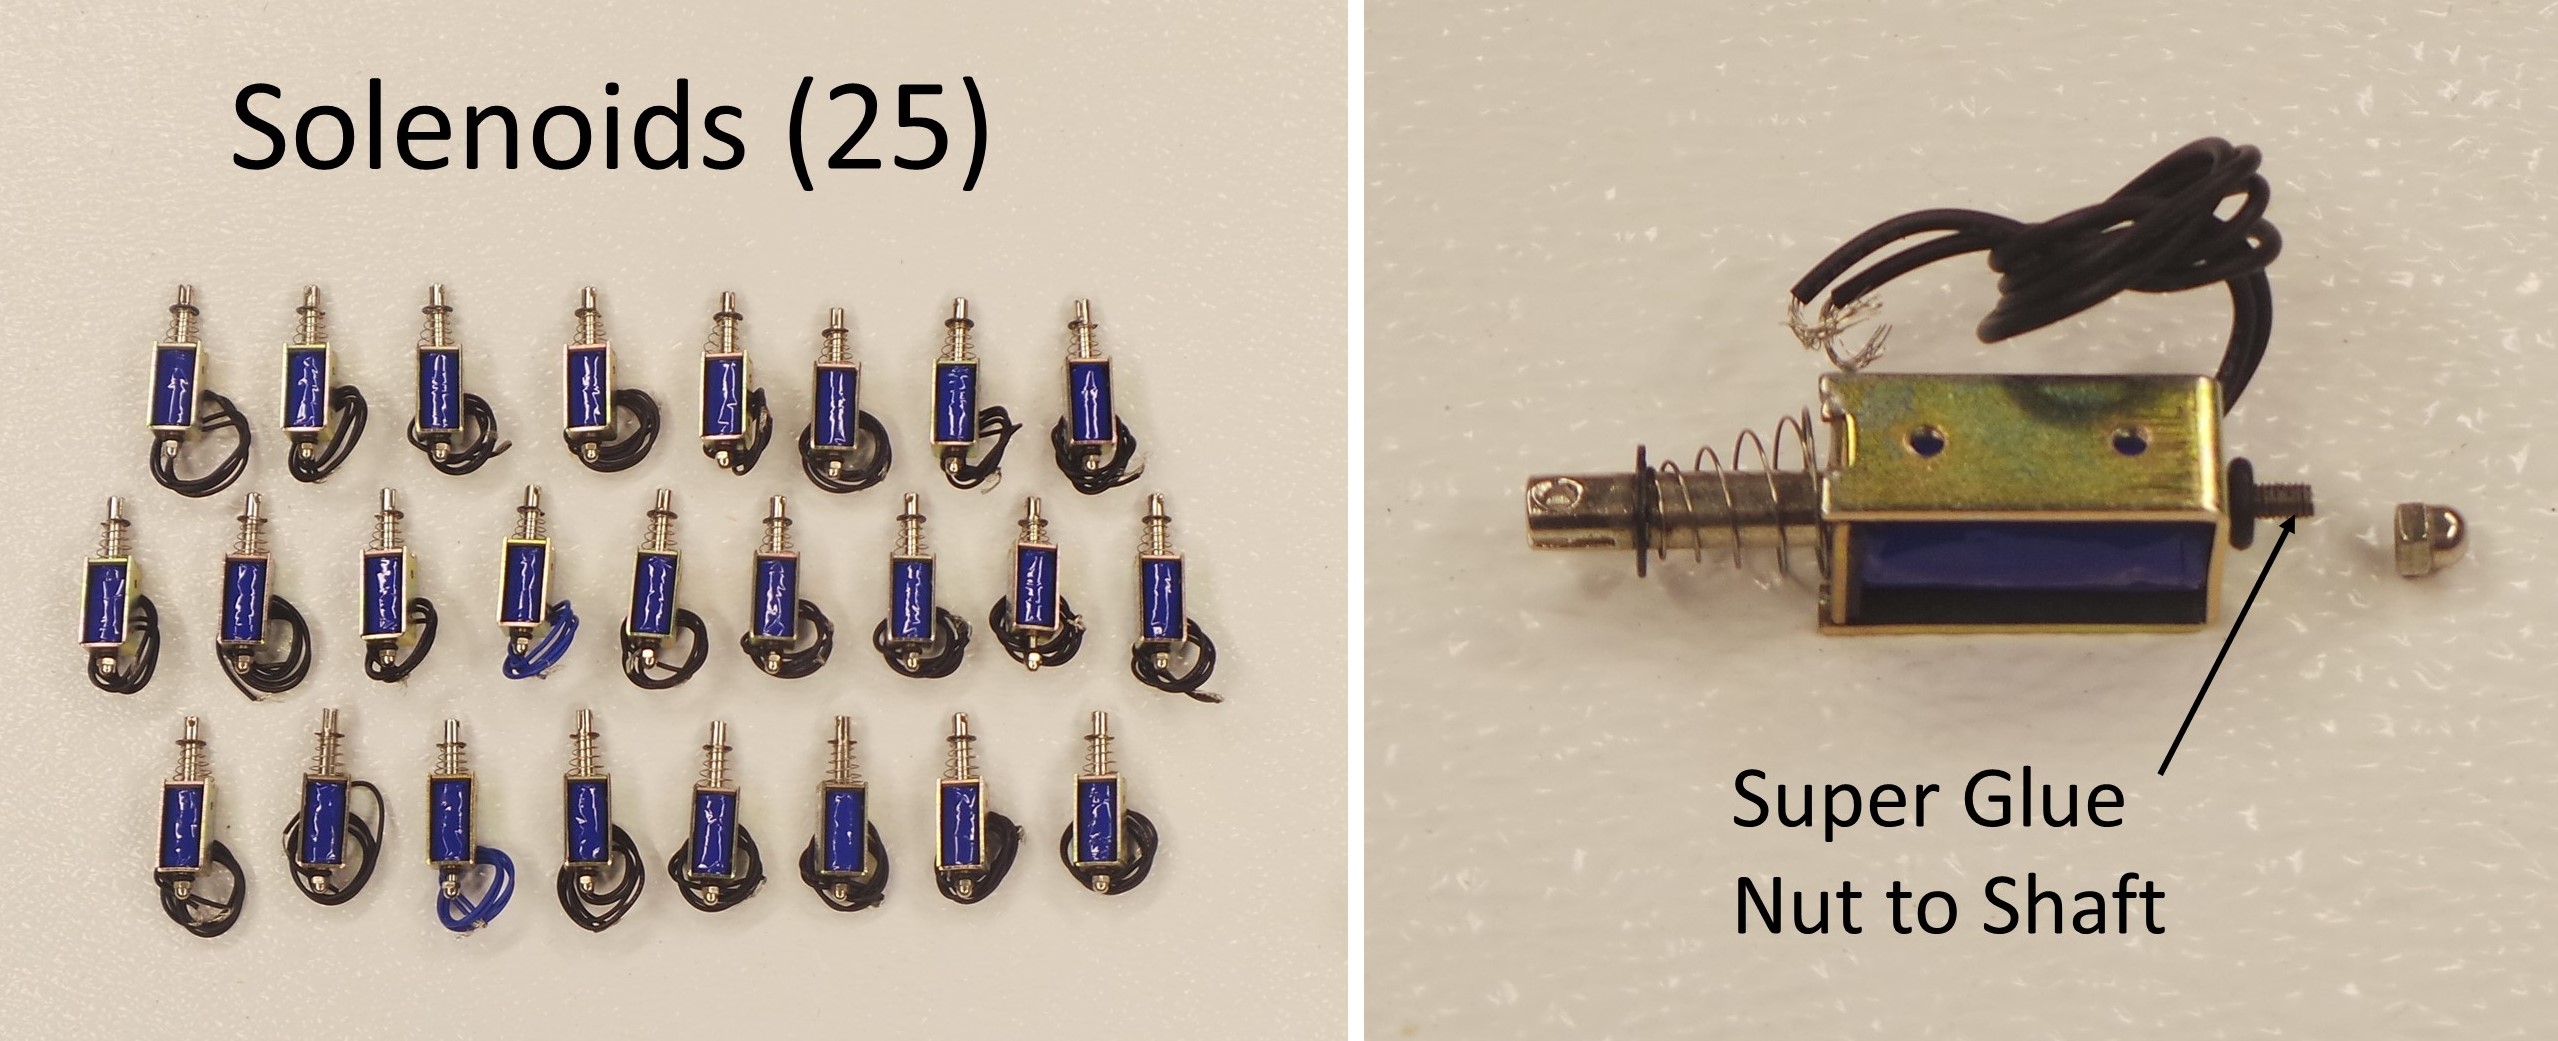
Step 6: For each of the 25 solenoids, unscrew the nut at the end of the shaft. Apply a drop of Super Glue, and screw the nut back on. This is necessary to prevent the nut from loosening and falling off later on.
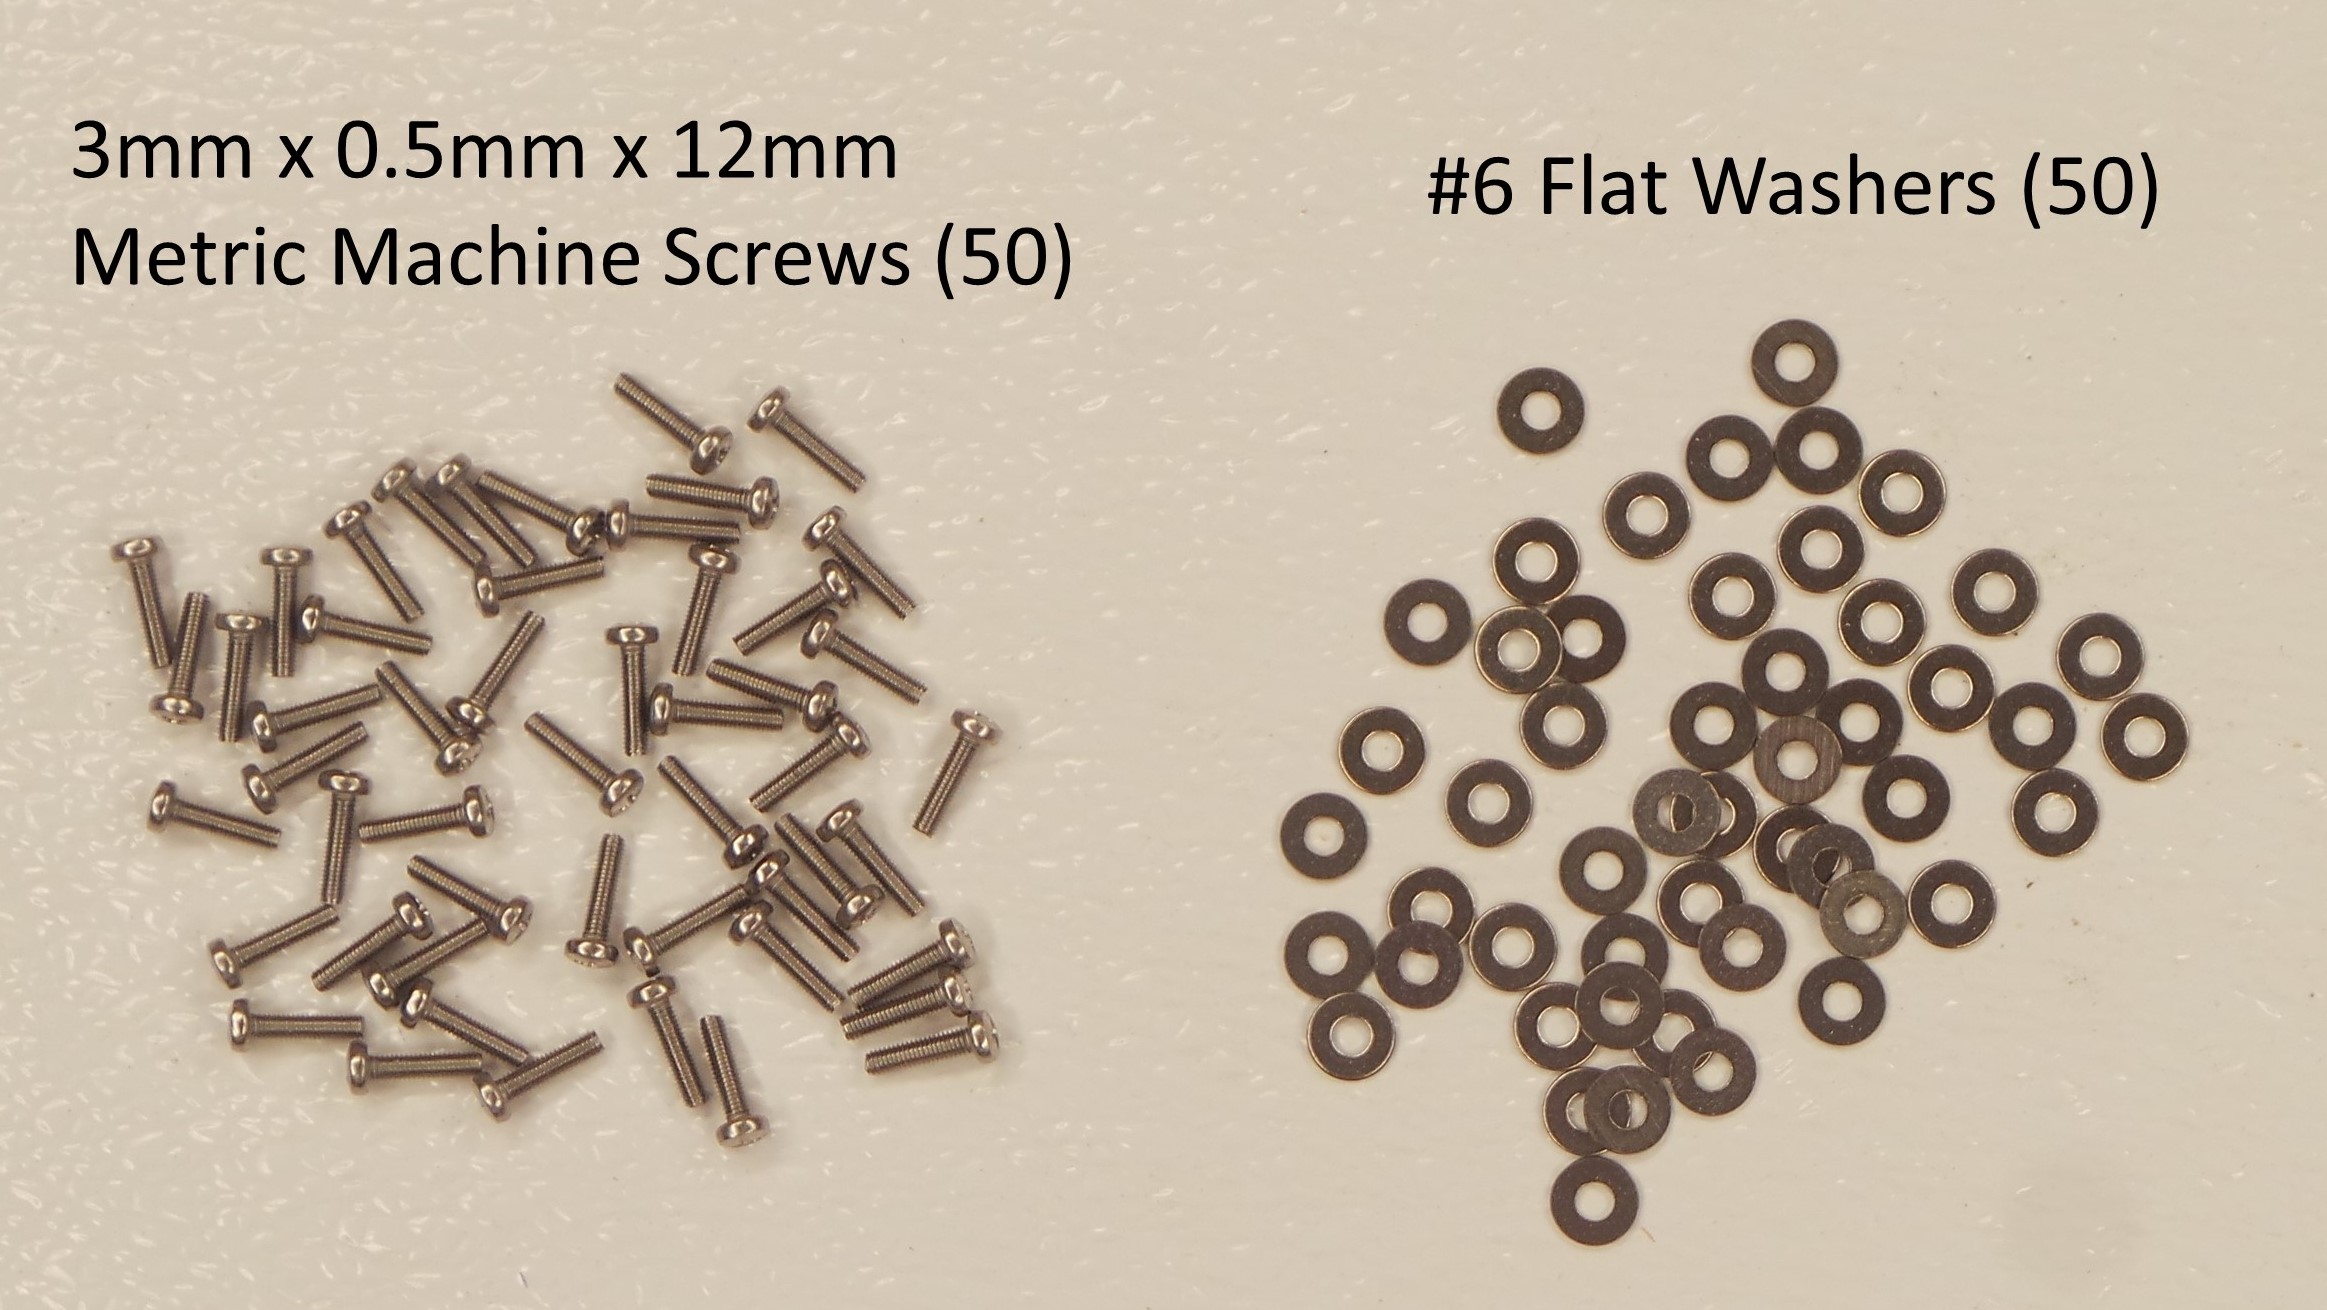
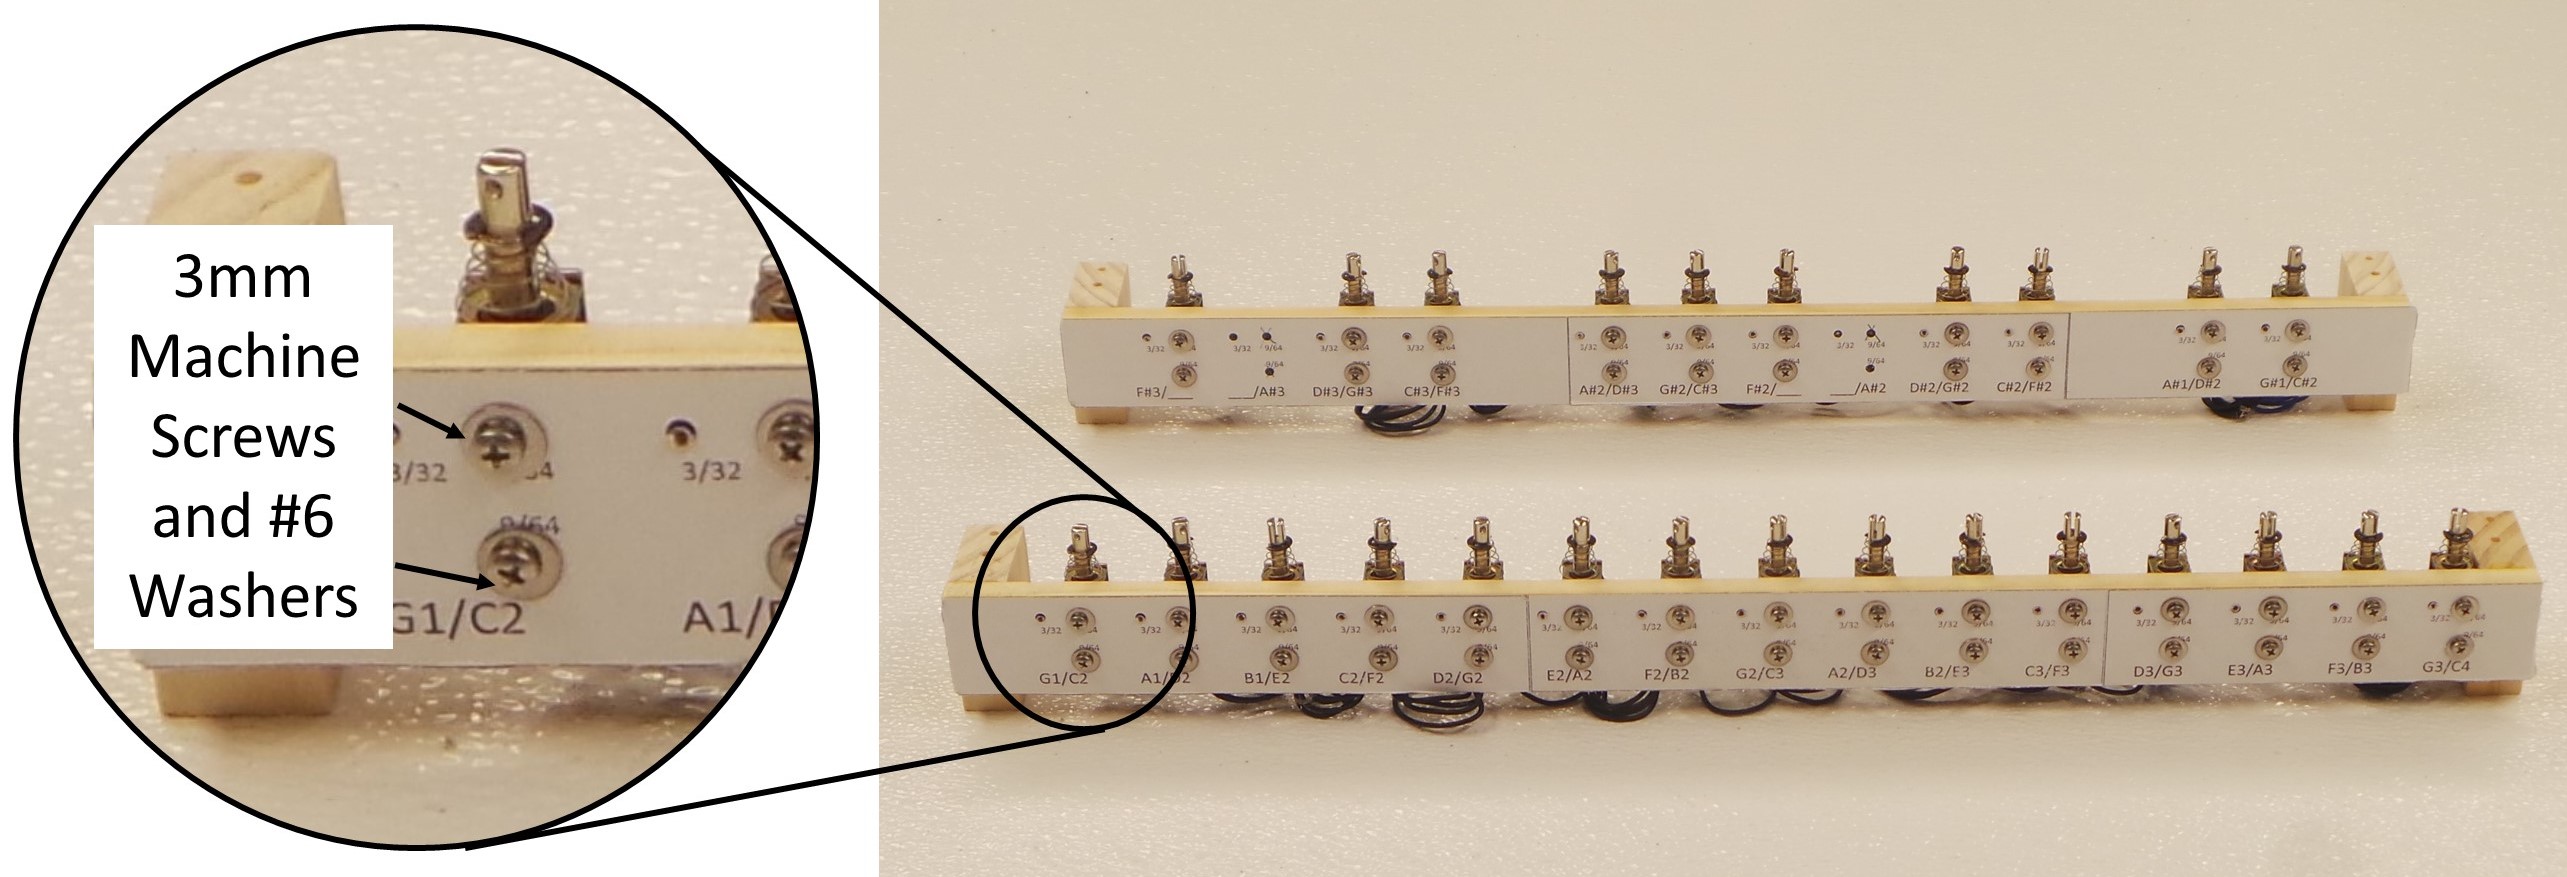
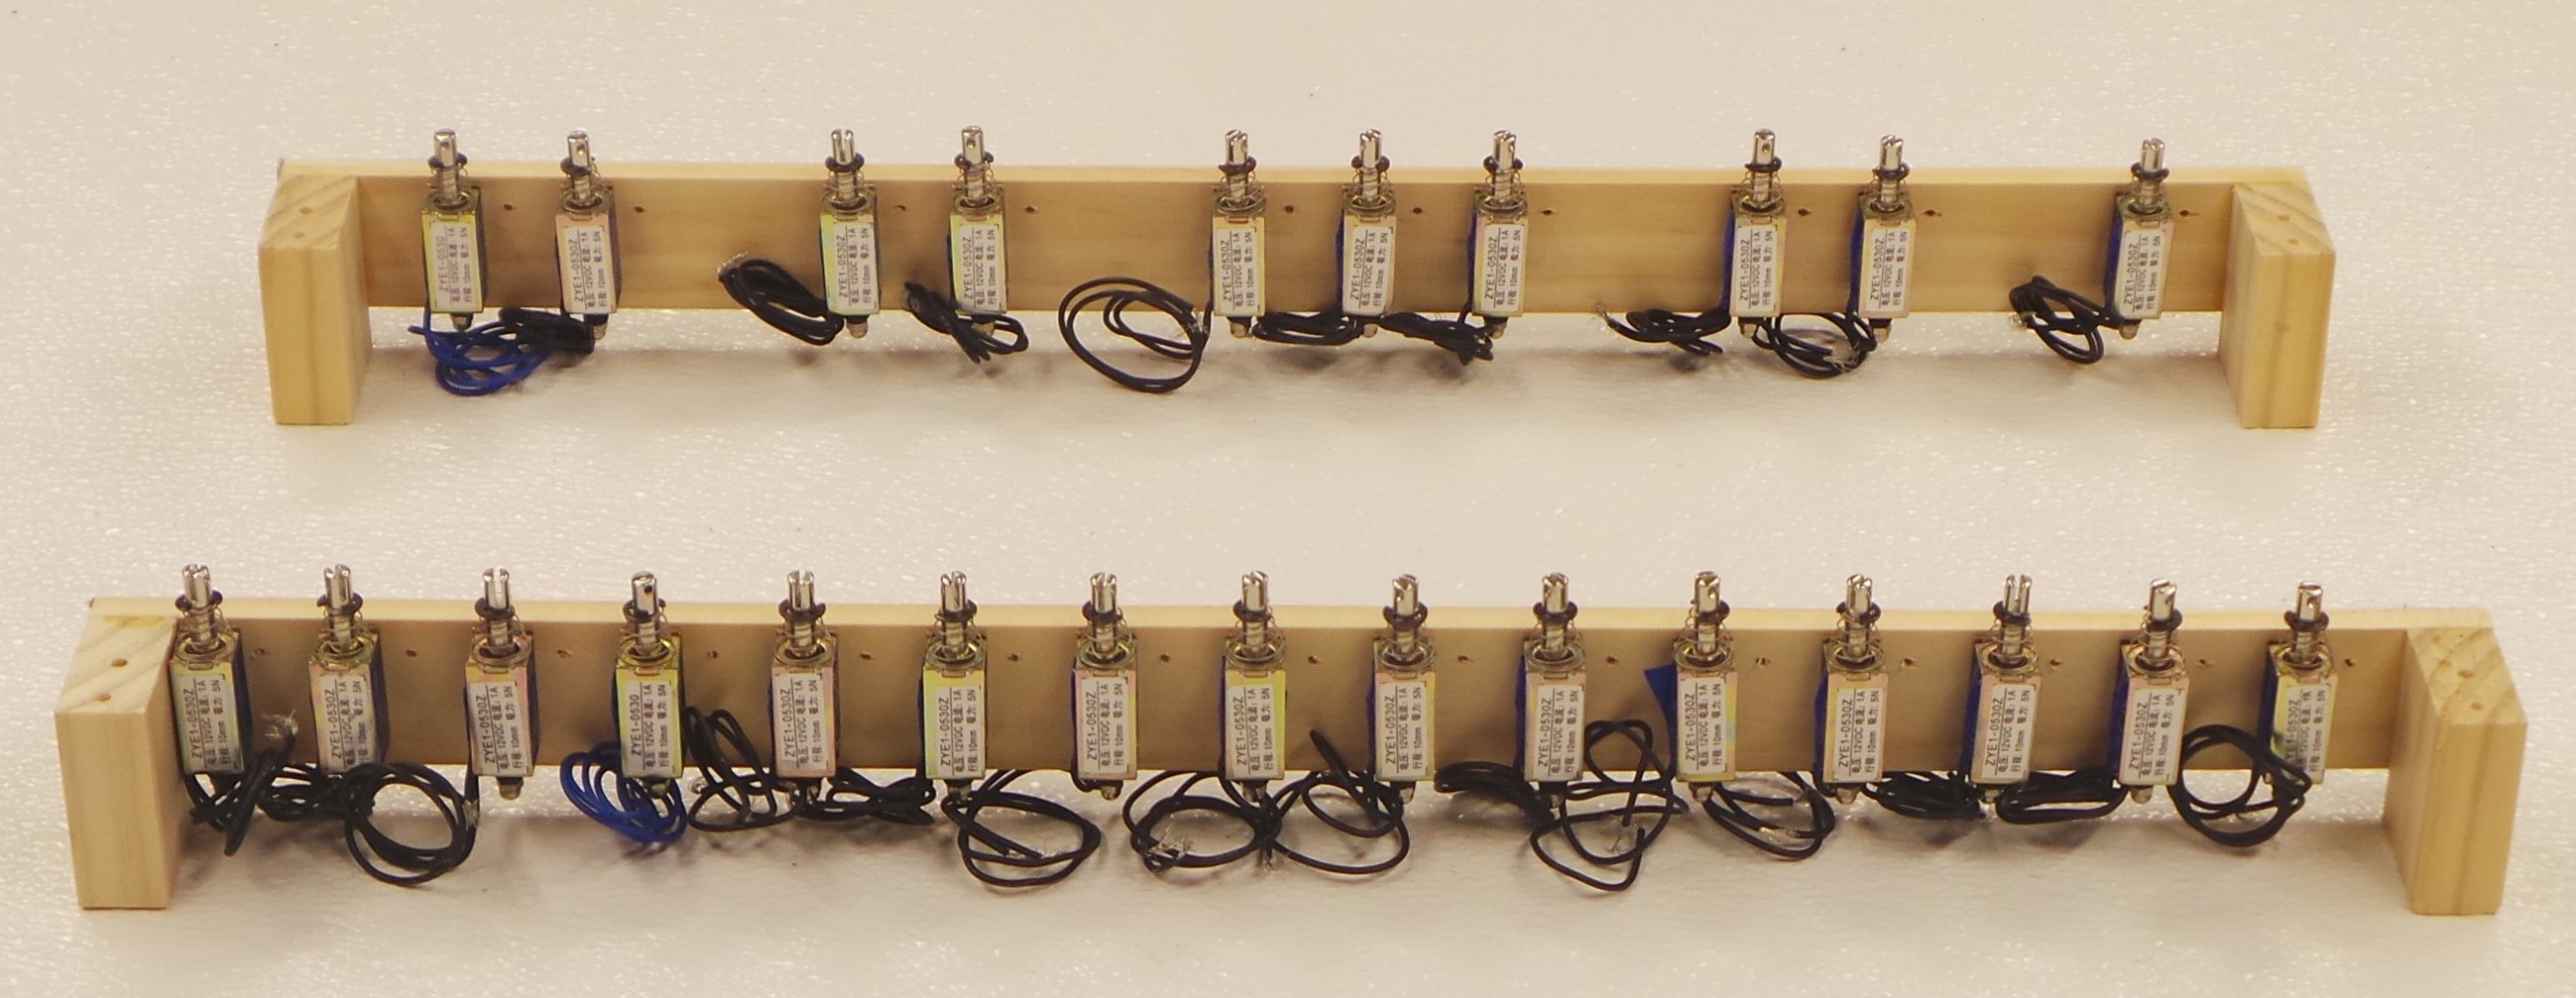
Step 7: Using the 3mm x 0.5 mm x 12 mm machine screws, attach all solenoids to the Solenoid Board at the 9/64″ diameter holes. Place a #6 Flat Washer between the screw and the board. The Washer is needed because the 12mm screw is just slightly too long for the 3/8″ board and solenoid mounting hole. Sometimes you may find that the board is very slightly less than 3/8″ thick. If that is the case, you may need 2 of the washers for each screw.
Next: Mount to Base
